Adding cameras by IP on cloud-connected NVR
When Watcher runs as an NVR connected to the cloud (see NVR registrators), adding a camera by IP opens a five-step wizard in a dialog — not the short probe-and-settings form used on cloud Watcher or on a local NVR without cloud.
The camera must support ONVIF and be reachable on the NVR local network.
Opening the wizard
- Open Cameras and click Add camera.
- In the dialog, choose Add camera by IP (recommended option on the NVR).
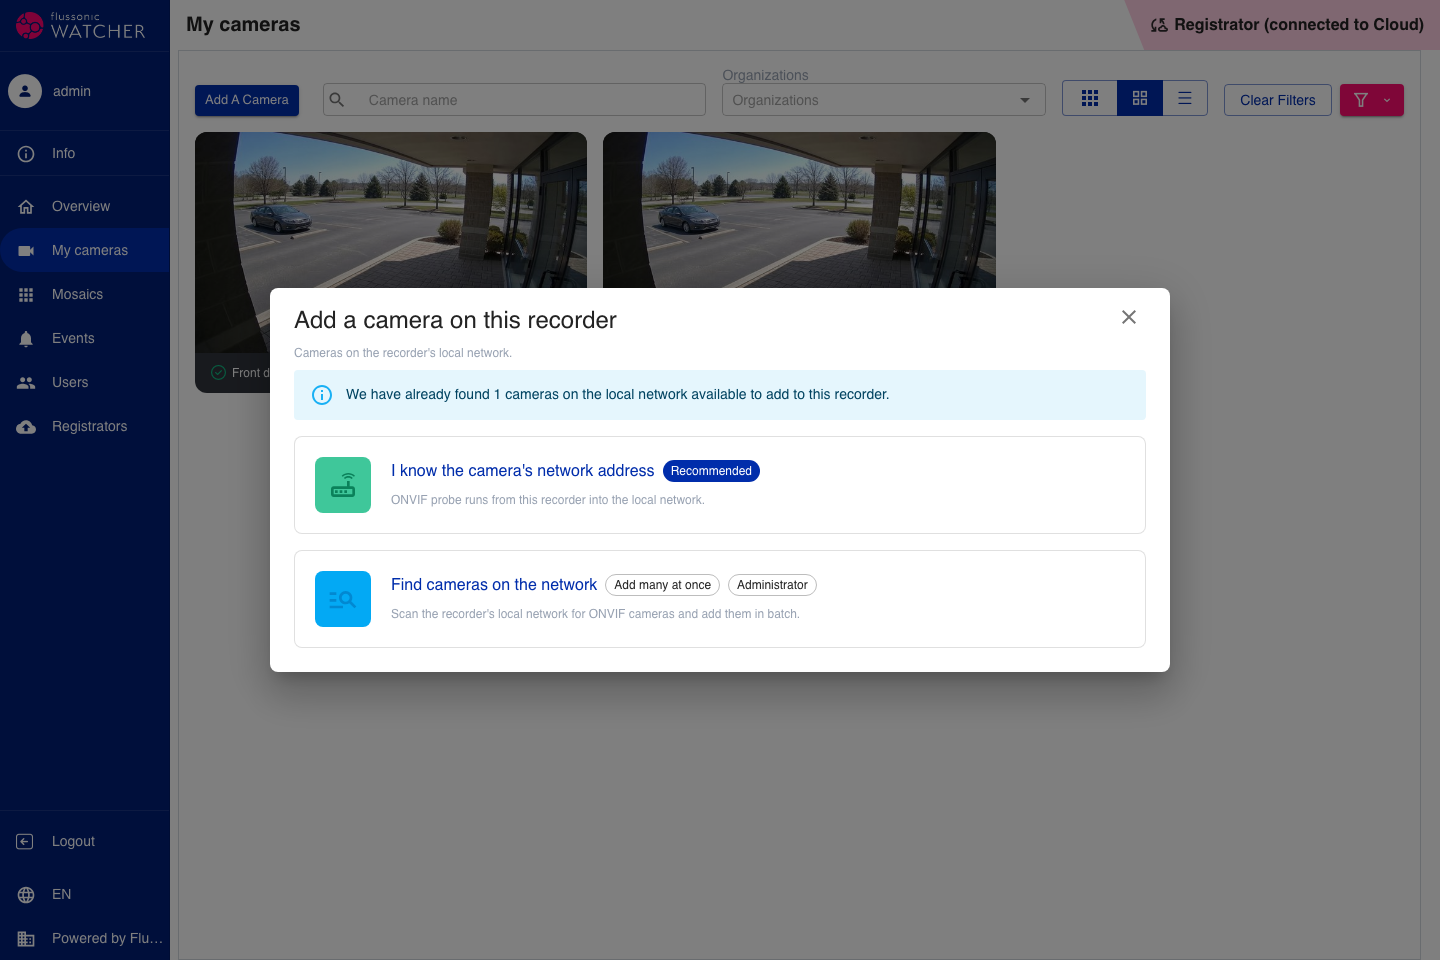
The wizard opens inside the dialog. At the top you see the step counter (Step N of 5) and a short description of the current step. Below that is a horizontal stepper with five stages. On the left — a draft card with camera preview and stream info. The active step form is on the right. Back and Continue (or Add camera on the last step) are in the footer.
On a cloud-connected NVR the wizard is available only through this dialog. The standalone page /cameras/add-by-ip redirects back to Cameras — use Add camera → Add camera by IP instead.
Navigating between steps
Use Continue to move forward and Back to return to the previous step.
After you advance with Continue, earlier steps in the stepper become clickable — you can jump back to any step you have already reached. Steps you have not visited yet stay inactive.
When you leave a step and return (via Back or the stepper), your choices are kept — for example, the cloud recording profile selected on the Cloud step remains selected when you come back.
Wizard steps
| # | Step | What you configure |
|---|---|---|
| 1 | Connection | IP, ONVIF credentials, connection check, name, organization, folder, note |
| 2 | Analytics & events | ONVIF camera events on the NVR (local processing, no video to the cloud) |
| 3 | Archive storage | Local NVR archive quota and recording mode |
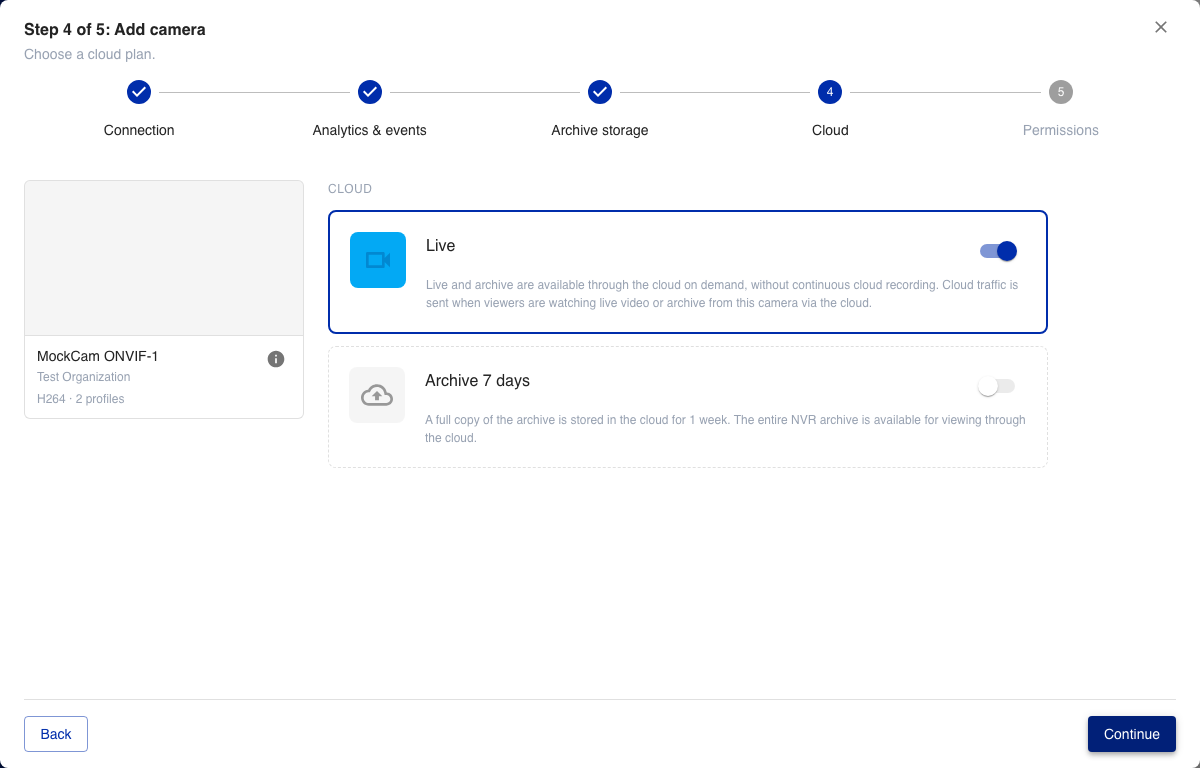
| 4 | Cloud | Cloud recording profile (live on demand, archive copy, episodes, cloud analytics) |
| 5 | Permissions | Informational — rights inherit from organization and folder |
On step 5 click Add camera to save.
Connection
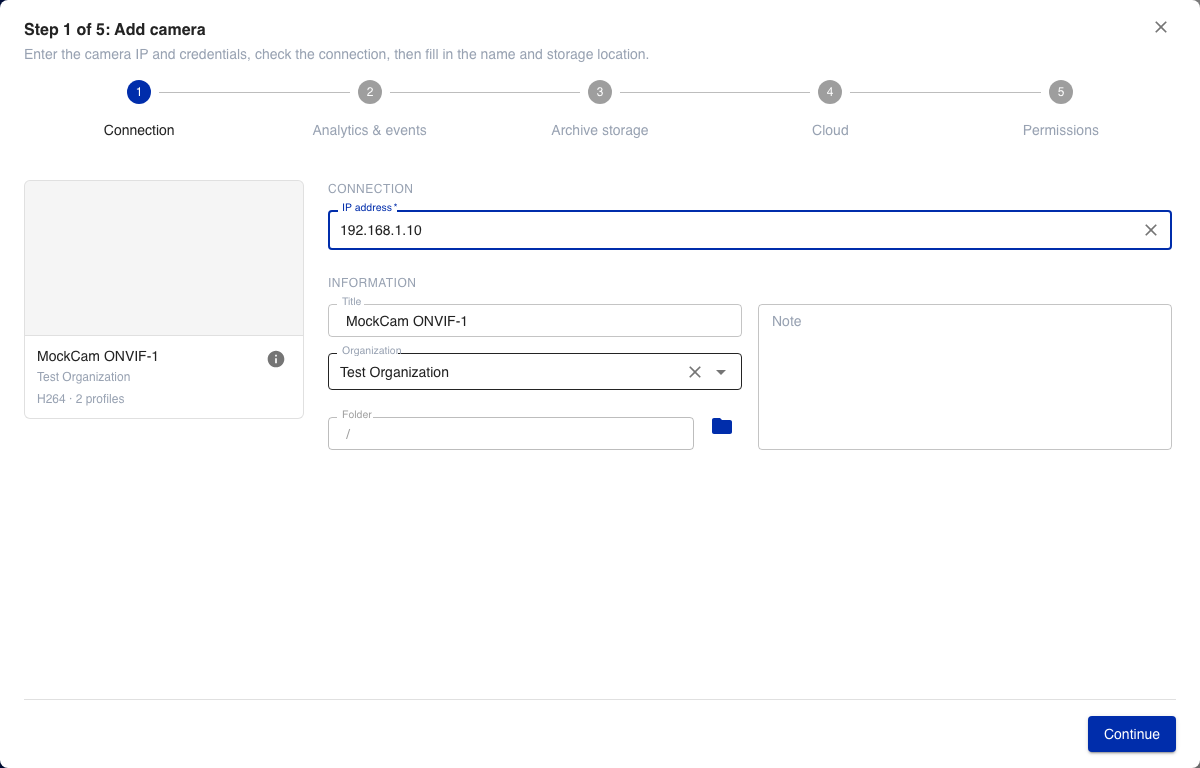
- Enter the camera IP address. Watcher checks ONVIF when the address is complete.
- If needed, enter login and password, then click Check connection.
- After a successful check, fill in name, organization, folder, and optionally a note.
Analytics & events
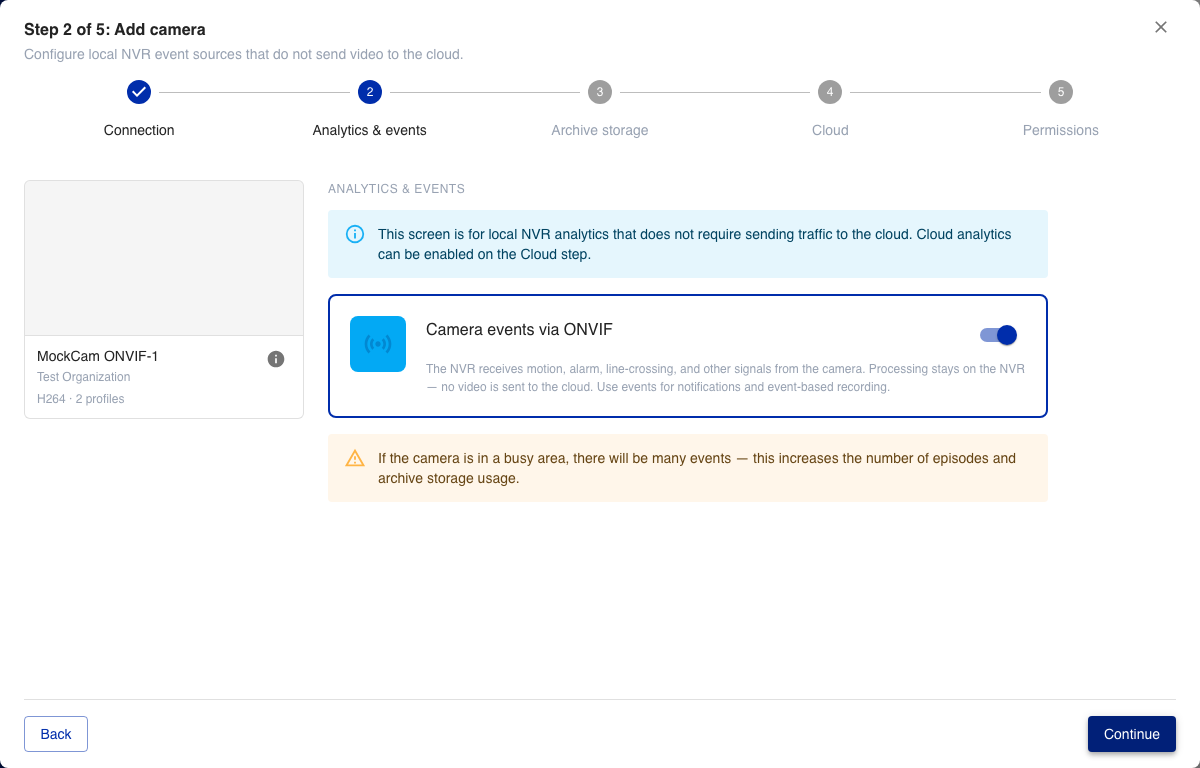
Turn Camera events via ONVIF on or off. When enabled, the NVR receives motion, alarm, line-crossing, and similar signals for local notifications and event-based recording.
Archive storage
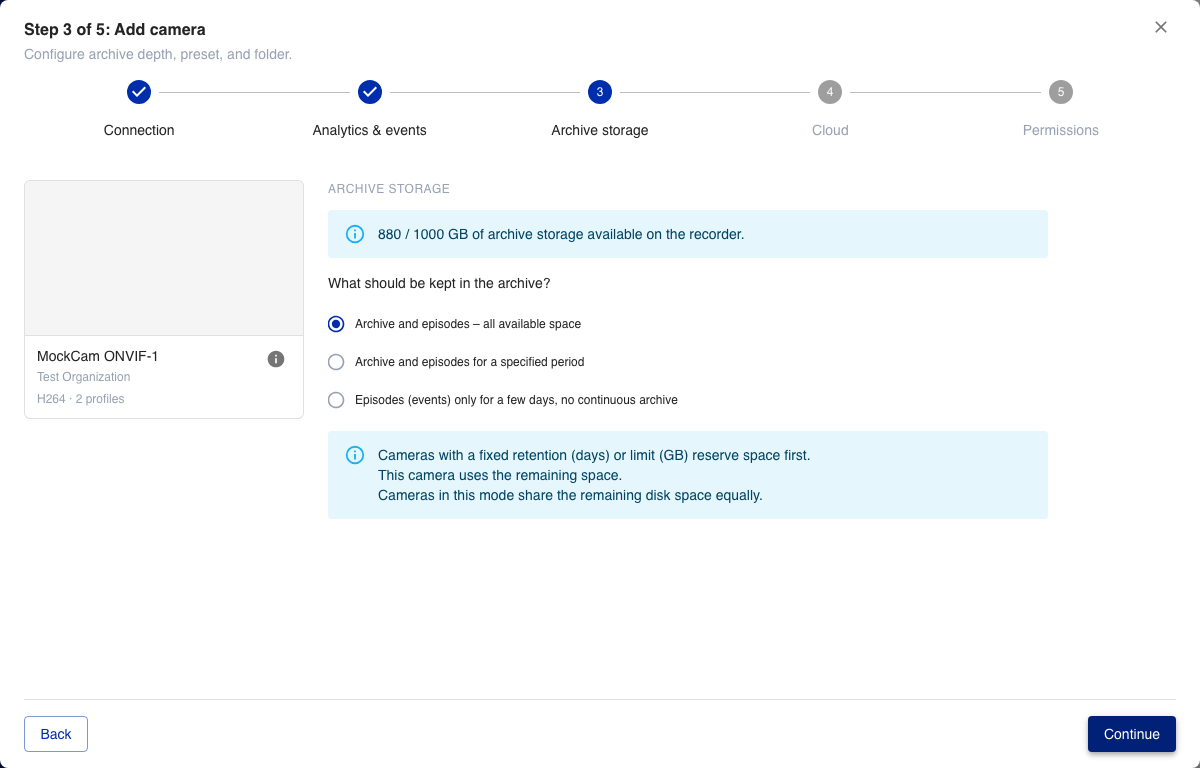
Set the local archive quota (percent or gigabytes of available NVR disk) and the recording mode:
- all available disk space;
- archive and episodes for a fixed period (same or separate retention);
- episodes only;
- manual allocation in gigabytes.
Cloud sync

Select a cloud recording profile. This is separate from the organization preset used on cloud Watcher — on an NVR you choose a cloud plan for what is stored and streamed through the cloud (live on demand, full archive copy, episodes, license plate or face recognition when included).
Permissions
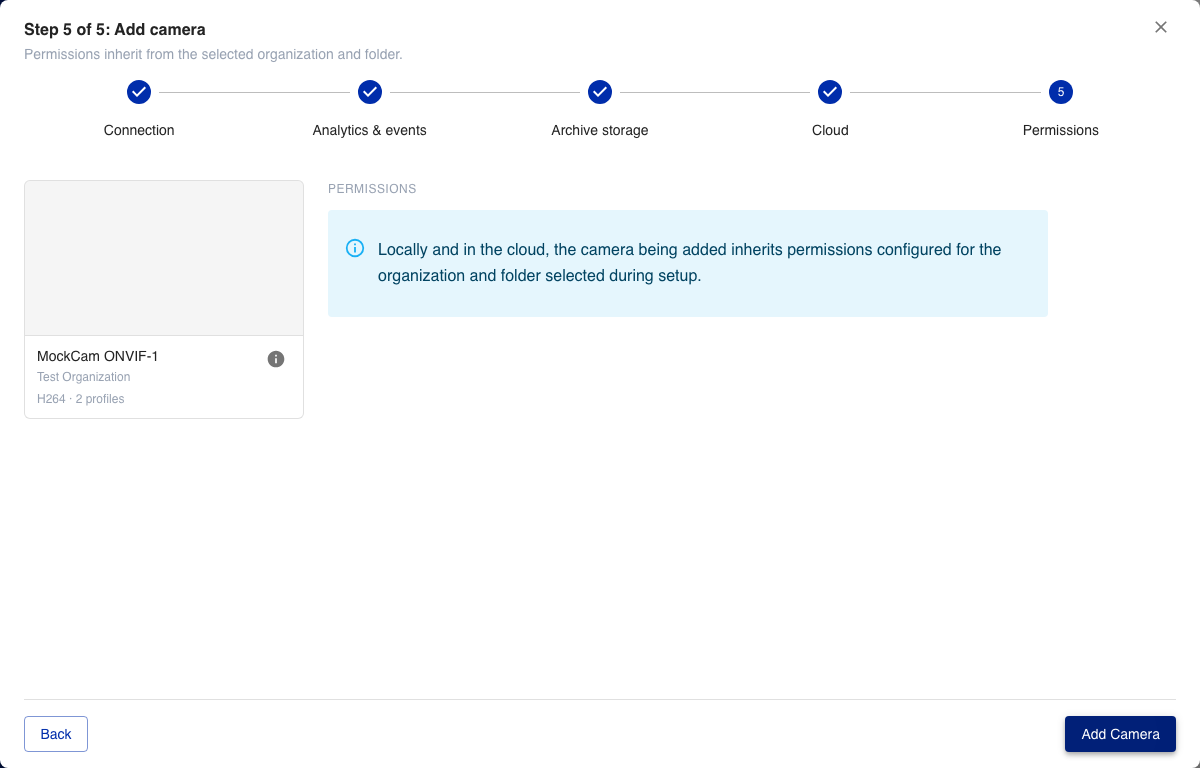
No fields on this step. The new camera inherits permissions from the organization and folder selected on the Connection step. Adjust them beforehand if needed (see Managing users).
Where the wizard is available
| Watcher deployment | Add by IP UI |
|---|---|
| Cloud Watcher | Short form — see Adding cameras by IP |
| Local NVR (not linked to cloud) | Same short form |
| Cloud-connected NVR | Five-step wizard in Add camera dialog only (this page). /cameras/add-by-ip is not available. |
Note
You need permission to add cameras in the target organization. The NVR must be activated and linked to the cloud account.
After saving, the camera settings page opens.