Layered Graphics Plans
Flussonic Watcher can display surveillance cameras on geo maps, as well as combine a geo map and floor plans (layouts) of the facility (premises). This feature allows you to conveniently navigate a large number of geographically distributed cameras, placing them directly on the map and placing them on the layouts of the facility. The solution of providers such as Google Maps, Yandex Maps, OpenStreet Maps can be used as graphic maps, and pictures in JPG and PNG format can be used as floor layouts.
Graphic map settings
Before you start using graphics maps, you must configure them. To do this, go to the Settings section, where you will see the Map section, on which you are offered to choose:
- Map provider. A service that provides a graphic background for a geo map. Google Maps, Yandex Maps, OpenStreet Maps are supported. For OpenStreet Maps it is also possible to specify an alternative server.
- Center of the map. The point that will open by default when you open the Map tab.
- API Key Google Maps. If you use maps from Google, then it is possible to specify the API Key in order to automatically recognize the addresses that are entered in the coordinate field and convert it to coordinates.
- The option to display maps in the main menu. If this option is enabled, the tab with maps will appear in the left navigation menu.

Adding a camera on a graphic map
In this mode, the camera image will be placed directly on the facility graphic map. This mode is relevant for cases when a small number of surveillance cameras are installed at one facility or when a camera is part of a city video surveillance system.
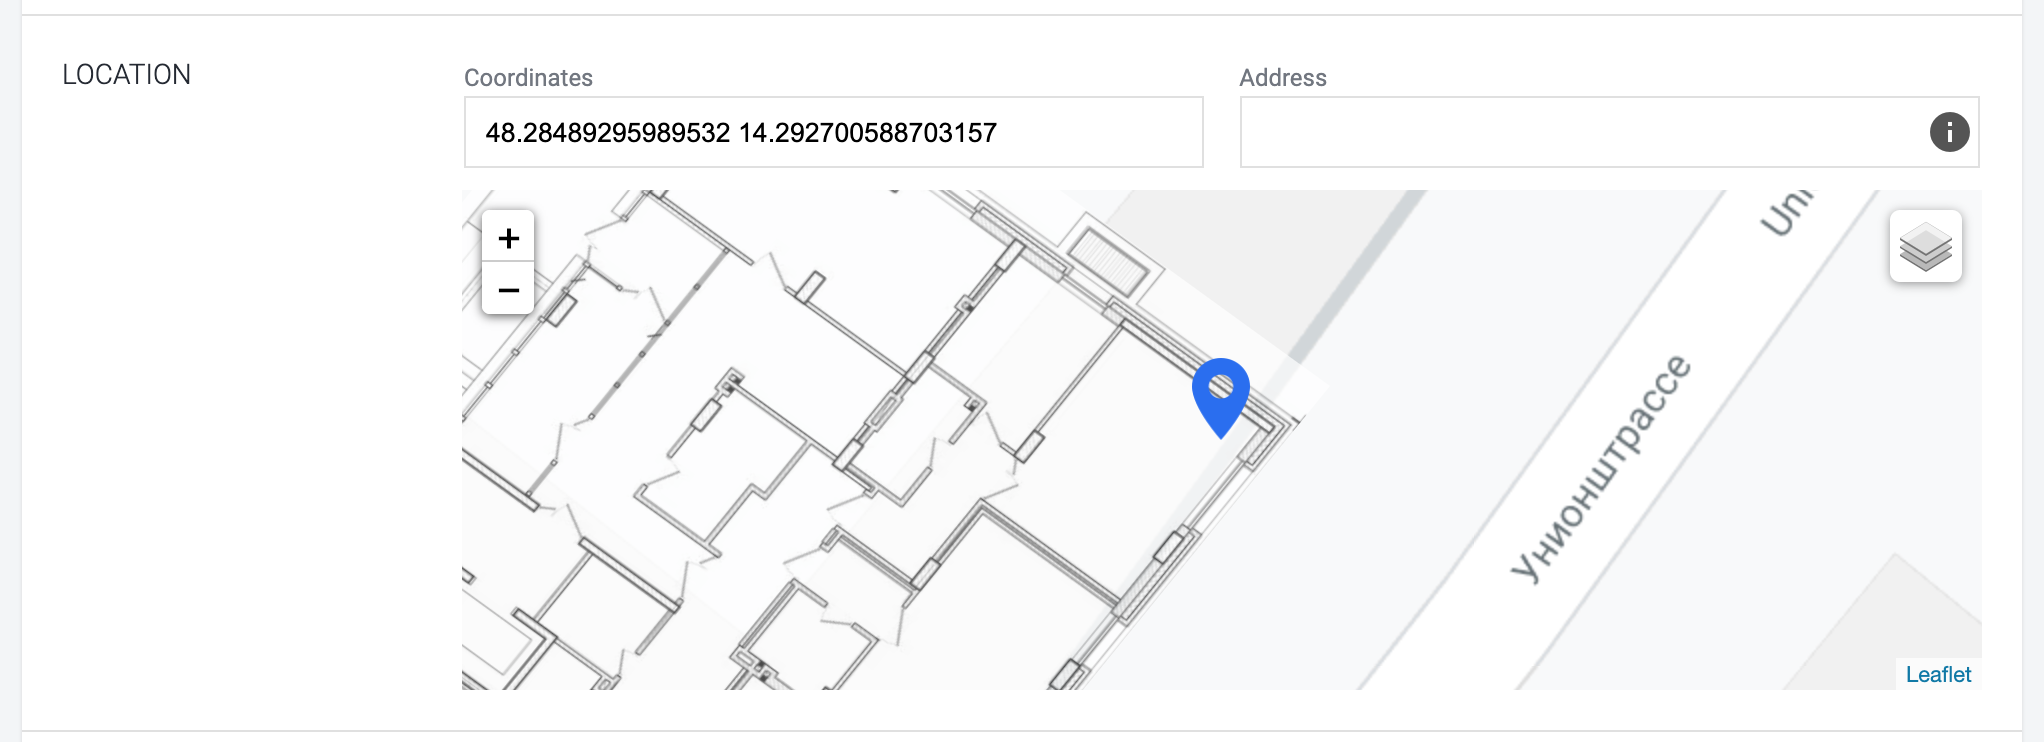
To place the camera on a graphics map, go to the camera settings, scroll from to the Location section and click the point on the map where the camera is physically located. The coordinates of the camera will appear in the appropriate boxes automatically.
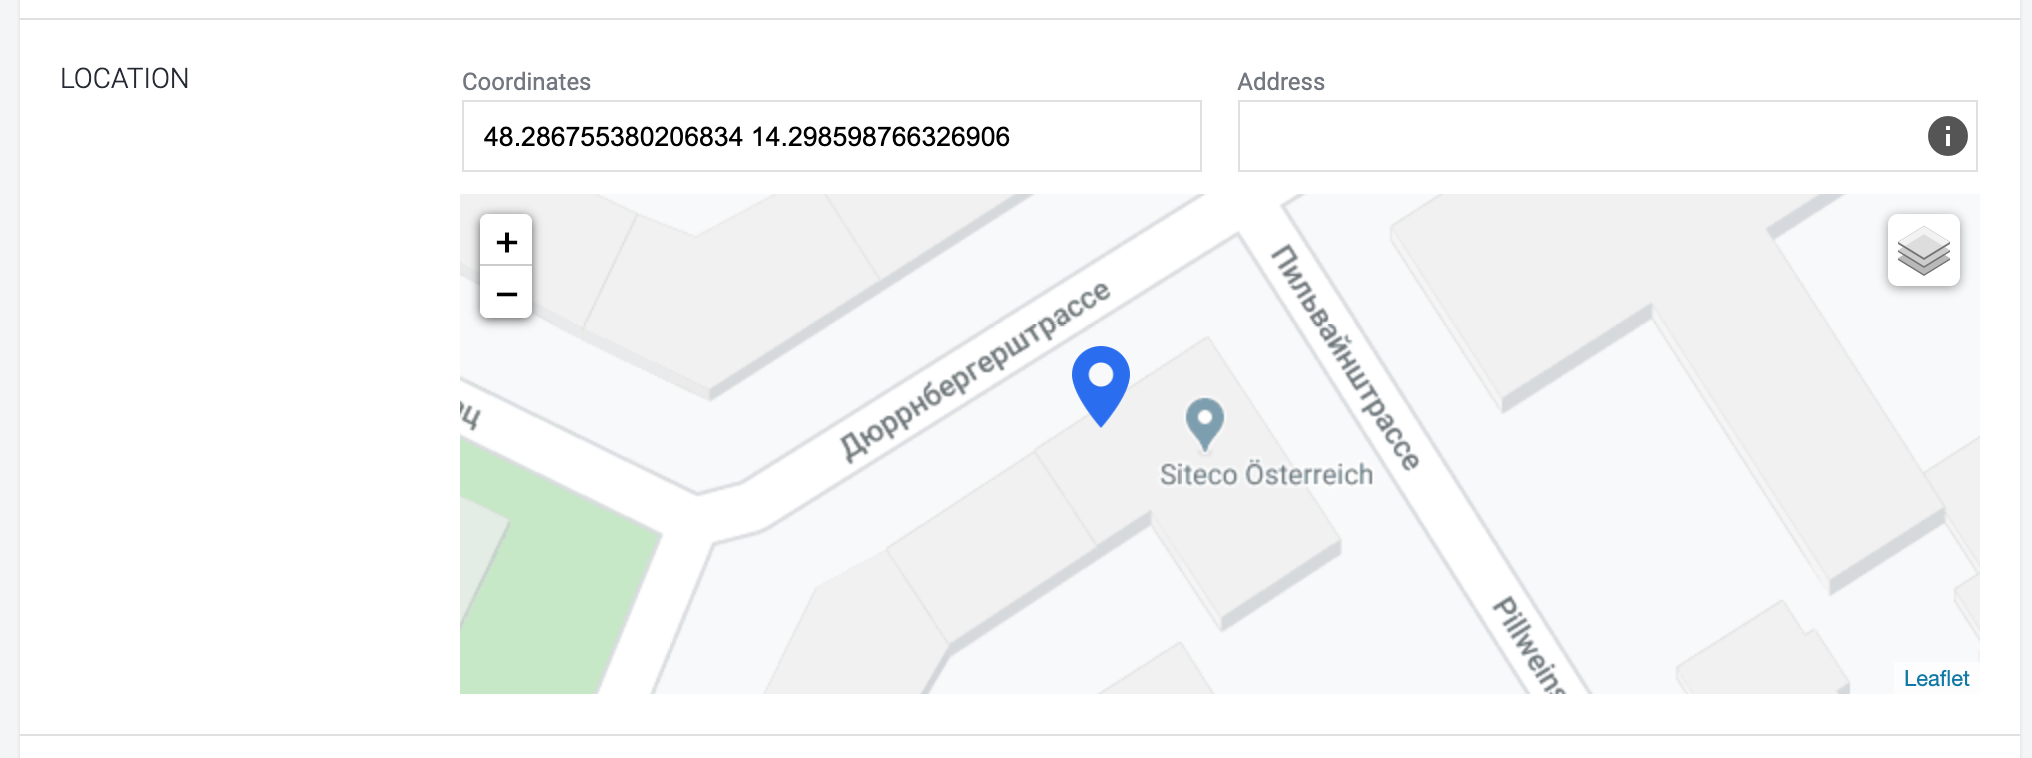
In addition, you can fill the camera coordinates by copying them from the map. After that, when opening the graphics map, you will see an icon corresponding to the installed camera.
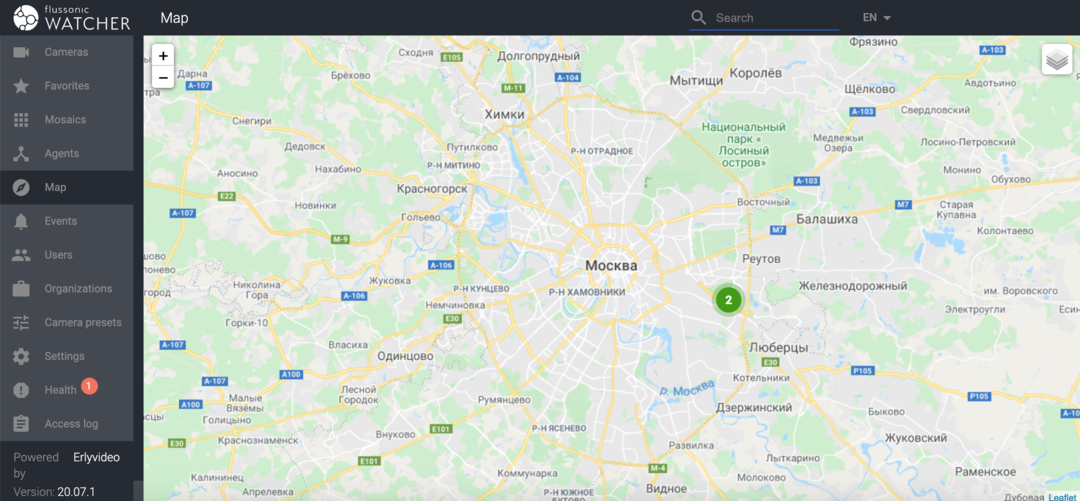
Several cameras can have the same coordinates. In this case, an icon with a number corresponding to the number of cameras placed at this point will appear on the map. To view the picture from a particular camera, click the icon with the number.
Adding facility layouts on a graphic map
You can add the layout of the facility directly to the graphics map and fit it to the size of the image of the facility itself. Let's say a house is displayed on a graphic map, and you have a floor plan of this house. You can setup the map so that at zooming in you could see the layout of this house and its floors.
An important point is that facility layouts are attached to camera folders in the Watcher structure. That is, if you want to place the layout of the house by floors, then a folder in the camera structure must be assigned to each floor and cameras must be added to those folders. The folders structure will be like that:
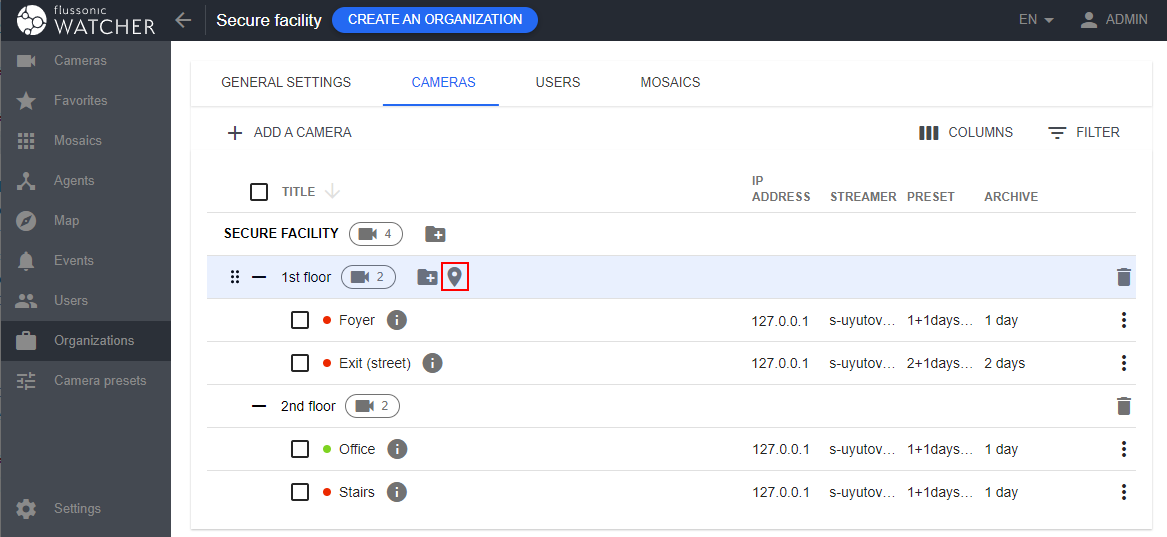
To attach the facility layout to the graphic map, click the coordinate icon to the right of the folder name.
In the form that opens, specify the following:
- Specify the center of the facility layout in relation to the graphic map. Just click on the house on the graphic map to which you want to attach the floor plan to specify the coordinates of the center.
- Upload a picture with the layout of the facility
-
Stretch the layout of the room along the contour of the building on the graphic map using the appropriate sliders.
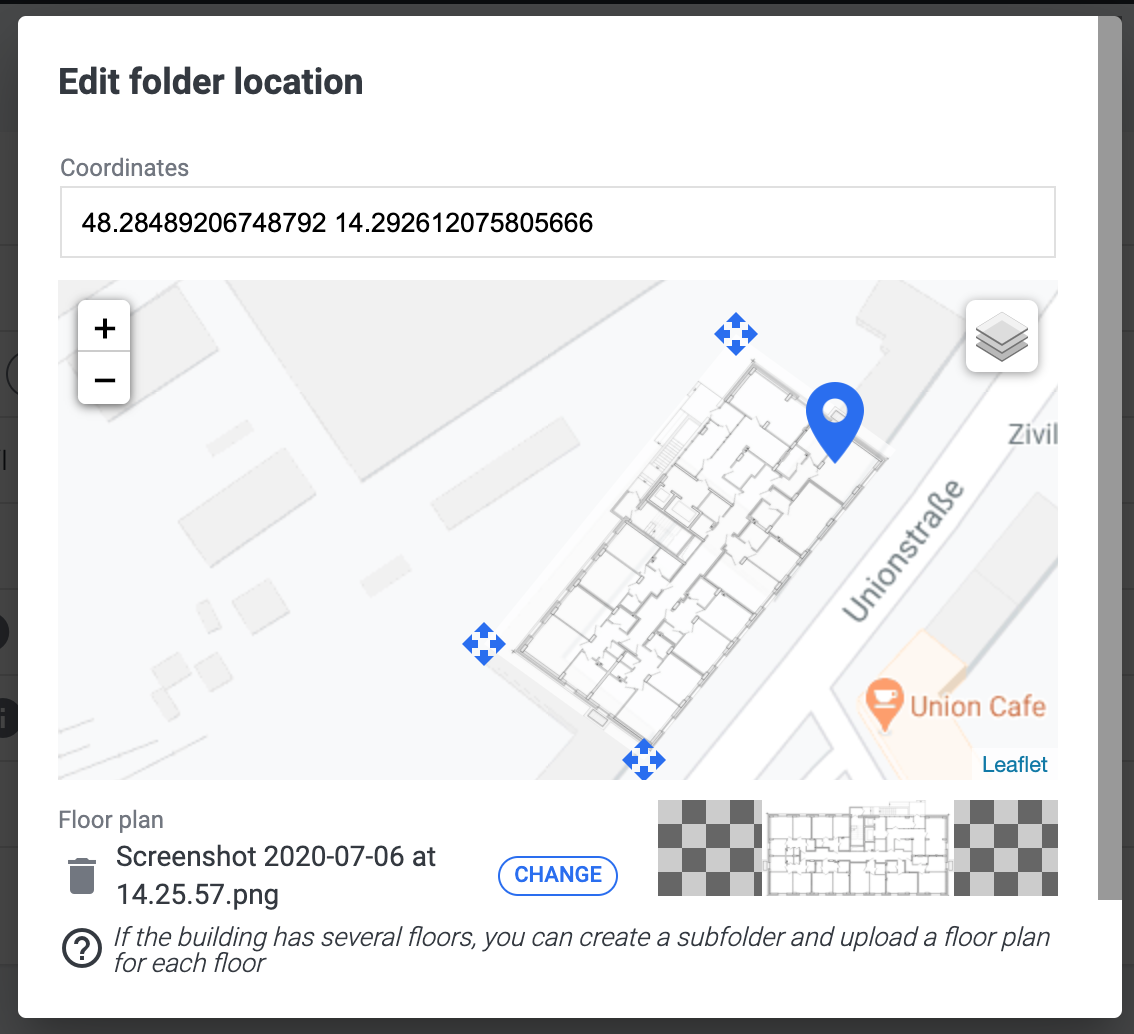
If you need to add the layouts of more floors, then create the appropriate subfolders for them, specify a single center on the graphic map and add the appropriate layouts.
After adding subfolders on the graphics map, you will be able to select the layout of the desired floor from the drop-down list in the top right corner of the map.
Adding cameras on the floor layouts of the facility
Floor plans are loaded. Now you can place cameras on them. To do this, simply open the camera settings and scroll to the Map section. In this section, you will immediately see the layout tied to the folder where the camera lies. You just need to click in the place where the camera is physically located on the floor plan.
Using graphics maps and layered facility layouts
Everything is ready and configured. Now you can see how it works. Open the graphic map where you will see cameras and facilities with floor plans attached. Click the icon of such a facility to see its layout with cameras placed on it. If the facility has multi-level plans, then you will see a drop-down list from which you can choose the floor you are interested in.