Embedding a camera on a website
A Watcher camera can be shown on an external website through the embedded player. The link contains an access token: website visitors receive the capabilities granted to that token.
This section describes administrative links on the camera Shares tab. A Watcher administrator can create these links. The user Share action in Cameras is a separate way to obtain a link.
Obtaining an embed URL
- Sign in as a Watcher administrator.
- Open Admin → Cameras and select the camera.
- On the Shares tab, enter a token name and select permissions.
- Click Create, then copy the required link or HTML code.
Permissions are set separately for live video and the archive. You can limit archive depth; archive export is controlled by a separate permission. Selecting DVR in the form also enables live video and export: check the final checkboxes before creating the token.
The form before token creation: selecting DVR has also enabled Live and archive export.

- Player live — a link to the live video player.
- Player DVR — a link to the player with archive access.
- HTML live — an iframe for embedding live video.
- HTML DVR — an iframe for embedding the player with archive access.
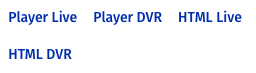
The list shows links matching the token permissions. Open a Player link in a separate tab to check the result. To embed it on a website, copy the iframe; its area dimensions are set with the CSS width and height properties.
If the player does not open, check token permissions, camera availability and the public streamer address: see streamer configuration. For a website using HTTPS, the player and video addresses must also be accessible to the browser over HTTPS.
Revoking camera access

Delete the token using the trash icon and confirm. Reopen the old link and check that it no longer grants access.
Share the link only with people who are allowed to view the camera: copying the iframe does not add visitor authentication to your website.