Camera analytics
Video analytics rules are stored and executed by the camera itself. Optic reads and writes them on the stream's Analytics tab and saves rule triggers as episodes with a camera frame. The set of rule types, their settings, and limits depend on the camera model and firmware, and the tab shows exactly what the camera declared. Specifics of particular cameras are collected in Camera adapters.
The superadmin and admin roles can configure analytics. The same operations are available through the API.
Stream preparation
The tab needs:
- Camera address and credentials — configured in the ONVIF settings on the Sources tab. If no ONVIF address is set, Optic uses the first stream input if it is RTSP; for an MBR group, it uses the first nested input. The camera account needs permission to change analytics settings. If the RTSP input uses an agent, camera management uses the same agent; see Adding a camera.
- ONVIF events — configure their reception on the Sources tab. ONVIF metadata over RTSP is also supported. Rules run on the camera; events must reach Optic for episodes to appear.
- Thumbnails — the tab shows the camera frame from them. A thumbnail is added on the Process tab in the Thumbnails block with the Stream keyframe source.
- Archive and episode retention — needed to watch video around a trigger, see archive and episode retention.

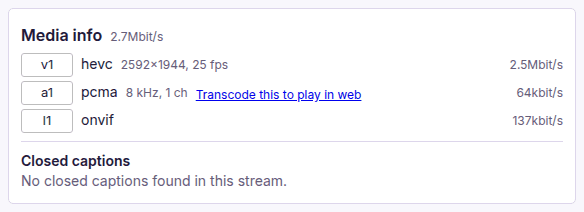
When metadata is sent over RTSP, the Media info block on the Basic Settings tab lists an onvif track.
Analytics tab
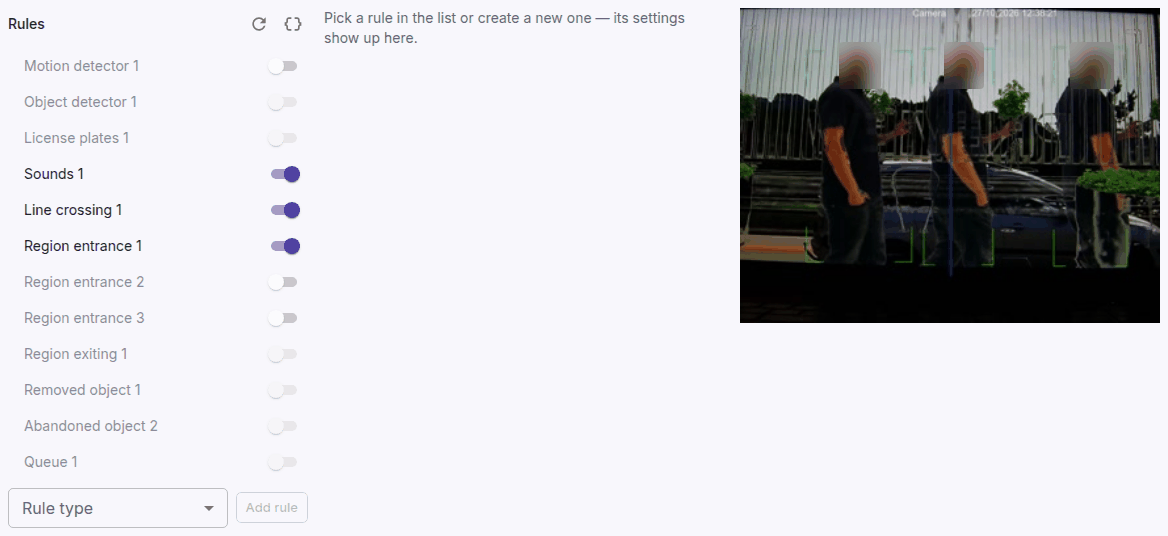
The Rules list is on the left. An armed rule is highlighted and its switch is on; a disarmed rule is grey. The number after the name tells rules of one type apart. Rule type and Add rule are below the list.
The middle shows the settings of the selected rule.
The camera frame is on the right and refreshes periodically. Optic draws the lines, zones, and cells of the selected rule over it; the camera may also add its own marks to the image. If the frame does not refresh, the reason is shown over its bottom edge: the stream has no thumbnails, or viewing requires a playback token.
Two buttons are above the list:
- Re-read — reads the rules from the camera again. The tab does not learn by itself about changes made in the camera's web interface, through the API, or from another workstation.
- Standard names and hints — turns on hints mode: shows the executor, the ONVIF standard names of rules and settings, and the limits declared by the camera, see Camera adapters.
Rules
Rule types
The tab knows the following types. The camera declares which of them it has, how many rules of each type can be created, and what settings the rules have.
| Type | What it does |
|---|---|
| Line crossing | An object crossed the line in the set direction |
| Crossing count | Counts objects that crossed the line |
| Zone with direction | An object moves in the zone in the set direction |
| Region entrance | An object entered the zone |
| Region exiting | An object left the zone |
| Intrusion | An object stays in the zone longer than the time threshold |
| Abandoned object | An object appeared in the zone and stayed |
| Removed object | An object disappeared from the zone |
| Crowd | More people in the zone than the threshold |
| Queue | A queue longer than the threshold or standing longer than the set time |
| Motion region | Motion inside the region |
| Motion detector | Motion in the marked frame cells |
| Object detector | People and vehicles in the frame |
| Sounds | Sound of the selected classes |
| License plates | License plate recognition |
| Face recognition | Face recognition |
| Human bodies | Detection of people |
| Vehicles | Detection of vehicles |
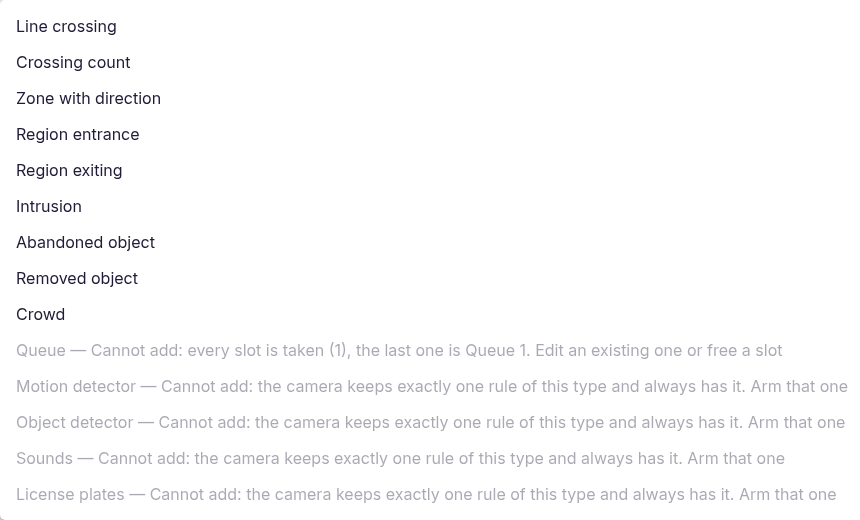
In the Rule type list, unavailable types are grey with the reason, for example "every slot is taken". Some cameras keep a rule of a type permanently: such a rule cannot be created or deleted, only armed or disarmed.
Creating, changing, and deleting
To create a rule:
- In Rule type, select the type and click Add rule.
- Place the line or zone on the frame.
- Set the rule's settings.
- Click Create and turn on the rule's switch in the list.
The buttons under the rule form:
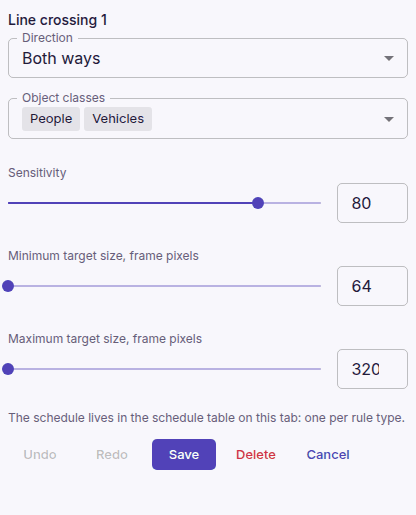
- Undo and Redo — step back and forward through edits not yet written to the camera.
- Save — writes the rule and re-reads it from the camera. The result is reported as "Saved and re-read from the camera".
- Delete — deletes the rule after confirmation and frees room for a new one. Permanent rules have no such button.
- Cancel — closes the form without writing.
If the camera requires a schedule for a rule, the tab does not let you write the rule without marked hours, see Schedule.
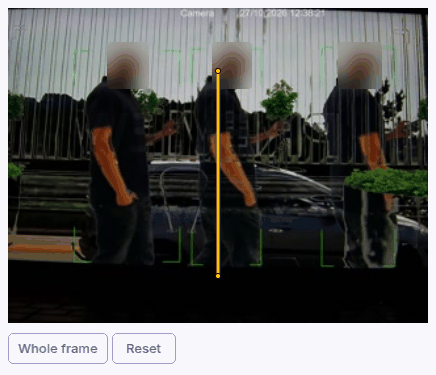
Line
A new line runs horizontally through the frame center. It is highlighted in yellow on the frame, and its ends are dragged with the mouse. Reset restores the initial position. Direction sets in which direction a crossing triggers the rule, Object classes — which of the classes declared by the camera.
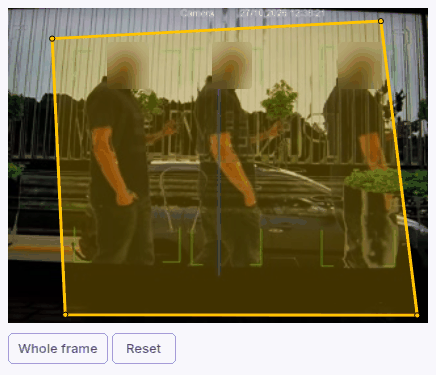
Zone
A new zone covers almost the whole frame; Whole frame and Reset return it to that shape. Zone vertices are edited with the mouse:
- dragging moves a vertex;
- double-clicking an edge adds a vertex;
- right-clicking a vertex removes it.
The camera limits the number of vertices; the tab does not accept vertices outside the frame. If a rule read from the camera has no zone, Add a zone or line adds one.
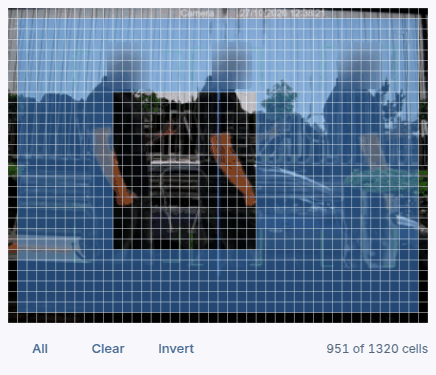
Motion detector cells
Motion detector detects motion in the marked frame cells. Marked cells are filled. The camera defines the grid size; the row and column count depends on the model.
To set the motion detection area:
- Open the stream's Analytics tab and select the existing Motion detector rule. In hints mode, it may be named
CellMotionDetector_1. A camera with a permanent rule does not need a new rule to be created. - Mark the cells on the frame. Clicking toggles one cell. Dragging from an unmarked cell marks a rectangle; dragging from a marked cell clears the rectangle.
- Click Save under the rule form. Optic writes the mask to the camera and verifies it by reading it back.
- Click Re-read and check that the intended cells are still marked. The marked cell count is shown on the right under the frame.
The buttons under the frame change the whole grid at once:
- All — marks every cell;
- Clear — clears every cell;
- Invert — swaps marked and unmarked cells.
Cells can be configured while a rule is disarmed. If the camera supports the Armed switch, turn it on when the rule should start detecting motion. Selecting cells alone does not save the settings.
If the camera does not declare its grid size, the mask is read-only. Optic does not assume a grid size: it is needed to map cells to the frame correctly. Available settings depend on the camera adapter.
The selected cells define the camera motion detection area. Short gaps between events are merged into an episode using the debounce window.
License plates
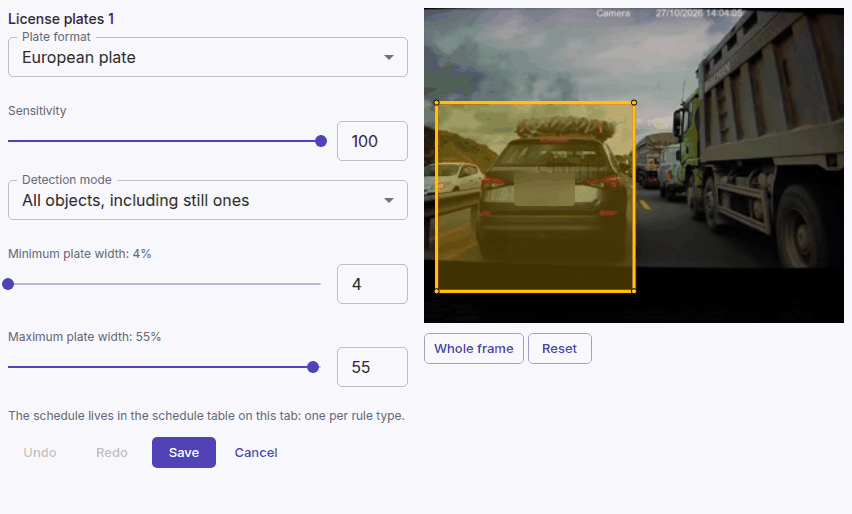
The License plates rule recognizes plates in a zone on the frame; the zone is edited like in other rules. The camera declares the recognition settings. The screenshot shows the settings of an Optimus camera: plate format, sensitivity, detection mode, and the minimum and maximum plate width in percent of the frame width.
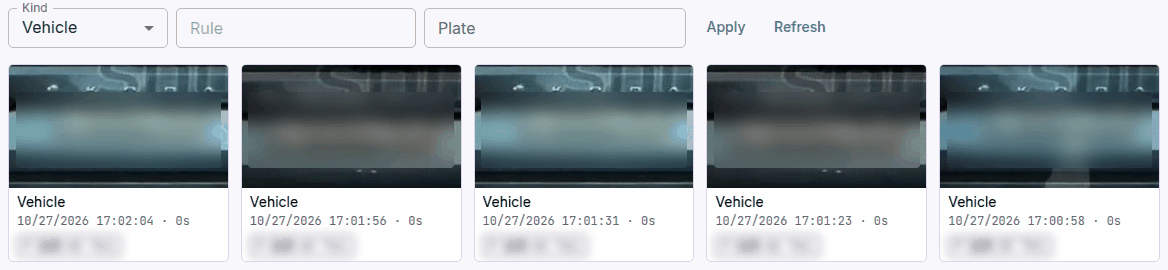
Recognized plates become episodes of the Vehicle kind. A tile shows the plate image, the time, the duration, and the read plate; the Plate field selects episodes by plate.
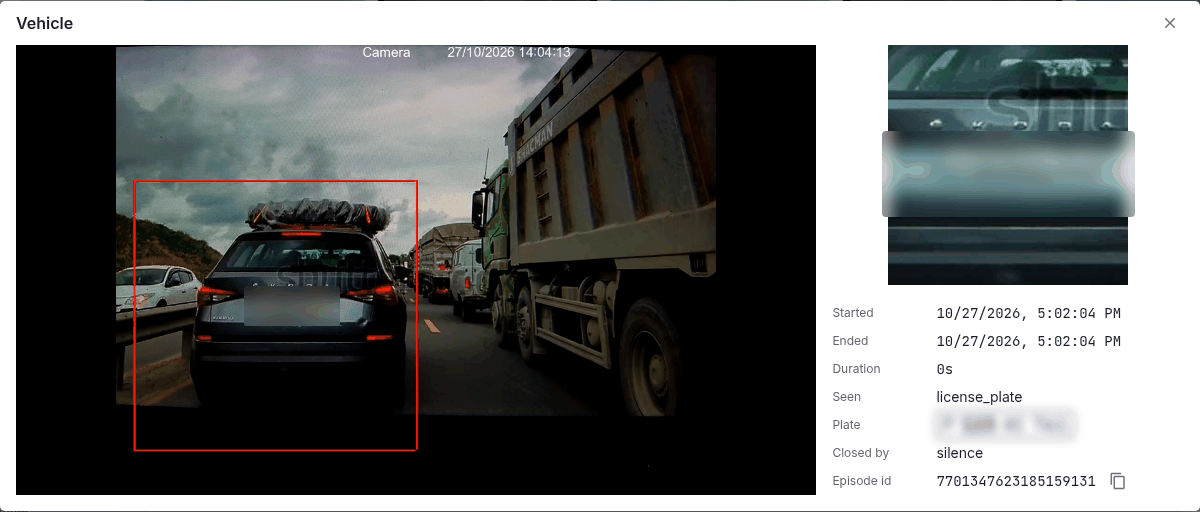
The card of such an episode shows, besides the video and the time, the classes of recognized objects and the plate. If the camera saw a vehicle but did not read the plate, "plate not recognized" is shown instead of the plate.
Schedule
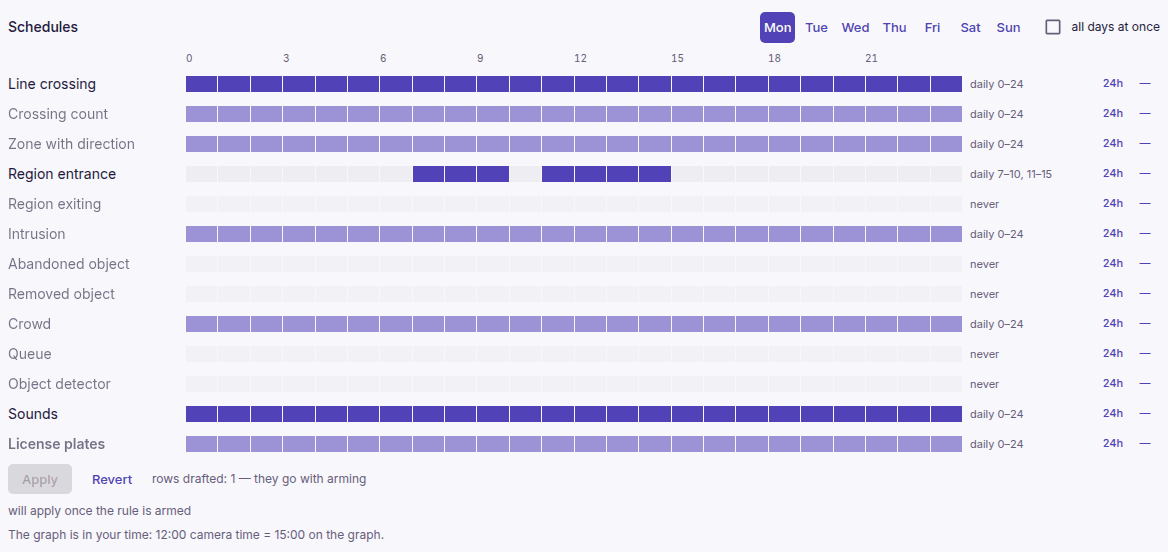
The Schedules table is shown if the camera supports rule schedules. The table has one row per rule type; columns are the hours of the selected day. It is needed when a rule should not work all the time.
The day is selected above the table; all days at once applies the edit to the whole week. Dragging the mouse along a row marks or clears hours, 24h fills the row, and the button next to it clears it. Apply writes the changed rows to the camera, Revert discards the edit.
Rows of types without armed rules are pale; a changed row not yet written is bold. The row of a disarmed type is written together with arming the rule; the note next to the buttons says "rows drafted: N — they go with arming". The grid is shown in the browser's time zone if the camera reports its own; the line below the table shows how camera hours map to the graph.
If the camera declared incompatible scenarios, the tab checks the schedule before writing and names the conflict with its day and hours.

If a write fails
A camera can report a successful write and still not apply some values. Optic compares what it sent with what it reads back and lists the differences under "The camera accepted the write but did not do everything:", one line per setting with the sent and the saved value.
If the camera did not answer some requests while reading, the tab names the request and the settings missing from the form because of it.
A write refusal is shown under the rule buttons, a read refusal in the rule list; a refusal has a Retry button:
- The stream has no camera address — no ONVIF address is configured, and the first stream input is not RTSP.
- The camera rejected the credentials — the login or password in the ONVIF or RTSP address is not accepted.
- The camera rejected a value — a value outside the camera limits.
- The camera cannot run the two rules in the same hour — schedules of incompatible rules overlap.
- No node runs this stream right now or The ingest node of the stream is not reachable — the stream is not running, or the streamer that ingests the camera video is unavailable.
- The camera answered with an error — details are in the refusal text.
Every attempt to write rules is recorded in the central audit log with the stream_onvif.rules_write action, including attempts the camera rejected.
Triggers on the Episodes tab
Episodes of the Motion kind merge gaps shorter than 30 seconds. If motion returns after 5 seconds, the previous episode continues with the same ID; after 30 seconds of quiet, it closes with the time when motion stopped. See merging motion episodes (debounce).
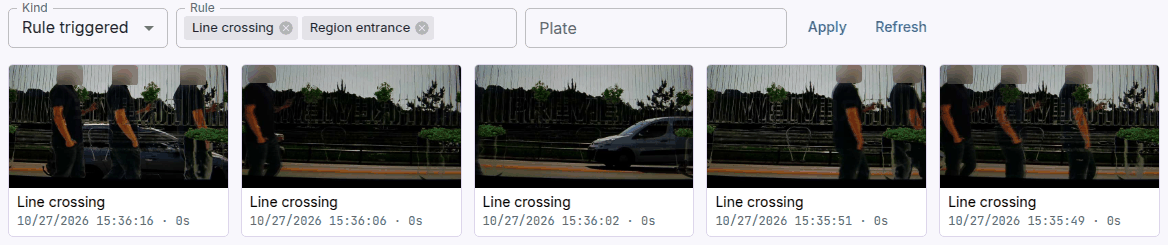
Every rule trigger becomes a closed episode with a camera frame. On the stream's Episodes tab, they are selected with Kind "Rule triggered" and the Rule field; the code of a rule that is not in the list is typed and confirmed with Enter. Objects and plates recognized by the camera become episodes of the Vehicle and Person kinds, see License plates. Searching triggers through the API is described in Camera analytics API.
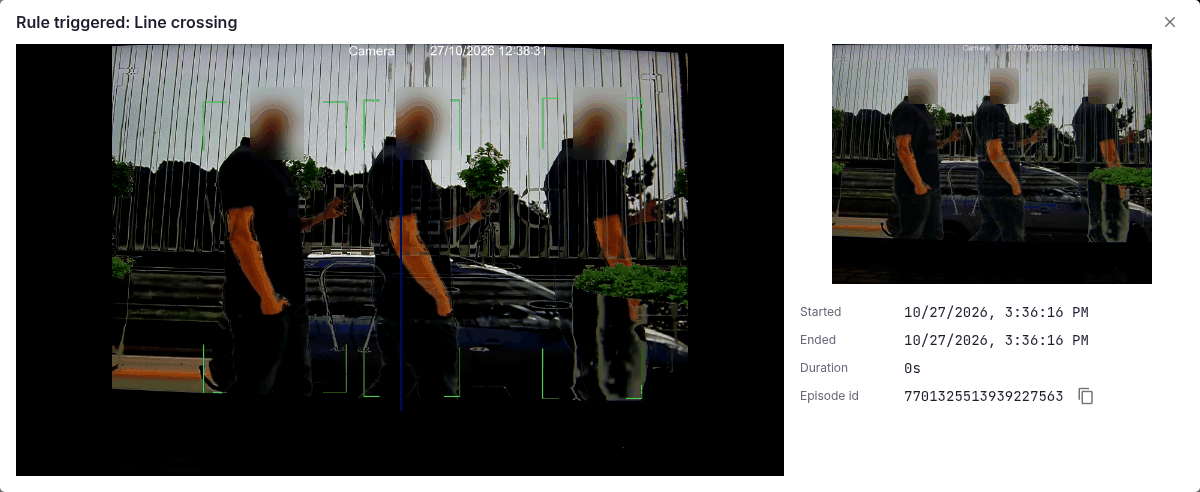
Clicking a tile opens the episode card. On the left is the archive video around the trigger; on the right are the frame sent by the camera, the start and end time, the duration, and the episode ID. Without an archive, "The stream video archive is not configured" is shown instead of the video.
Camera adapters
Optic chooses how to work with the camera automatically for every operation. In hints mode, the executor is shown under the Rules heading:
- adapter: hanbang — supported Hanbang-family cameras. Optic configures motion through the camera's web API.
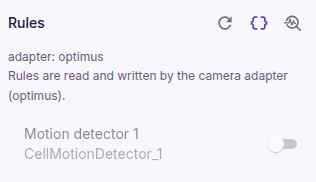
- adapter: optimus — Optimus cameras. Optic works through the camera's web API.
- executor: the camera — other cameras. Optic works through the camera's own ONVIF Analytics service.
Optimus
Metadata. The camera sends ONVIF metadata only when the RTSP URL contains onvif_metadata=true, for example rtsp://camera-user:camera-password@192.168.10.20:554/rtsp/streaming?channel=1&subtype=0&onvif_metadata=true. Optic does not add this parameter.
Rule types. The camera supports 14 types:
| Types | Rules of one type | Creating and deleting |
|---|---|---|
| Line crossing, Zone with direction, Region entrance, Region exiting, Intrusion, Abandoned object, Removed object | up to four | allowed |
| Crossing count, Crowd, Queue | one | allowed |
| Motion detector, Object detector, Sounds, License plates | one, always present | not allowed, only arming |
Several rules of one type are several zones of one camera scenario: each has its own geometry, the schedule is shared, and a value of another setting changed in one rule may be applied by the camera to all rules of the type. Disarming a line or zone keeps its geometry; deleting frees room for a new rule.
Schedule.
- All types have a schedule except Motion detector.
- For the camera, an empty row means "scenario off", so arming needs at least one marked hour, and disarming clears the row.
- While a scenario has a schedule, the camera switches it on and off by the grid itself. A switch value sent against the grid is not applied by the camera, and the tab shows it as a difference.
- The camera stores the schedule in half-hours; an hour that is only half marked in the camera is shown empty.
Incompatible scenarios. The camera declares scenarios it does not run in the same hours, for example lines and zones with License plates and Object detector. The tab does not let you write them into overlapping hours.
Geometry. The camera stores coordinates on its own grid, so vertices shift by a fraction of a percent of the frame after writing.
Hanbang
Supported cameras in this family expose the motion mask and the Armed switch. The UI names the rule CellMotionDetector_1; the rule name inside the camera stays the same.
Optic reads the saved cells even when the detector is off. Saving a mask preserves the switch state and the other camera settings, including schedules and alarm actions. The switch state can be changed separately. Adjusting sensitivity through this adapter is not supported; saving the mask preserves its current camera value.
After writing, Optic reads the settings back. If the camera did not save them or the result could not be read, the UI reports a save error.
Standard ONVIF
For other cameras, Optic calls the camera's ONVIF Analytics service. The camera declares the rule types, their settings, and limits; the set depends on the model and firmware. The camera does not declare incompatible scenarios over ONVIF, so a conflict is rejected by the camera itself on write. Optic verifies every write by reading it back; differences are shown as described in If a write fails.
Diagnostics
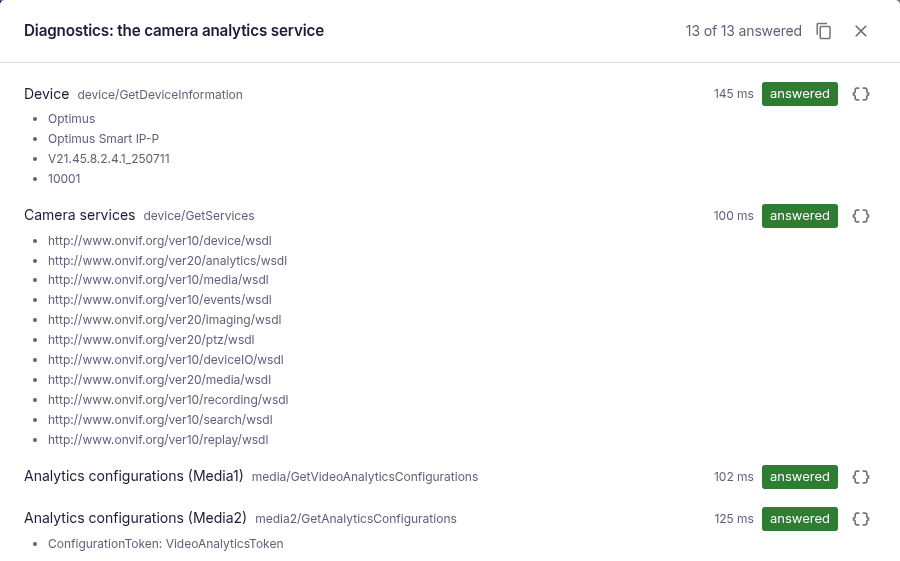
In hints mode, the Analytics service diagnostics button appears next to the Rules heading. It runs 13 requests to the camera one by one, from device information and the service list to the rules and event topics. Each step shows the request, the time, and the result:
- answered;
- refused;
- no answer.
The camera's answer as is of a step shows the original camera response; Copy the report copies the result for a support request.