Connecting cameras
A camera in Lumika always lives inside an organization and always has a plan. What an organization is and where plans come from is described on Getting started with Lumika.
The way you connect a camera depends on what the camera is and where it stands. Cameras can be connected by a user with the Camera administration permission in the organization — usually the subscriber themselves as the owner of their organization, or your installer whom you granted permissions.
Which way to choose
| Camera | Way | What the network must provide |
|---|---|---|
| Flussonic with Wi-Fi | A QR code in the mobile application | An ordinary home Wi-Fi with internet access |
| Flussonic over Ethernet | Device search in the mobile application | The camera and the phone in the same local network, and internet access from it |
| Third-party IP camera | An RTSP address or an ONVIF probe by IP in the web interface | The camera reachable from the internet: a public IP or a port forwarded on the router |
Flussonic cameras differ from the rest in that they run Flussonic Agent inside — a program that establishes the connection to the cloud by itself. The camera needs no public IP, no ports have to be forwarded on the router, and the link is encrypted. For a subscriber behind a home NAT this is the only way that works without configuring the router.
Note
The Flussonic Watcher mobile application is available in the App Store and on Google Play. Signing in takes a login, a password and the Operator ID, see Subscribers and access. The screenshots below are from Android; the iOS screens differ slightly while the steps are the same.
The subscriber activates the camera under their own account. Grant the installer access to the required organization and provide their own login; the procedure for granting and revoking access is described in billing integration. If the user has access to several organizations, select the intended subscriber's organization during activation. Revoke the installer's temporary access after the work is complete.
A Wi-Fi camera by QR code
This is how Flussonic cameras with Wi-Fi are connected. A camera comes from the warehouse bound to no domain; if the camera has been used before, reset it to the factory settings.
-
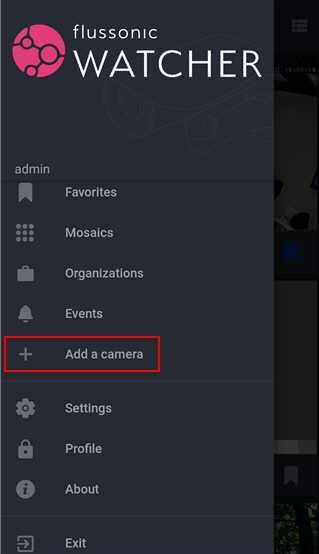
Sign in to the application, open the menu and choose Add a camera.
-
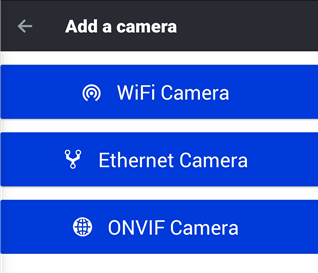
Choose WiFi camera.
-
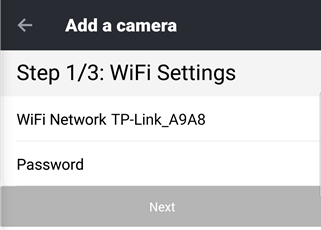
Check the name of the Wi-Fi network and enter its password. The application passes this to the camera together with the QR code.
-
On the same screen, check Organization and the plan in Preset. If alternatives are available, select the intended subscriber’s organization and recording settings before proceeding to the QR code.
-
Tap Next. A QR code appears on the phone screen. Hold it in front of the camera lens at 15–20 cm and keep it still.
-
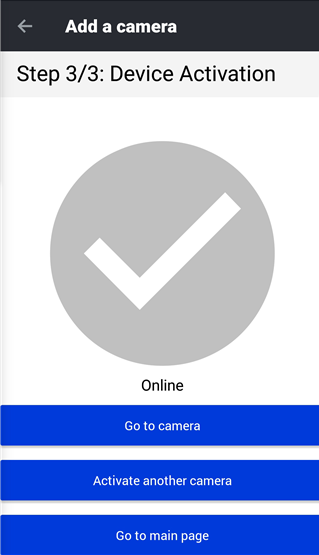
The camera announces that the code has been read and connects to the Wi-Fi network. After that you can go to the video, activate the next camera or return to the home screen. To change its title or other settings after connection, tap Edit camera.
If it did not work
- The camera does not react to the QR code. A camera ready to read the code plays a voice message from time to time. If there is no message, check the power supply and reset the camera to the factory settings.
- The camera did not join the Wi-Fi network. Check the network password and that the network runs in a band the camera supports.
- The camera was added to the wrong subscriber. The application was signed in with an account that has access to several organizations. Move the camera to the right organization in its settings — see below.
An agent camera over Ethernet
The application finds Flussonic cameras connected over Ethernet by itself. The phone and the camera must be in the same local network.
-
In the add-camera menu choose Device Search. The application scans the network and shows the cameras it found.
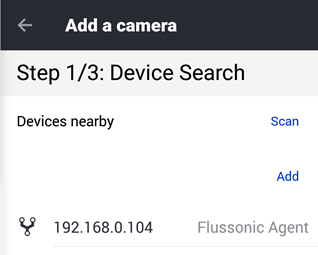
The Search button runs the scan again. If the camera is not in the list but you know its IP address, tap Add and enter the address.
-
On the same discovery step, check Organization and the plan in Preset. Change them before activation if necessary, then select the discovered camera or enter its IP address manually.
-
On the next screen tap Activate.
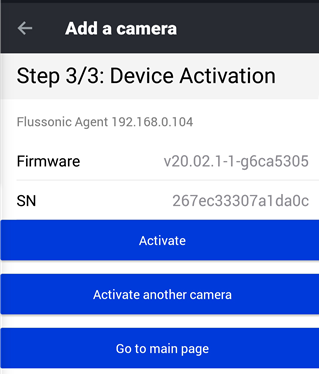
-
Wait for the message that the activation succeeded. To change the title or other settings, tap Edit camera. Check the image and recording separately.
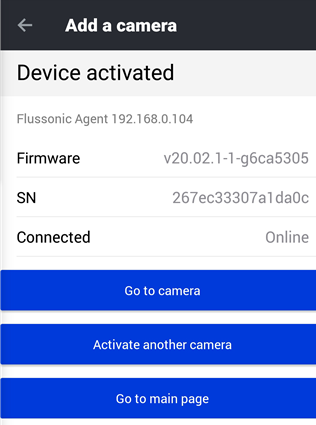
If it did not work
- The application does not find the camera. The search runs over MDNS — a request to
224.0.0.251. Configure the network so that such requests are not blocked: on a router this usually means turning IGMP snooping off. Check as well that the phone is connected to the same network as the camera and not to mobile internet. - The camera was found, but activation fails with "Need specify the organization ID". The account has no organization it may add cameras to. Make the user the owner of their organization — see Subscribers and access.
A third-party camera by RTSP address
Any camera that supports RTSP can be added by hand by entering the address of its stream. There is no agent inside such a camera, so the cloud establishes the connection, not the camera.
Warning
The cloud has to reach the camera over the network. That means the camera has a public IP address, or the RTSP port is forwarded outwards on the subscriber's router. A camera in a home network behind NAT with no port forwarding cannot be connected this way, and a camera port open to the outside is access to that camera for the whole internet. For subscribers in private networks use cameras with an agent.
What you need before you start:
- The RTSP address of the main stream — it is in the camera documentation or in its own web interface.
- The camera login and password — they are part of the address.
- The external address and port — the address at which the camera is visible from the internet, not its address in the local network.
The whole address looks like this:
rtsp://admin:pass@203.0.113.10:554/stream1
Check this address with any player that supports RTSP before you create the camera: if the player shows no video, Lumika will not get it either.
To add a camera:
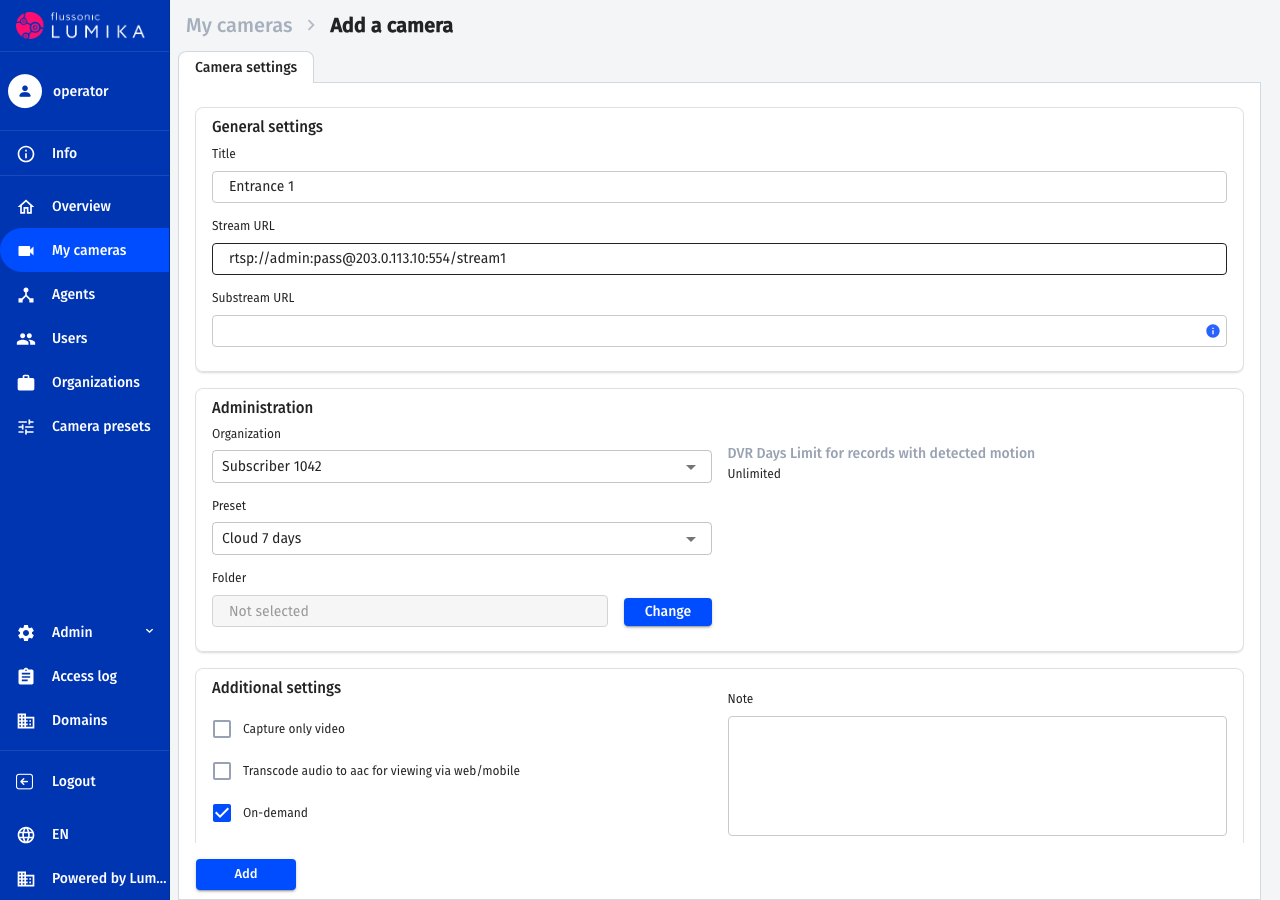
- Open My cameras and click Add a camera.
-
Fill in the form:
- Title — the name the subscriber sees.
- Stream URL — the RTSP address of the main stream.
- Substream URL — the address of the second, lower-resolution stream if the camera provides one. Optional.
- Organization — the subscriber's organization.
- Preset — the plan of the camera.
- Folder — a folder inside the organization, if the subscriber needs access granted folder by folder.
-
Click Add.
If it did not work
- The camera was added but there is no video. Check the address with a player from the same side the cloud looks from, not from the subscriber's local network. If the camera does not answer from the internet, the problem is the port forwarding or the public address.
- The address contains special characters. A password with
@,:or/in it breaks the address. Change the camera password to letters and digits. - The camera delivers video that the browser does not show. Lumika accepts H.264 and H.265, but not every browser plays H.265. If subscribers report an empty player, switch the camera to H.264.
Adding by IP
If the camera supports ONVIF, you do not have to look up the stream address by hand: Lumika probes the camera and fills in the streams itself. The network requirement is the same: the camera must be reachable from the internet, and not only the RTSP port but also the camera's ONVIF port (usually 80) must be open to the outside.
-
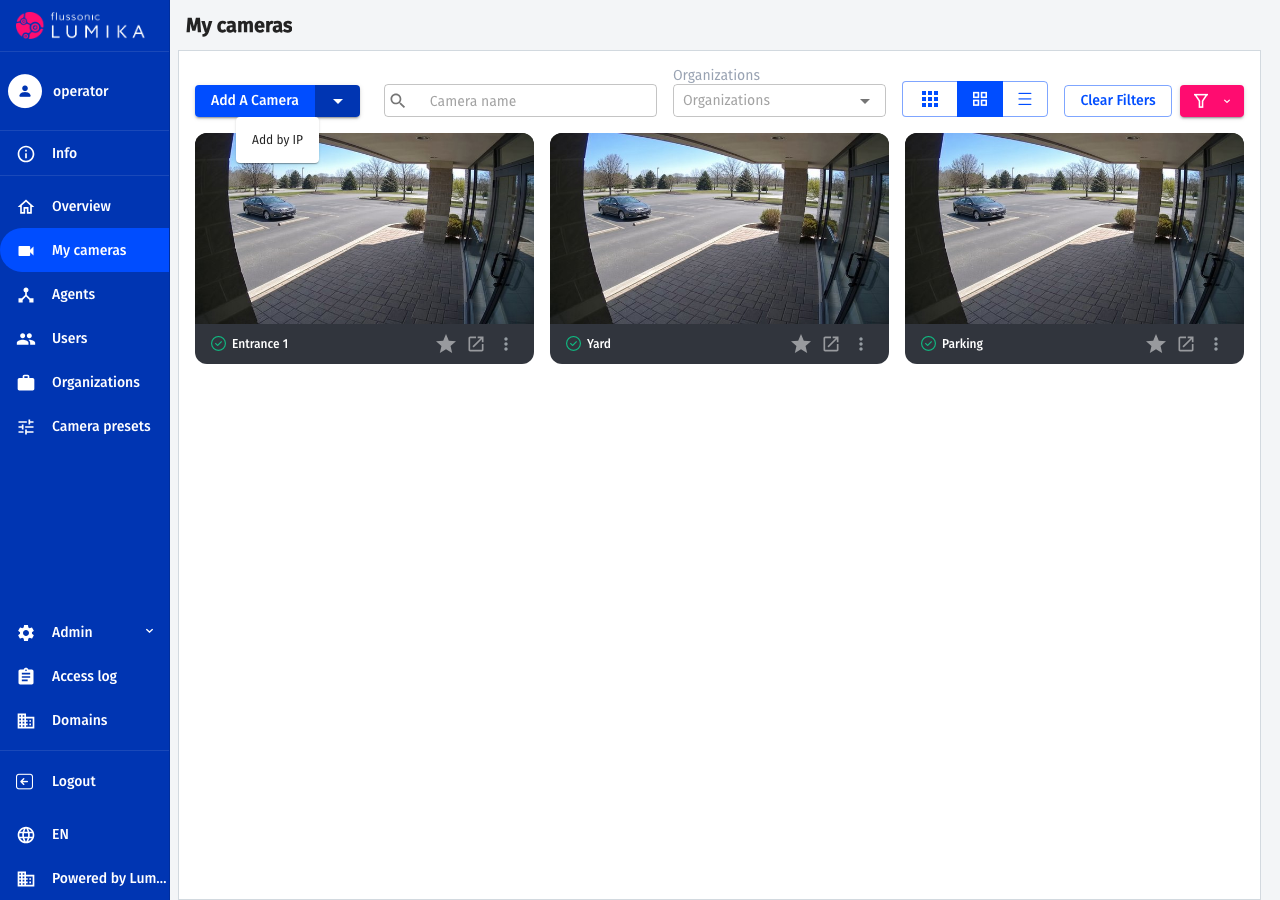
Open My cameras, expand the list next to the Add a camera button and choose Add by IP.
-
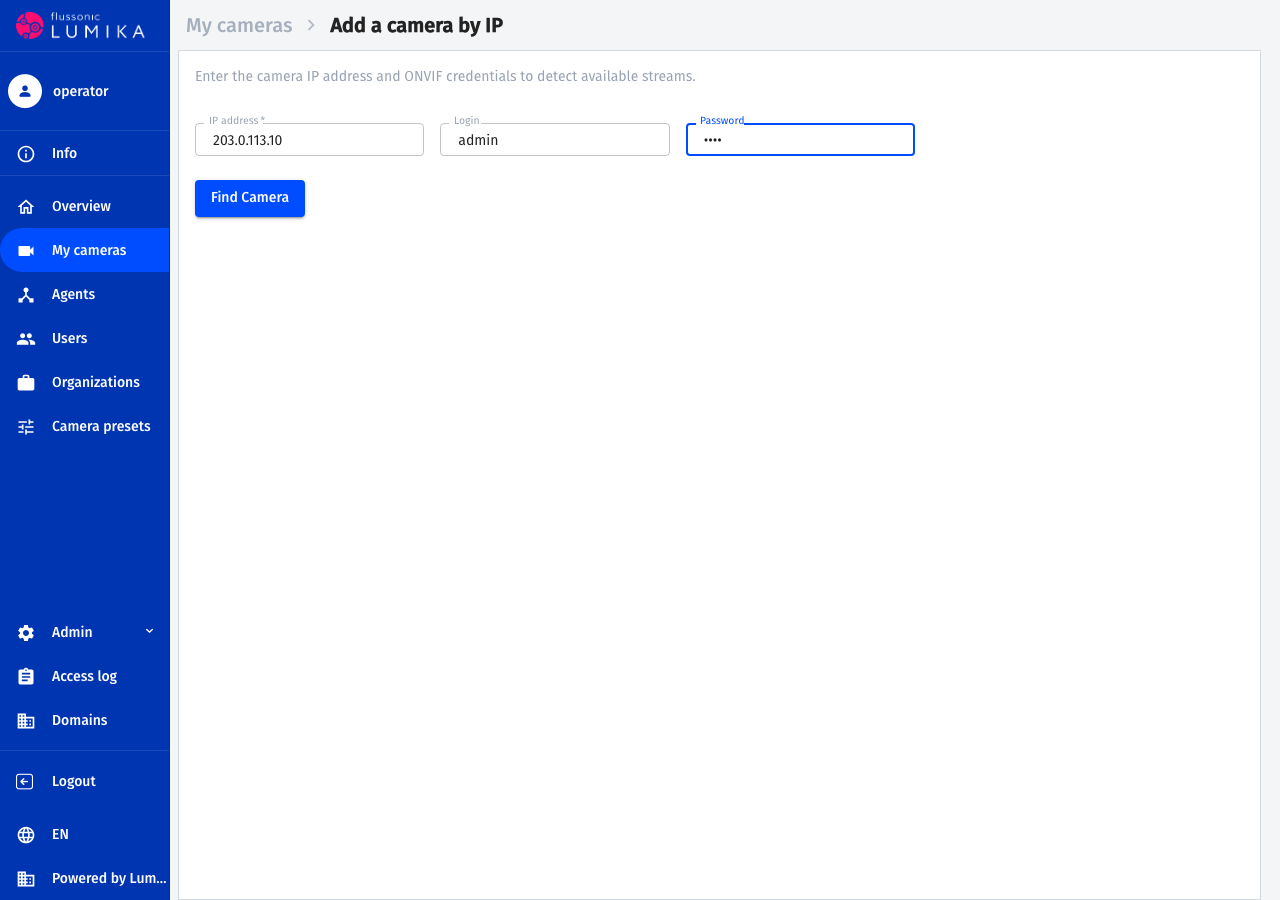
Enter the external IP address of the camera, plus the ONVIF login and password if the camera requires them. Click Find camera.
-
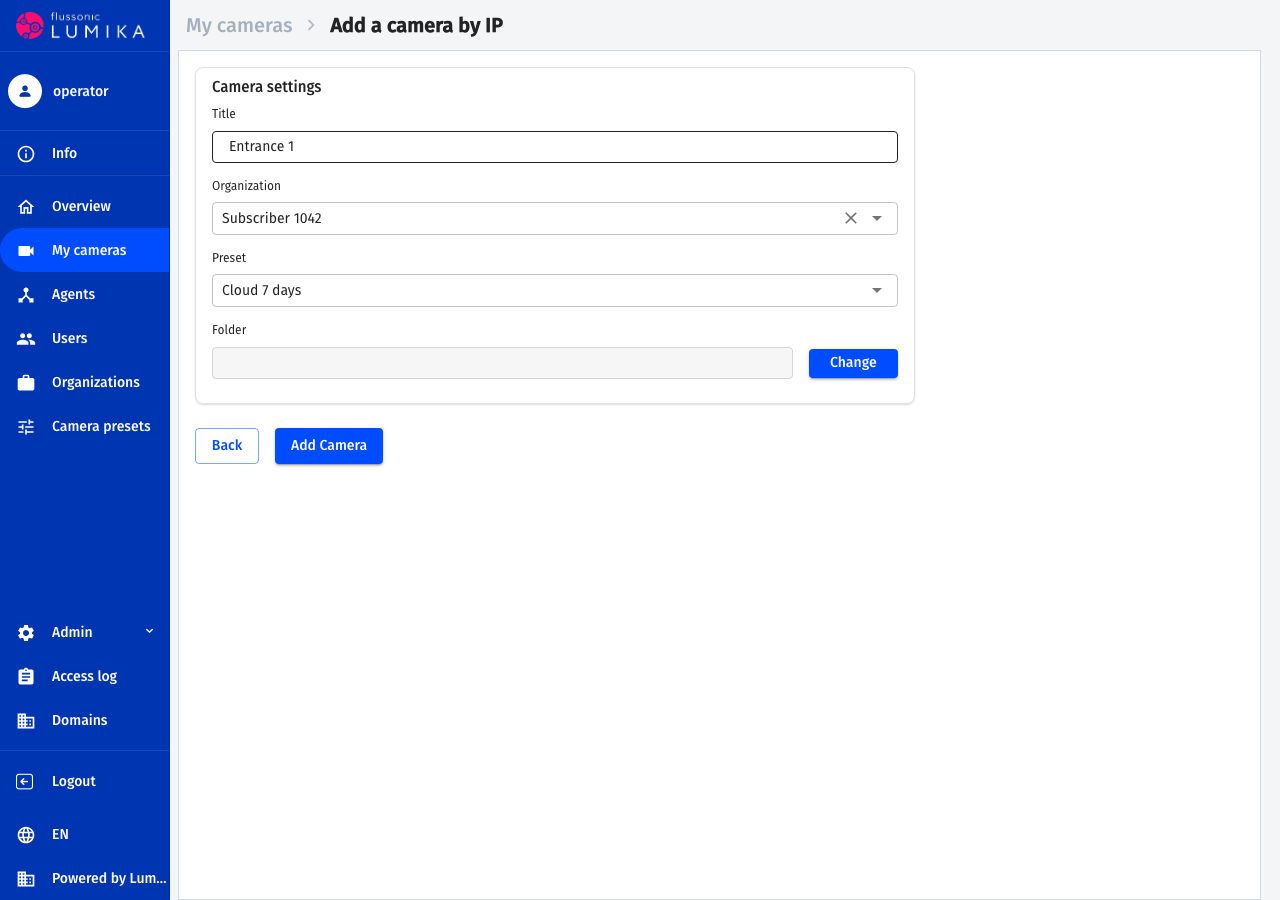
Once the camera responds, a form with the title, the organization, the plan and the folder appears. Fill it in and click Add camera.
If the camera does not respond, check that its address and ONVIF port are open from the internet. ONVIF credentials do not always match the login and password of the camera's web interface.
What to do with the camera next
The camera appears in the My cameras list right after it is added. The first frames do not arrive instantly — it usually takes up to a minute. While there is no video, the indicator next to the camera name is not green.
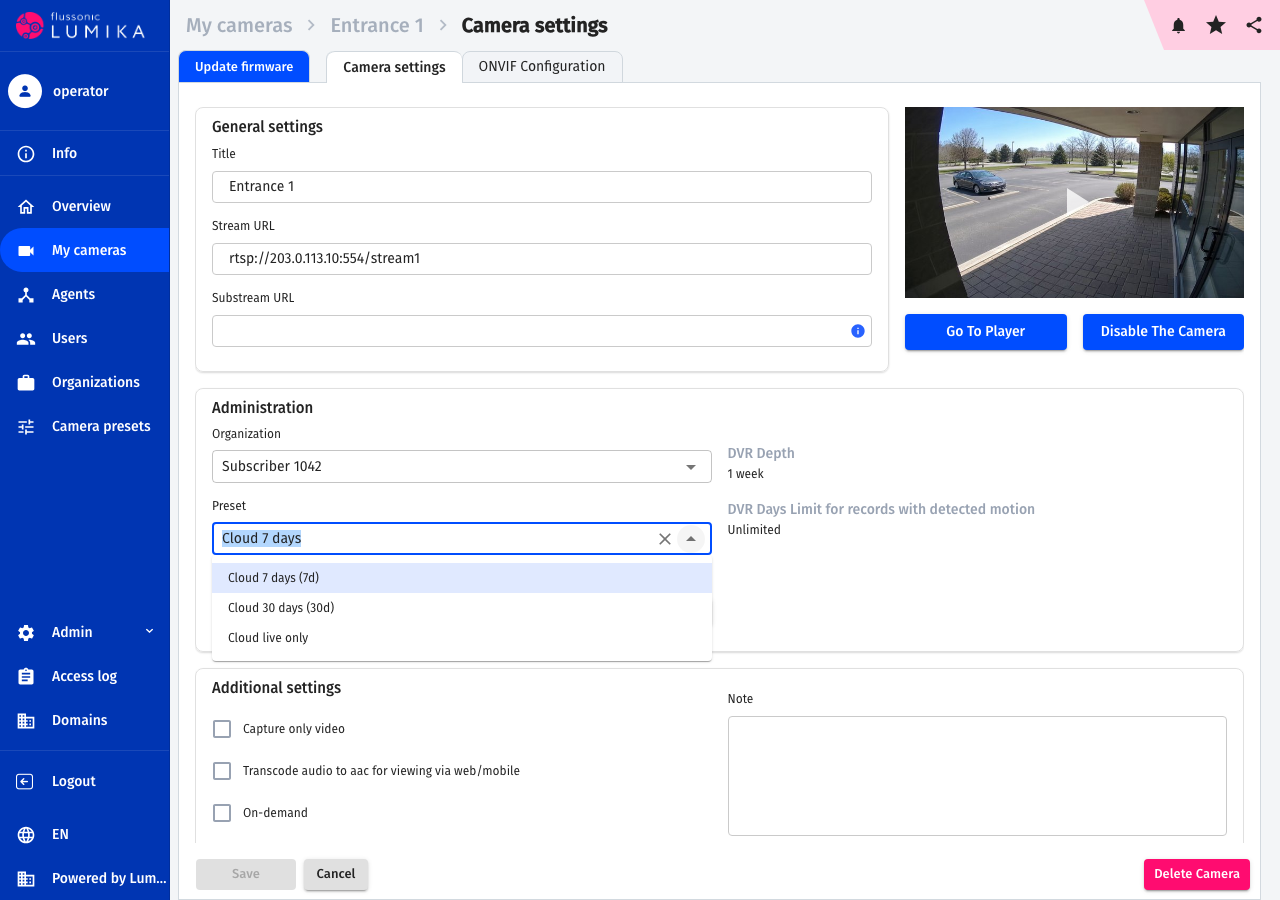
Everything else you do with a camera is on one page: open the camera and go to Camera settings.
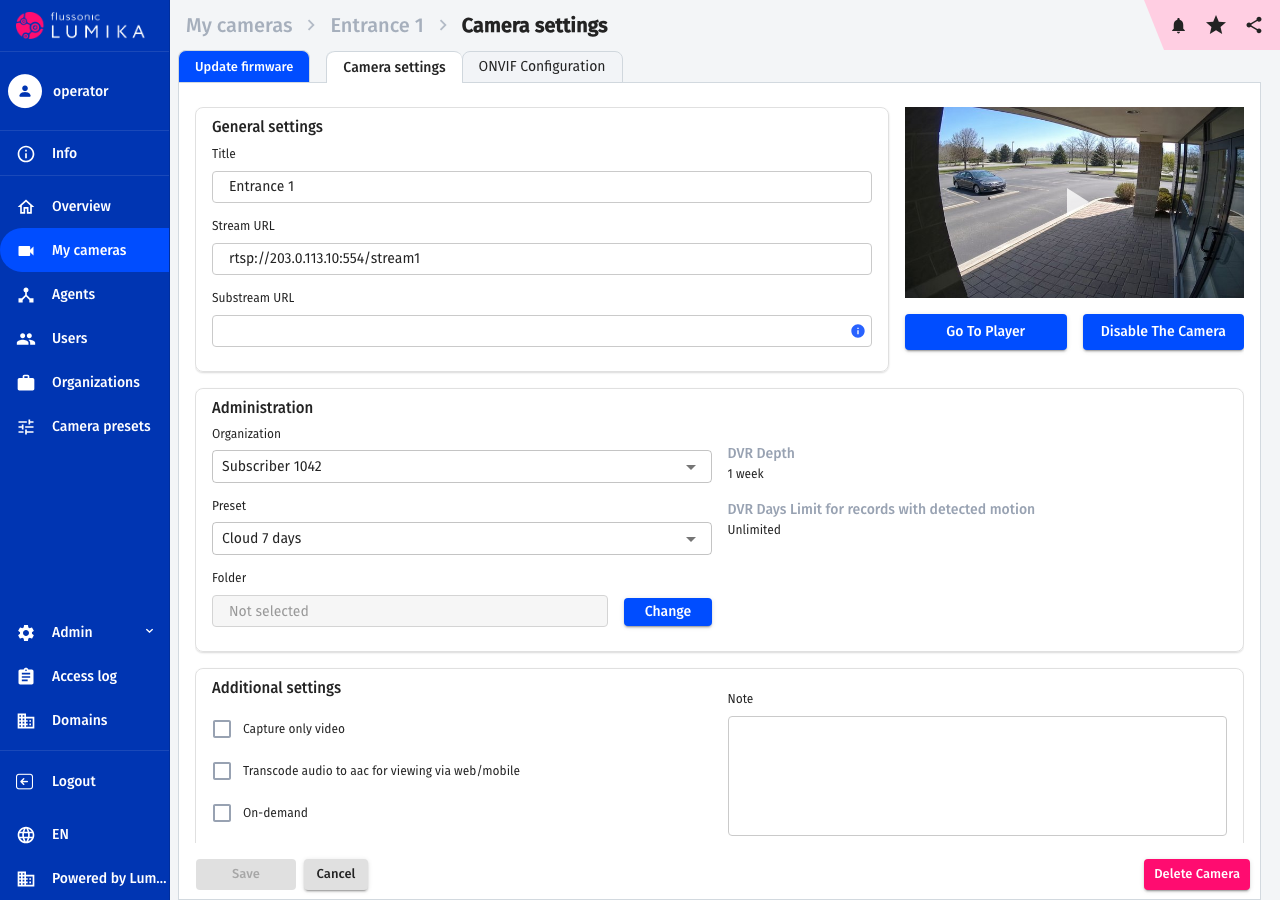
On this page:
- Organization — the organization the camera belongs to. This is also where a camera is moved to another subscriber.
- Preset — the plan of the camera. Choose another one from the list and click Save.
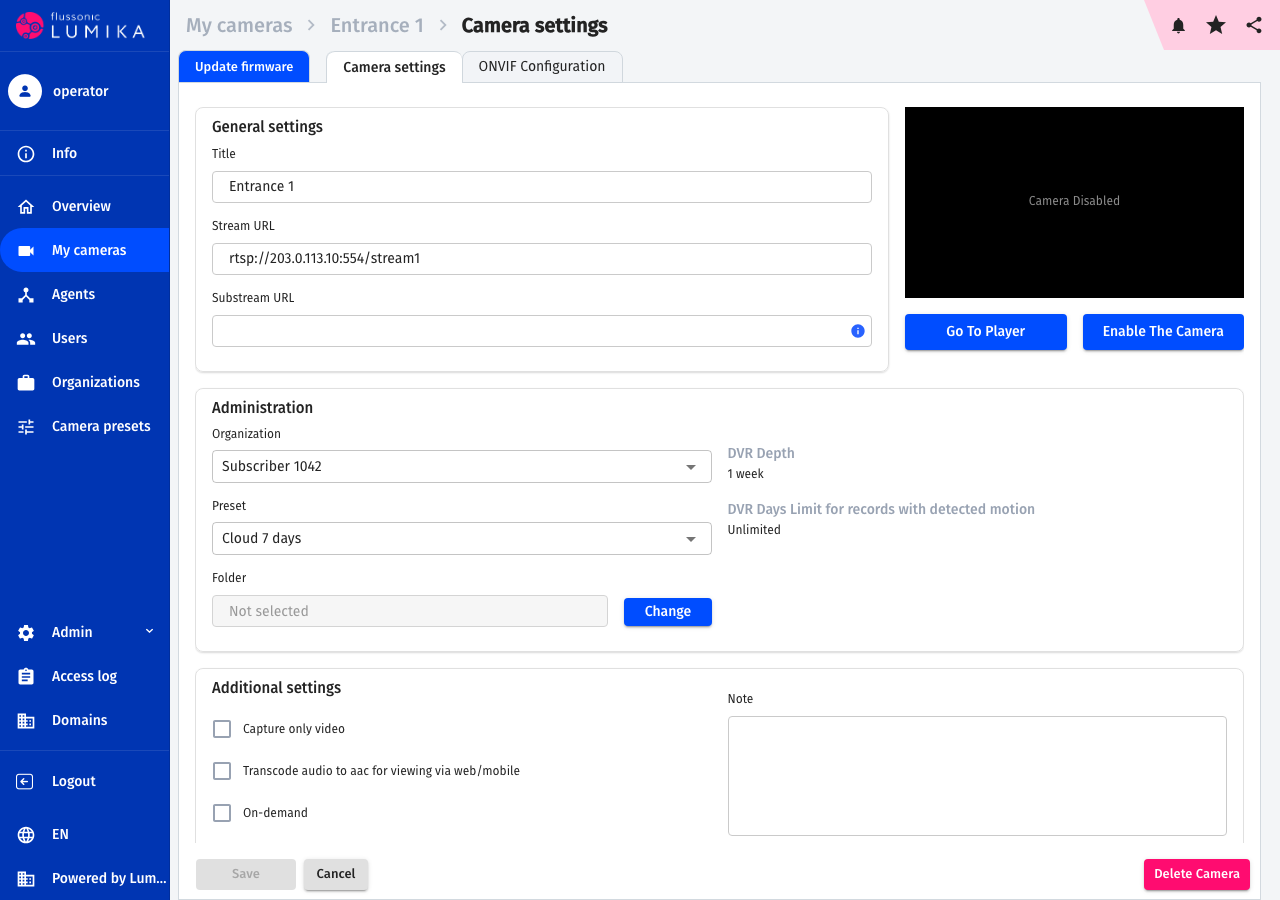
- Disable the camera — the camera stops capturing video and writing the archive.
- Delete camera — the camera and its archive are deleted.
The list of plans available to a camera is limited to the ones allowed to its organization — see Subscribers and access.
Warning
Changing the plan does not delete the recorded archive at the moment of the switch. The recordings are kept until they fall outside the archive depth of the new plan. If the new plan is shorter than the old one, recordings older than the new depth are removed gradually; if it is longer, what was already removed does not come back, and the archive starts growing to the new depth.
A disabled camera stays in the list, but no video comes from it: the subscriber sees a stub in the player. The same button enables the camera again.
Warning
Disabling a camera does not stop the charges: the plan stays attached to the camera. Only deleting the camera stops the accounting completely.