Installing Watcher NVR
Watcher NVR is supplied as a hardware and software appliance sized for an agreed workload. These instructions describe installation through the cloud Watcher connection wizard as part of an agreed delivery or recorder service procedure. They do not define support for an arbitrary Linux server as an appliance. Use the command provided by your cloud server: it is linked to the current connection session and reports installation results to the wizard.
Before starting, make sure the server contains no data that must be retained. Installation can clear the working directory and formats the selected archive disks. Rerunning the installation command is not a routine way to update a working recorder.
Requirements
Prepare:
- Server — hardware from the agreed delivery or service procedure. The installer described here uses Ubuntu Server 24.04 LTS; resources must match the agreed workload.
- Permissions — local
rootor a user withsudoand an interactive terminal. - Network — access to the Internet, cloud Watcher and cameras at the site.
- Address — the server's known IP address for local sign-in.
- Disks — separate archive disks, with any required data backed up beforehand.
- Cloud — an account and Organization that permit recorder management and provide access to the installation wizard.
The ports checked by the installer must be available on the server: 80, 5432, 6379, 8083, 9019, 9020, 9025, 3135. An available port does not mean it needs to be exposed to the Internet: configure external access according to the deployment's network design.
Do not rely only on a successful preliminary wizard step: check available memory, processing resources and disk space for your workload yourself.
Obtaining the installation command
- In cloud Watcher, open Registrators and click Add registrator.
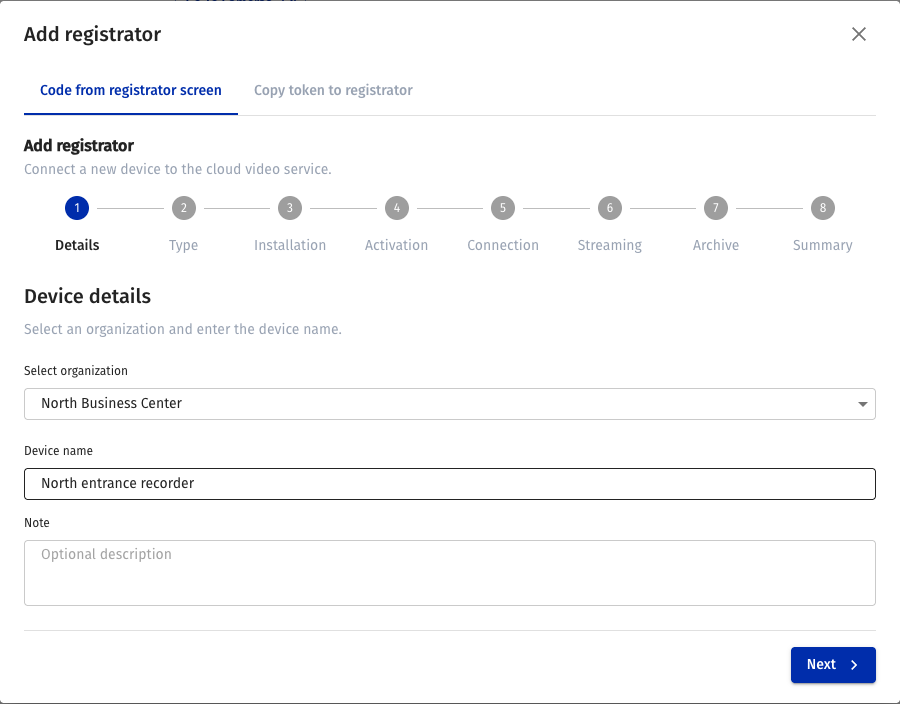
- On Code from registrator screen, select the Organization and enter a name.
- Select Software on your server and proceed to Installation.
- Copy the command from the wizard and run it on the prepared server as
root.
Cloud wizard example: the Organization is selected in Select organization.
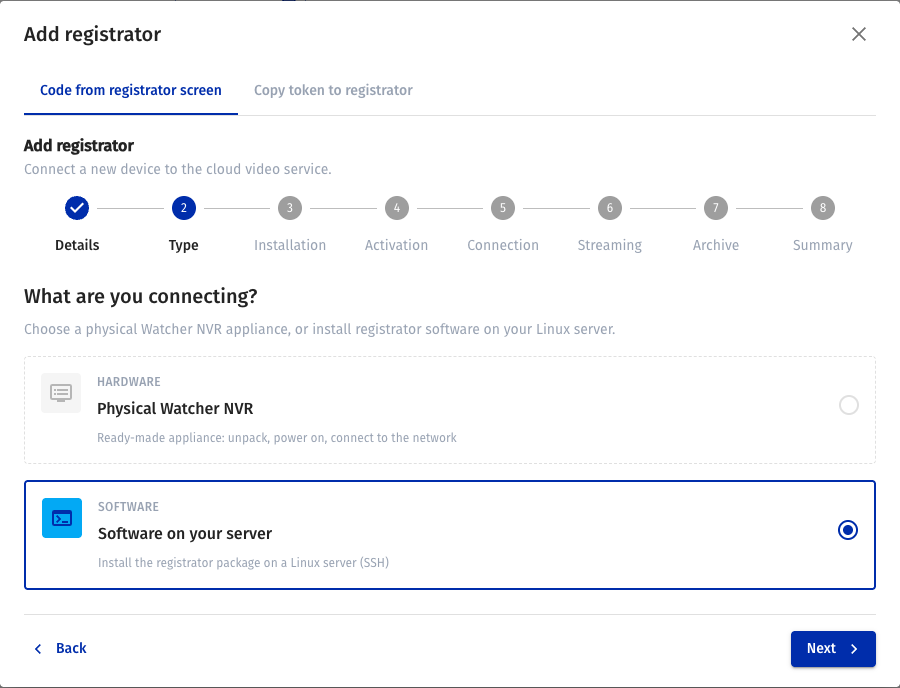
The software installation option is selected at the Type step.
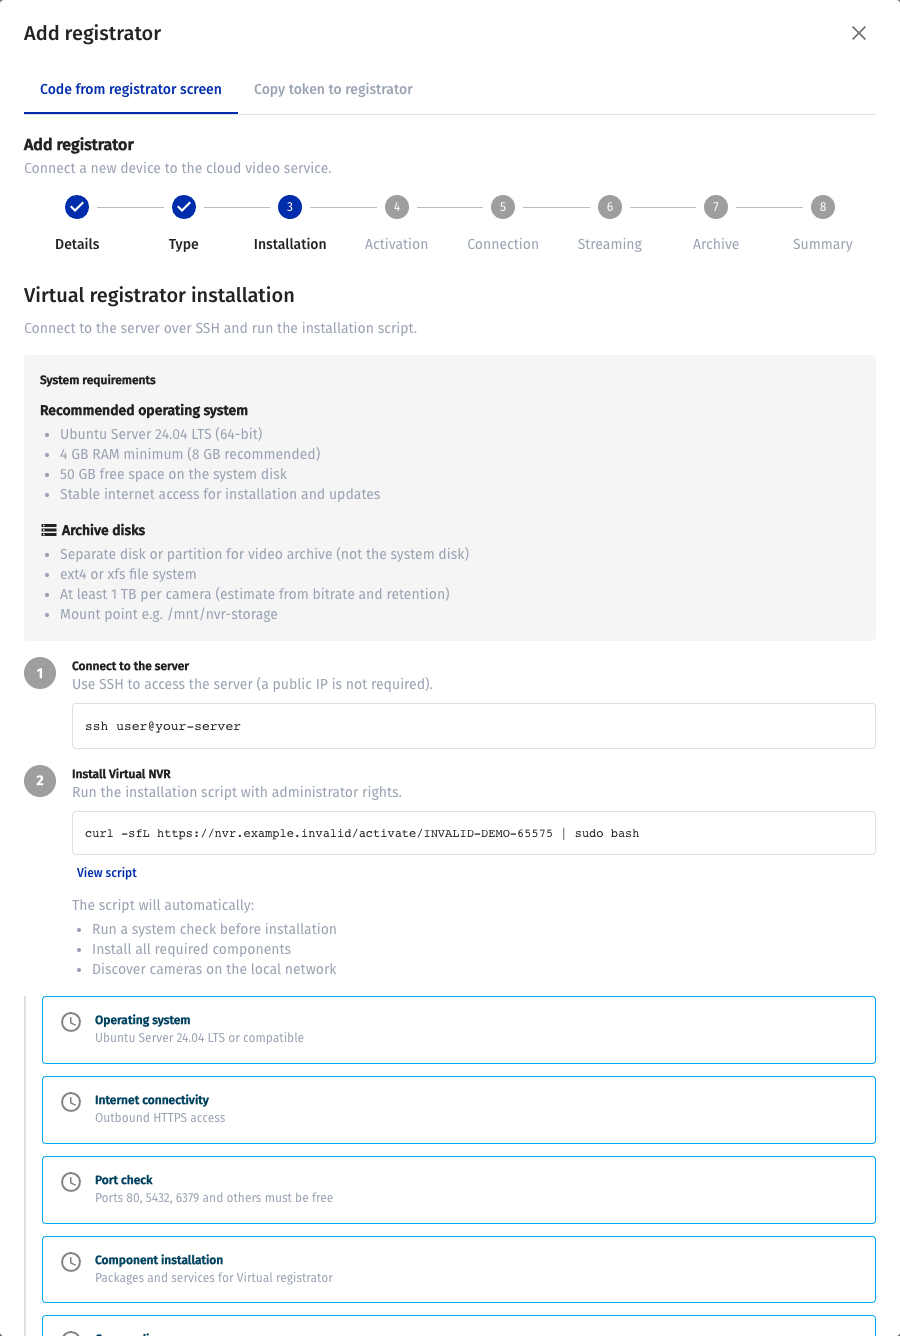
The installation command appears at Installation. Use the command from your own wizard session.
Do not share the command with another user: the generated script belongs to your connection session. If the session has expired, obtain a new command from the wizard.
For cloud interface steps, see Recorders.
Installation stages
1. Preliminary check
The script checks the operating system, network access and occupied ports, then starts installing recorder components. Wait for each stage's result in the terminal and cloud wizard. If a stage fails, correct its cause before retrying.
2. Ports and firewall
If a required port is occupied, identify the service using it and decide how to resolve the conflict. Do not stop unknown services on a production server to continue installation.
If ufw is active, the installer asks to disable it:
Disable ufw now (sudo ufw disable)? [y/N]:
If your network policy does not permit this, stop installation and arrange server preparation. Do not disable protection on an Internet-accessible server without planned replacement access rules.
3. Docker
The installer checks Docker and Compose and installs them if necessary. Downloading packages and images requires access to their repositories. An image download failure does not indicate successful container installation: check the final status.
4. Working directory
Recorder files are stored in /opt/watcher-nvr. This directory contains the Compose configuration, .env, helper scripts and component data.
A fresh installation command may clear the existing directory. Do not run it on a working recorder without a separate reinstallation and data preservation plan.
5. Selecting archive disks
The disk preparation wizard shows detected devices and protected system disks. Check disk names, sizes and purpose before confirming.
Selection example:
Default selection: /dev/sdb /dev/sdc /dev/sdd
Enter disks to use, space-separated (Enter = use default): /dev/sdb /dev/sdc
An empty response selects the suggested list. If you only need specific disks, enter their names separated by spaces. Make sure the list contains no disk with data you need.
Before partitioning, the wizard requests confirmation:
About to DESTROY any existing data and create GPT+ext4 on:
  /dev/sdb
  /dev/sdc
Type yes to continue:
Entering yes permits deleting data on the selected disks and creating GPT and an ext4 filesystem. Prepared partitions are mounted at /storage/d1, /storage/d2 and so on; mount entries are added to /etc/fstab.
If no separate disks are available
The installer may offer to continue with the archive on the system disk:
Continue without dedicated HDDs? [y/N]:
For an operational installation, prepare separate disks and repeat installation. Continuing without them places the archive in /storage/d1 on the system partition; archive growth can fill it and disrupt the OS. This option requires short retention and free-space monitoring.
6. Checking storage
Before startup, make sure the selected /storage/dN mount points are accessible and DVR settings have been created. Do not substitute an ordinary directory for a missing mounted disk: recording there can fill the system partition.
The DVR configuration path and format depend on the installed package. Use the files prepared by its scripts and check the result with its standard installation check.
7. Preparing startup
Wait for configuration preparation and complete all installer prompts. Store the supplied administrator address, username and password securely. Do not publish .env, the generated script or full output containing credentials.
8. Startup and initial check
The installer starts Compose and checks components and storage. At the end, it displays the recorder address and local sign-in credentials; the pairing code is needed for the wizard's next step.
If no code is obtained, check the recorder's network and cloud access. Starting containers does not yet mean pairing succeeded.
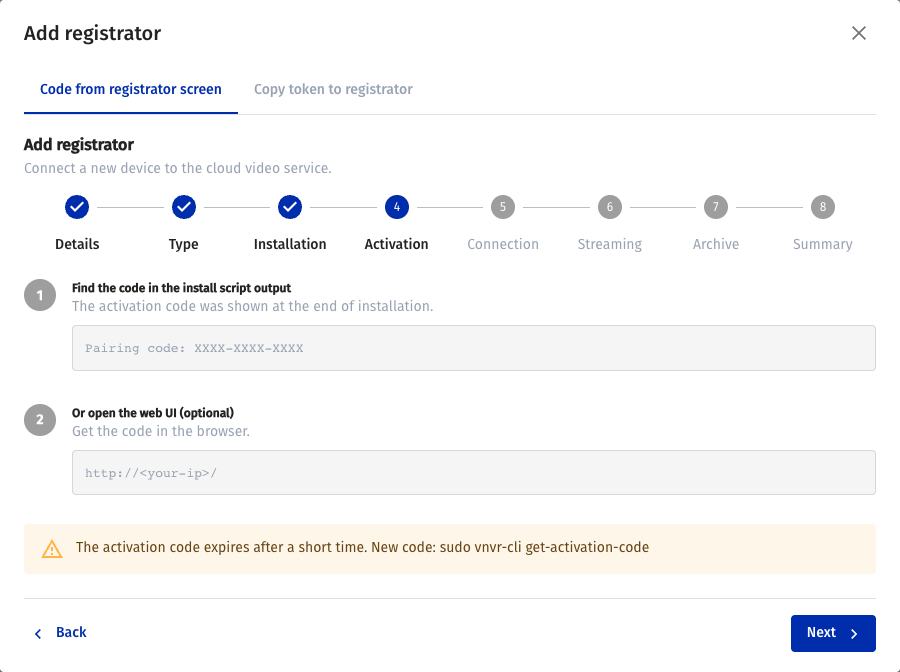
Activation step example: the wizard explains where to obtain the connection code.
After installation:
- Open
http://NVR_IPand sign in with the supplied account. - Complete cloud pairing.
- Check the installed version and available update on the recorder's cloud page.
- Add a test camera, configure recording and check archive playback.
Manual check
Check container status:
cd /opt/watcher-nvr
sudo docker compose ps
If the installer supplied post-install-check.sh, repeat its check:
sudo bash /opt/watcher-nvr/post-install-check.sh
The script checks container startup and archive storage availability for the installed package. A successful result ends with:
=== All checks passed ===
If an error occurs, save the failed stage's output, container status and check time. Running containers do not replace checking camera recording.
Next steps
- Cloud pairing — code and QR code.
- Adding cameras — connection and archive.
- Troubleshooting — error handling without immediately clearing data.