Activating a recorder in the cloud
Pairing links a local Watcher NVR to an Organization in cloud Watcher. The recorder needs Internet access and access to the connection services. In the cloud, use the Organization owner's account or an account with permission to manage its recorders.
Code and QR code
- Open
http://NVR_IP. - Sign in with the local administrator credentials provided during installation. They are also stored in
/opt/watcher-nvr/.env. - For an unpaired device, open the connection screen containing a QR code and a code in the
XXXX-XXXX-XXXXformat. When installing through the cloud wizard, use the code from the script output or the recorder screen.
If there is no code and a connection error is displayed, restore network access and request the code again. The local administrator password is not a pairing code.
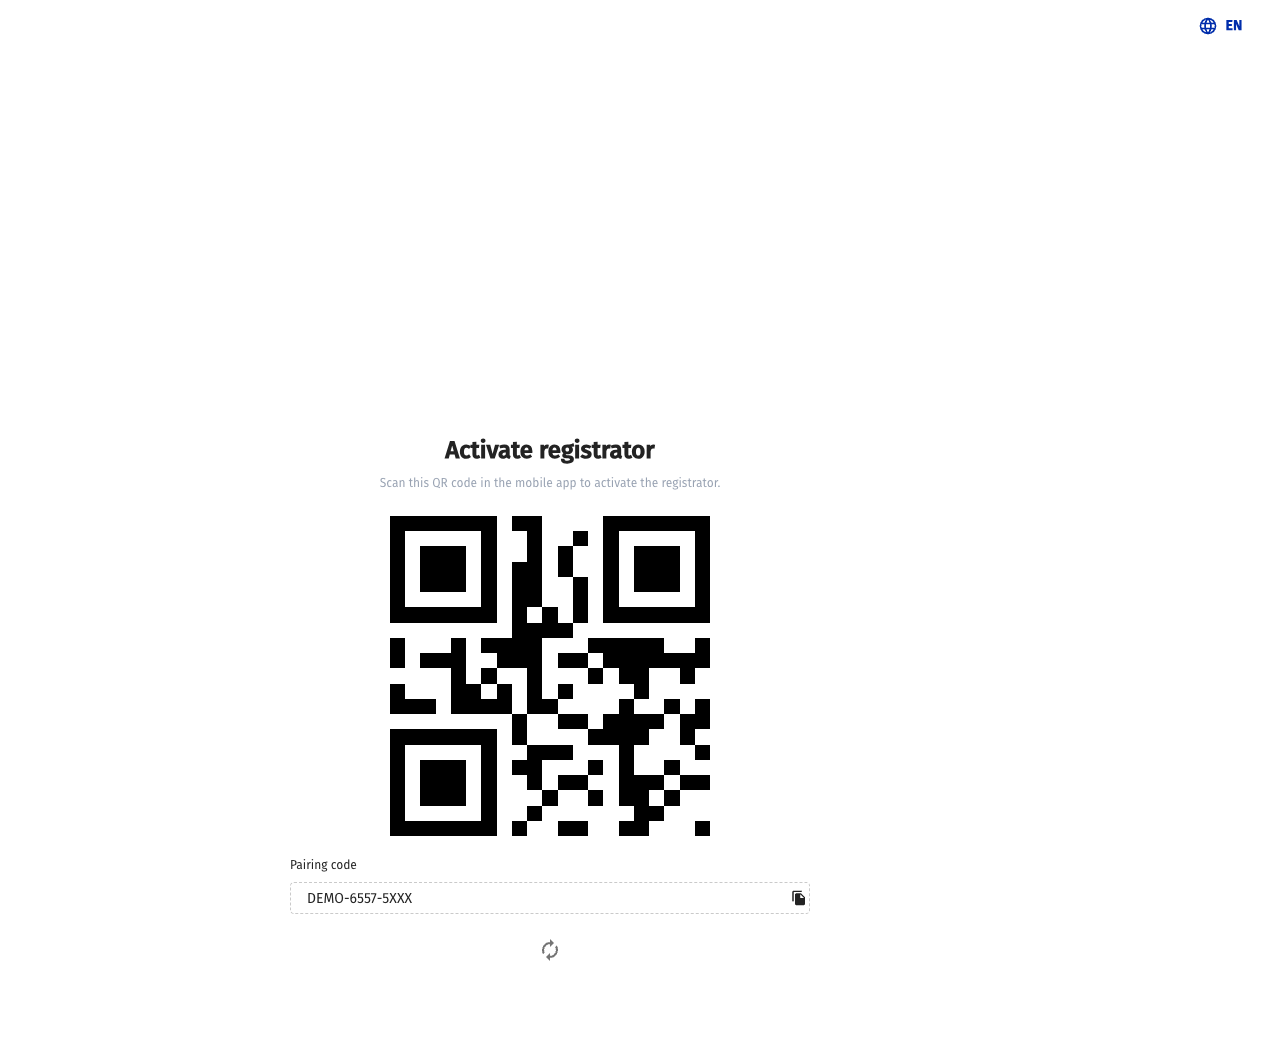
Connection screen: a QR code for the app and a code for manual entry.
Connecting to an Organization
You can scan the QR code with the mobile app or enter the code in the cloud web interface.
Using the mobile app
In the Watcher app for Android:
- Sign in to the required cloud service and open the recorders section.
- Open the add-recorder screen and select an Organization whose recorders you may manage. Check the selection before proceeding to the scanner.
- Open the scanner and scan the recorder's QR code, or enter and submit its code manually.
- Wait for the pairing result. Scanning immediately submits a request for the selected Organization; there is no separate confirmation after scanning.
Use the add-recorder function: an NVR pairing QR code and a user sign-in QR code perform different actions. If this function is unavailable in your app version, use the web interface.
Using the web interface
- In cloud Watcher, open Registrators → Add registrator.
- Select Code from registrator screen.
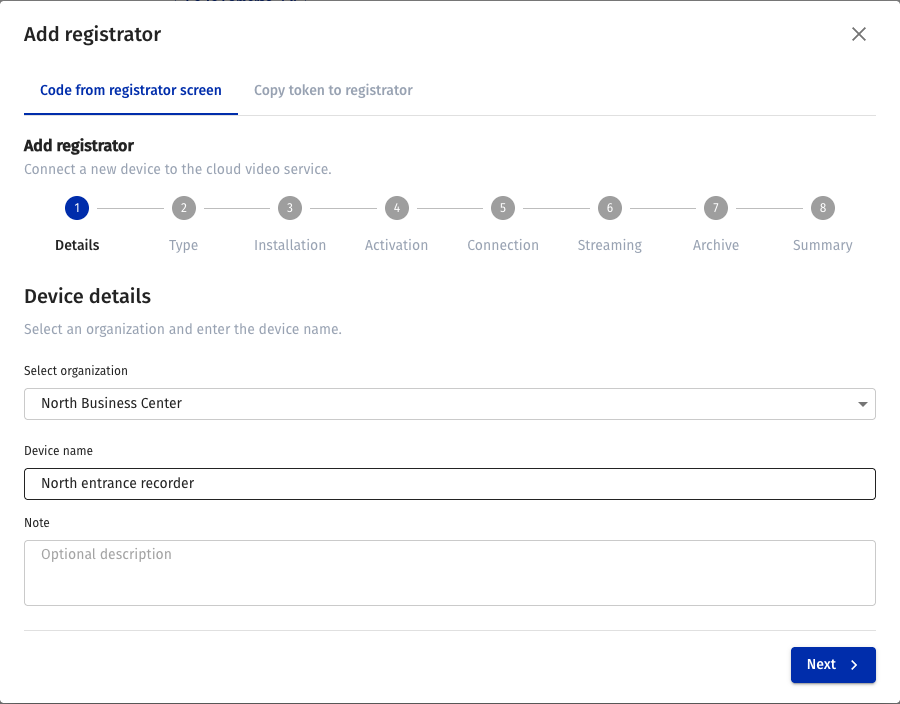
- At Details, select the Organization and enter a device name.
- Select the device type and complete the preparation steps. If installation is already complete, use the code for that recorder.
- At Connection, enter
XXXX-XXXX-XXXXand click Activate. - Complete the camera import and cloud archive steps, then check the summary.
These images show the cloud wizard. The site's Organization is selected in Select organization.
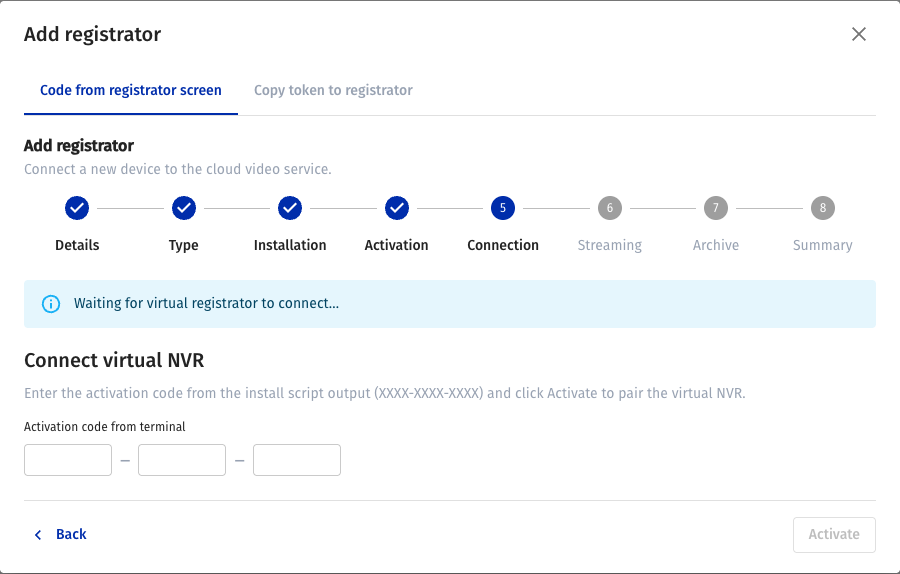
Code form before submitting the activation request.
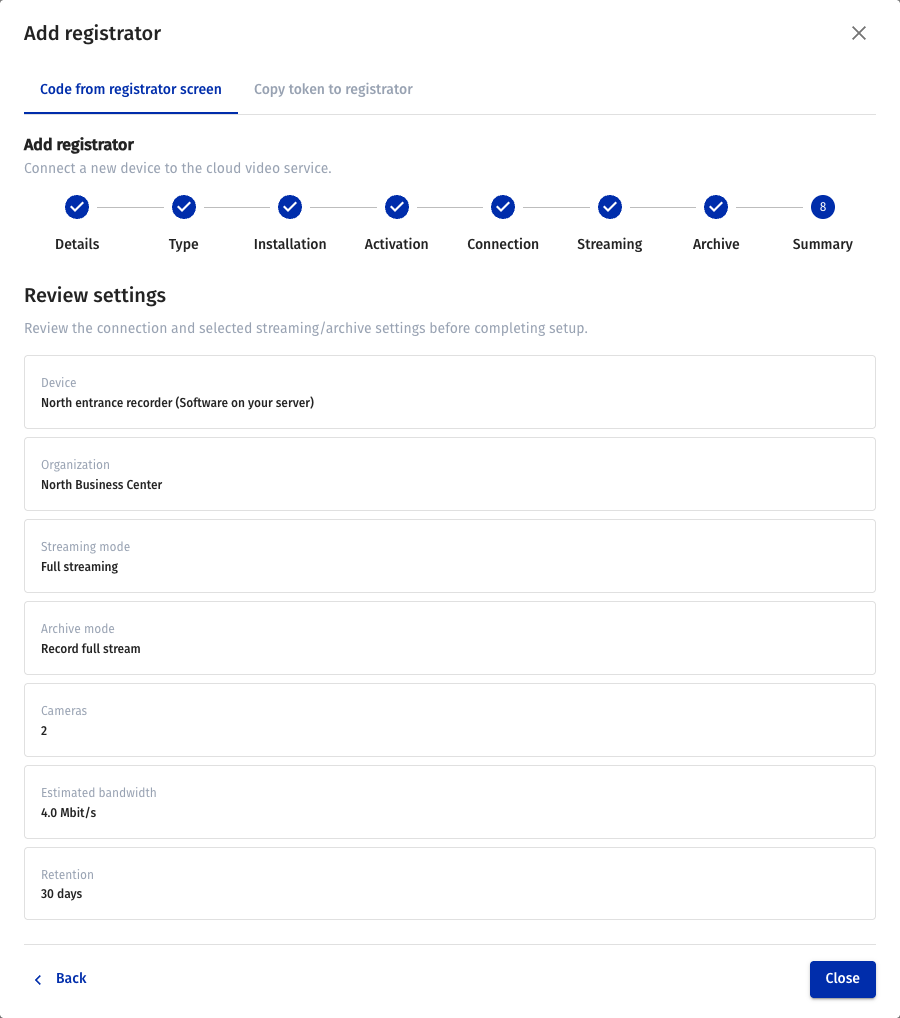
Example of the selected cameras, streaming mode and archive settings before completing the wizard.
If you are already using the virtual recorder installation wizard, continue its current session. Do not create a second recorder for the same device because the page is slow to refresh.
Checking the result
Check both sides:
- On the recorder — the activation state has changed; in the current interface, pairing opens the cameras page.
- In the cloud — the recorder appears in the selected Organization, with connection status and device information available.
- Cameras and video — after synchronization, the required cameras are visible and video opens according to the user's permissions.
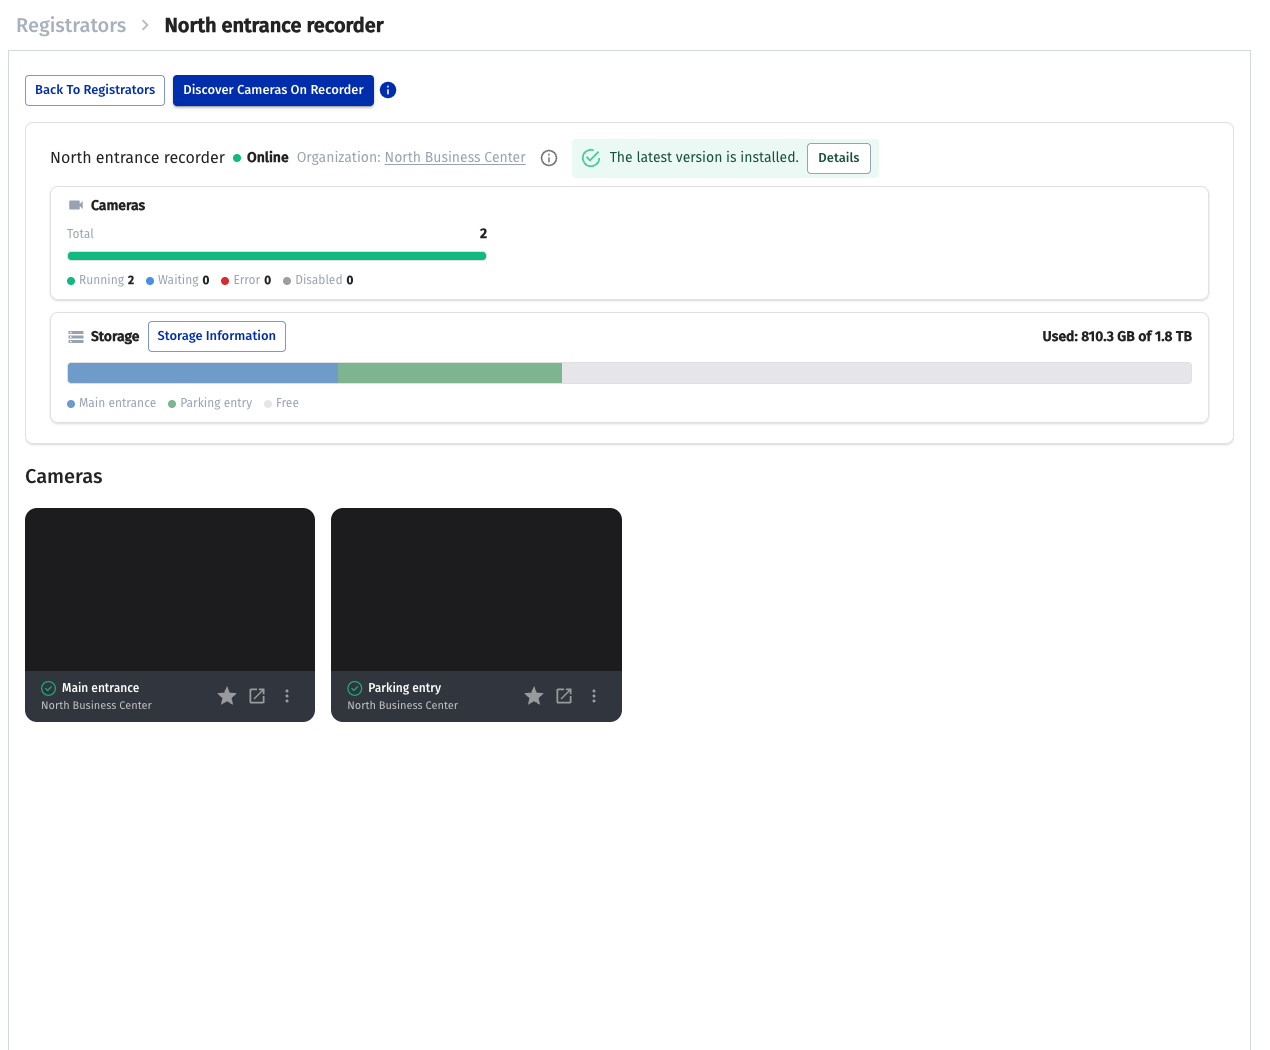
Connected NVR and its camera list. Recorder connectivity and each camera's state are shown separately.
Pairing and background status updates take time depending on the connection. Do not rely on a fixed 30-second interval. If the connection fails, see activation troubleshooting.
Next steps
Continue with adding cameras and configuring synchronization. Separately check the installed NVR version and available updates.