Managing presets
A Watcher preset is a set of DVR and analytics parameters used as a template when adding and configuring cameras. Selecting a preset in camera settings inserts its values into the camera settings. The presets available to a camera are determined by the presets added to its Organization.
Presets can be customizable or non-customizable. With a non-customizable preset, the inserted settings cannot be changed manually; with a customizable one, they can.
Presets serve these purposes:
- Common storage and analytics parameters — a non-customizable preset sets parameters for a group of cameras and restricts manual changes. When integrating, agree on preset selection with the external accounting system.
- Individual camera configuration — a customizable preset inserts initial parameters that a user with the relevant permissions can change on the camera.
User permissions required to manage and use presets:
- Full preset management is available to the Watcher administrator. A domain administrator may have limited access to individual fields; access to the page does not mean the whole preset can be changed.
- Adding presets to an Organization requires Organization editing rights.
- Selecting a preset on a camera requires camera management rights in the Organization.
Camera parameters use the selected preset; if no preset is specified, an available default preset applies. After Watcher installation, the system contains a Default preset available to all Organizations.
Note
If you use Watcher as a video surveillance system, the default preset is sufficient. You can also use presets as needed to simplify DVR configuration for many cameras.
Creating a preset
To create a preset:
-
Select Camera presets in the main menu on the left.
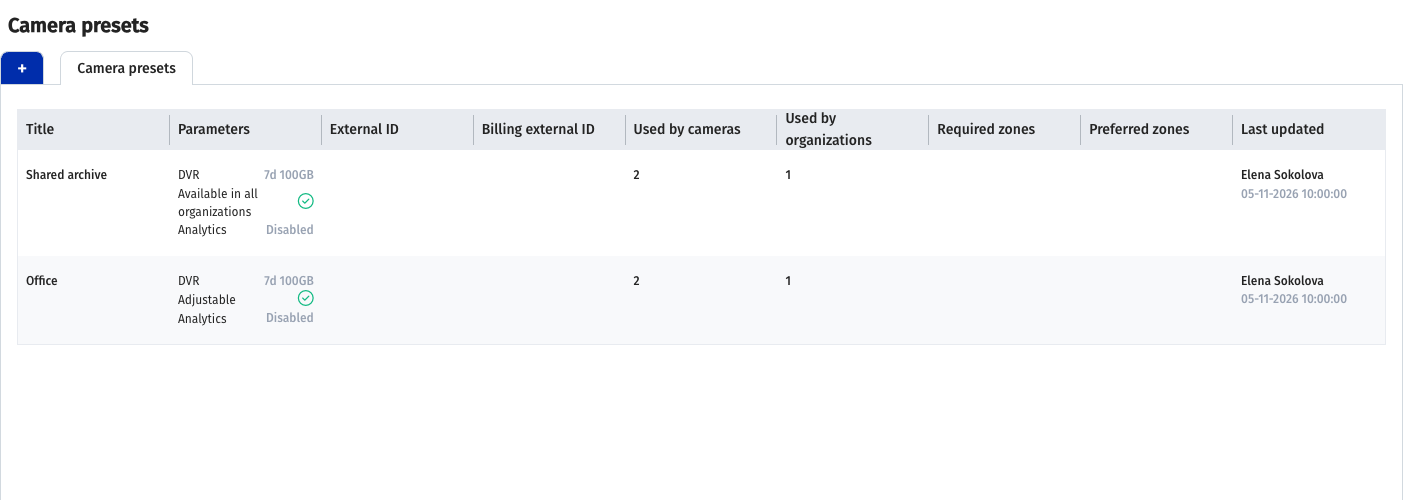
The preset list opens:
Here you can select an existing preset for editing or delete presets. The page also displays a read-only summary: DVR parameters, whether the preset is customizable and whether it is available to all Organizations. Configure these parameters in the form below.
-
Click Create a preset.
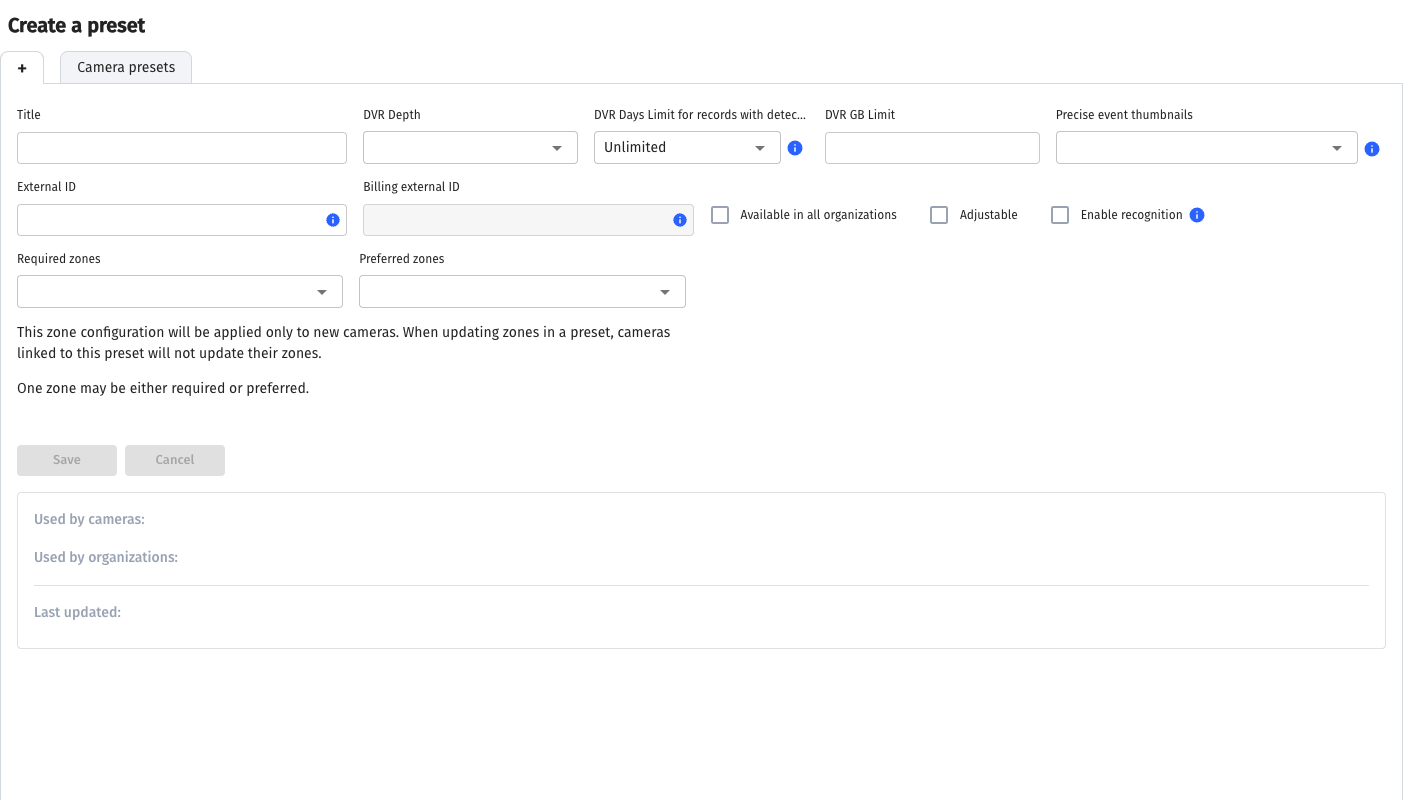
The preset configuration form opens:
Note
Hover over an information icon to see a tooltip explaining the parameters.
-
Set the following parameters:
-
Title — preset name.
-
Archive parameters: DVR Depth, DVR Days Limit for records with detected motion, DVR GB Limit, Precise event thumbnails. See Archive settings.
-
Available in all organizations — select to allow this preset for any camera in any Organization, or clear to make it available only in Organizations where it is selected (see Adding an Organization).
-
Adjustable — if selected, a user with camera editing rights can change DVR settings individually on each camera using this preset; if cleared, DVR settings on a camera with this preset cannot be edited.
-
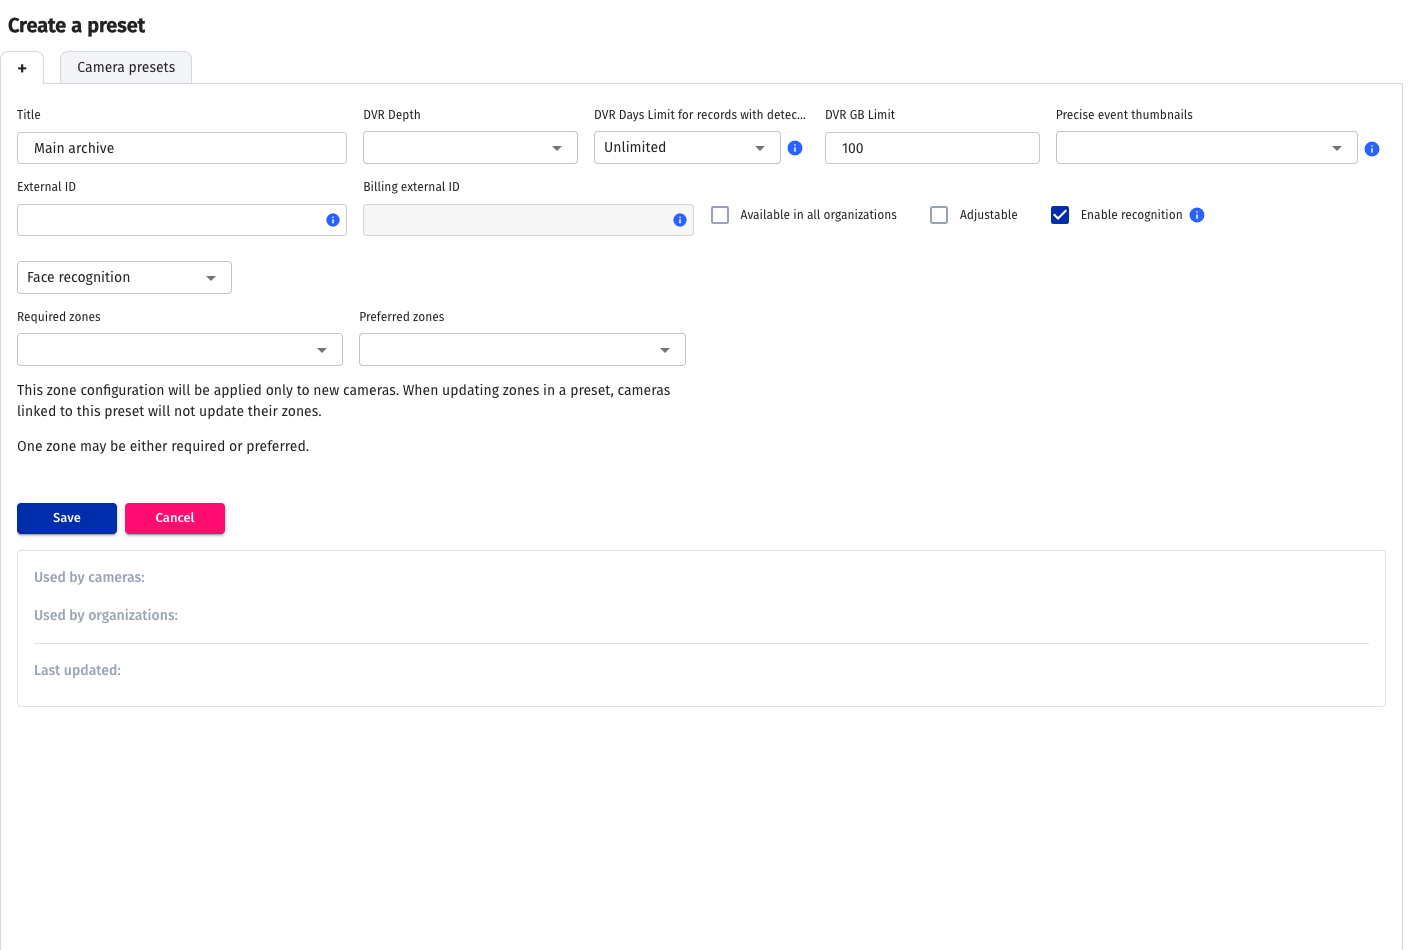
Enable recognition — for a preset, use license plate recognition or face recognition. Processing is performed by the configured analytics module.
The form also contains Human detection and Motion detection. In the current release, selecting these through a preset does not retain analytics as enabled. Do not use these two preset options to connect detectors; after saving, check the actual camera analytics state.
-
-
Save the form. Open the preset from the list and check its parameters.
- Assign the preset to the Organization unless it is available to all Organizations, then select it on the required camera. Check the applied DVR and analytics parameters in camera settings. To verify recording, wait for a new archive segment and open it in the player.
After adding presets, you can select one or more in Organization settings, making them available in camera settings. If a preset is available to all Organizations, it can be selected on cameras immediately.
Agree on configuration order with the external accounting system: it may transmit camera parameters through the API or only create cameras. In the latter case, configure presets, Organizations and users in Watcher beforehand.
Presets of a specific Organization
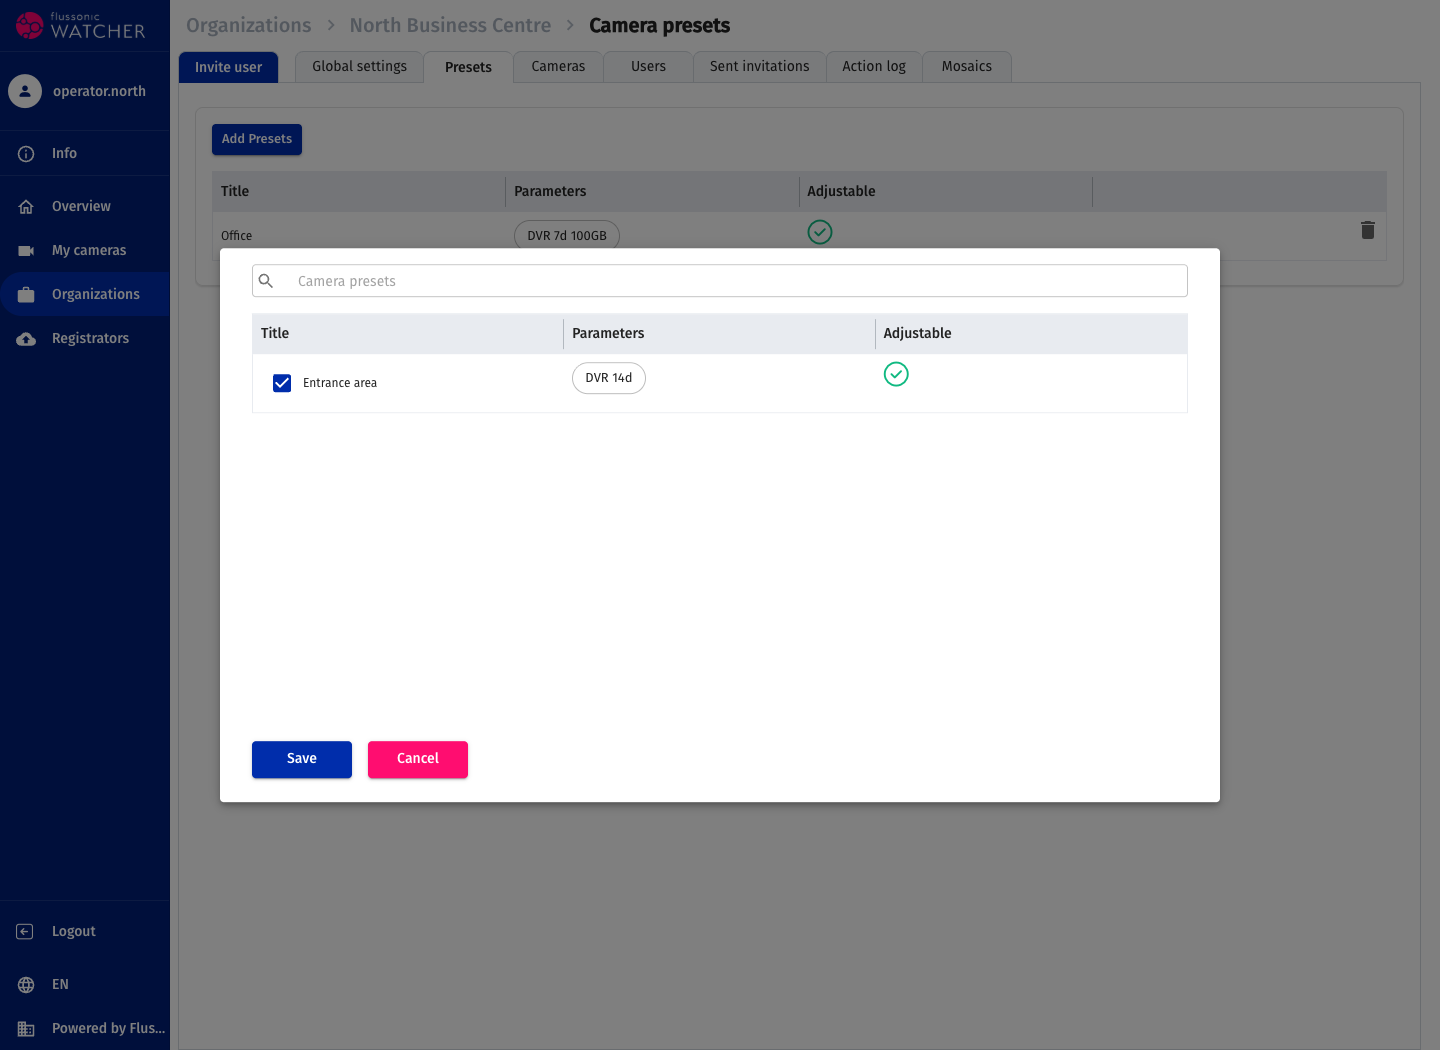
Open Organizations → required Organization → Presets. This manages the availability of existing presets in the Organization; create new presets separately under Camera presets. Adding and removing associations requires domain Organization editing rights. Owning one Organization alone does not replace that permission.
- Click Add presets. Find the required preset in the selection dialog and select its checkbox; presets already assigned are not offered again.
- Click Save and check that the preset appears in the Organization table. On an error, reload the list before trying again.
- Open settings for the required camera in this Organization and check that the preset is available for selection. Assigning a preset to an Organization does not replace selecting it on the camera or grant new user permissions.
To remove a preset from the Organization set, click delete in its row and confirm. Check the updated table. This removes the association with the Organization, not the preset under Camera presets; a preset available to all Organizations may remain selectable on a camera.