Face recognition
Watcher supports face detection and recognition. Detection finds a face in a frame. Recognition matches it against person data. Install and connect the video analytics module to use it.
Required permissions
A Watcher administrator manages persons and lists across the system. Within an Organization, permissions differ:
- Organization camera editing — grants access to view and change its persons and manage its person lists.
- View person lists — a separate permission to view Organization lists.
- Edit person lists — a separate permission to change Organization lists.
The Organization owner also has access to its persons and lists. Camera video viewing permission alone does not grant person database editing rights. An account in Read only mode cannot save changes.
See Managing users. If an operation is unavailable, check permissions in the person or list's Organization.
Preparing the image
Install the camera so the full face is visible and sufficiently large. Image quality affects detection and identification; fixed camera settings do not guarantee recognition of every visitor.
When configuring, check:
- Angle — point the camera at visitors' faces, reducing steep downward angles and strong sideways face rotation.
- Sharpness in motion — adjust focus and exposure time so faces are not blurred while people pass.
- Face size — avoid wide shots where faces occupy a small portion of the frame. Check the actual stream sent to analytics.
- Lighting — provide even lighting without deep shadows or overexposure; check backlighting and night mode.
- Compression — choose stream quality that retains facial detail without pronounced artifacts.
Check typical passages at different speeds and lighting conditions. If quality is unsatisfactory, contact support with analytics versions, camera parameters and times of examples with errors.
Enabling recognition and detection areas
- Open the required camera settings on My cameras.
- On the administrative settings tab, enable Enable recognition and select Face recognition.
- If necessary, click Configure detection zone.
- Save changes in the zone dialog, then save camera settings.
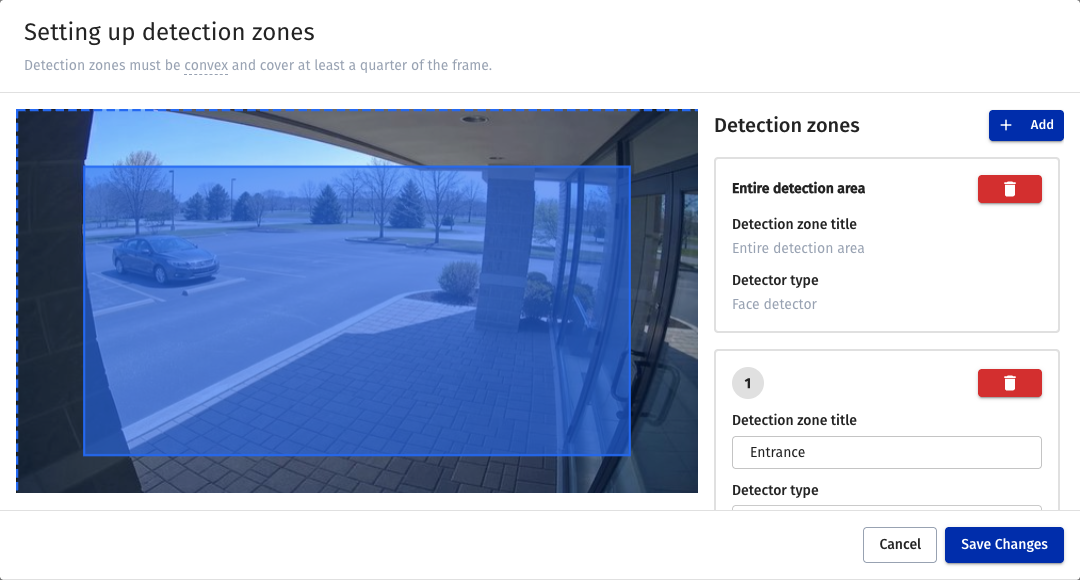
By default, the detector processes the entire frame. To restrict analysis, create areas, select the face detector type for them and delete the separate full-frame processing card. Adding polygons alone does not disable full-frame processing.
Each area can have a name, shape and detector type. Up to five polygonal areas are allowed; each must be convex and occupy at least a quarter of the frame. Invalid geometry prevents saving until corrected. See Detection zones for dialog details.
Areas are set separately for each camera. If a non-customizable preset is selected, common recognition parameters are changed through the preset, while areas can be set for an individual camera.
Persons and lists
A Person is a record about a human with a name, photograph and additional attributes. A Person list groups records, such as department employees or site visitors. 1:N identification matches a detected face against a set of persons.
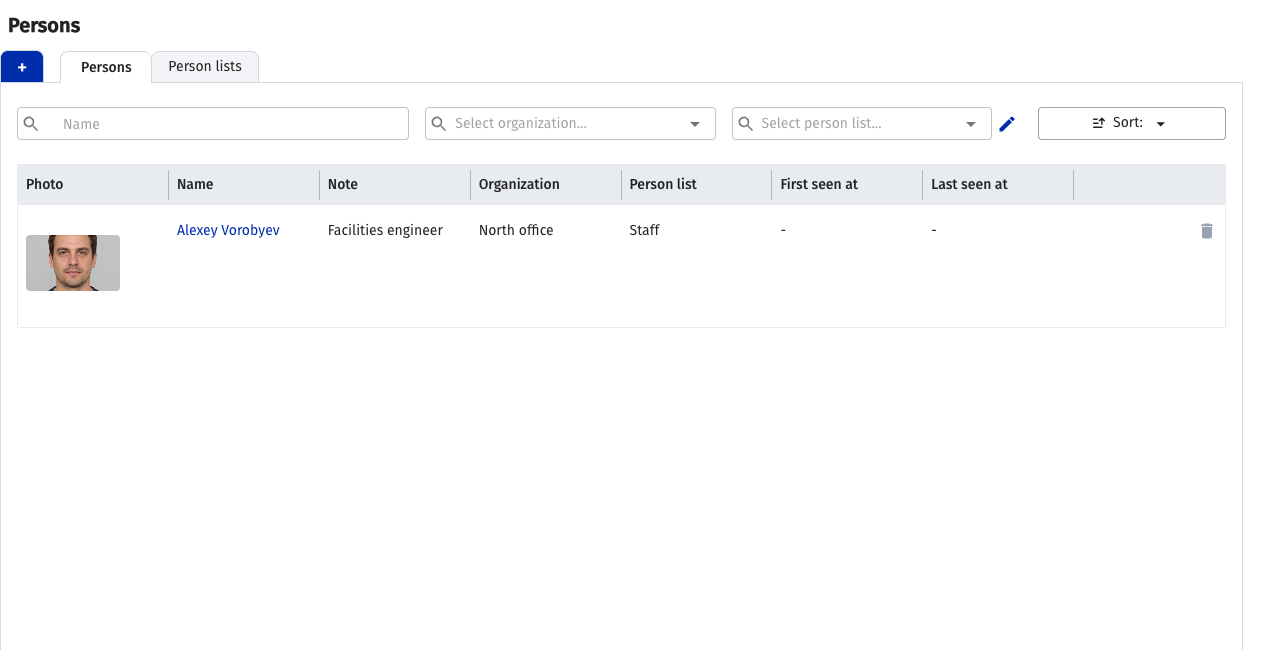
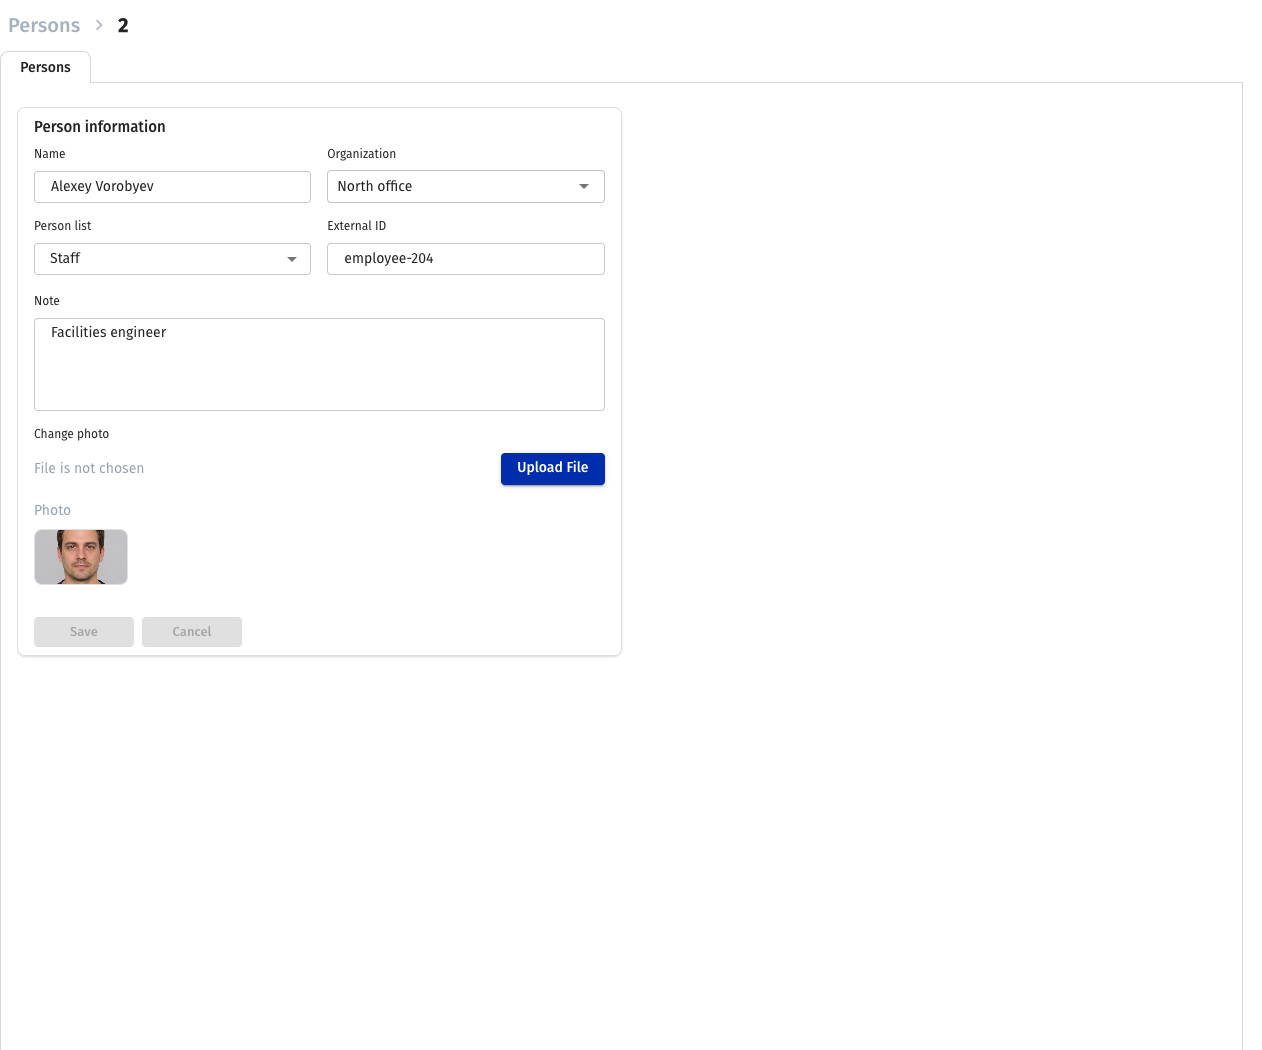
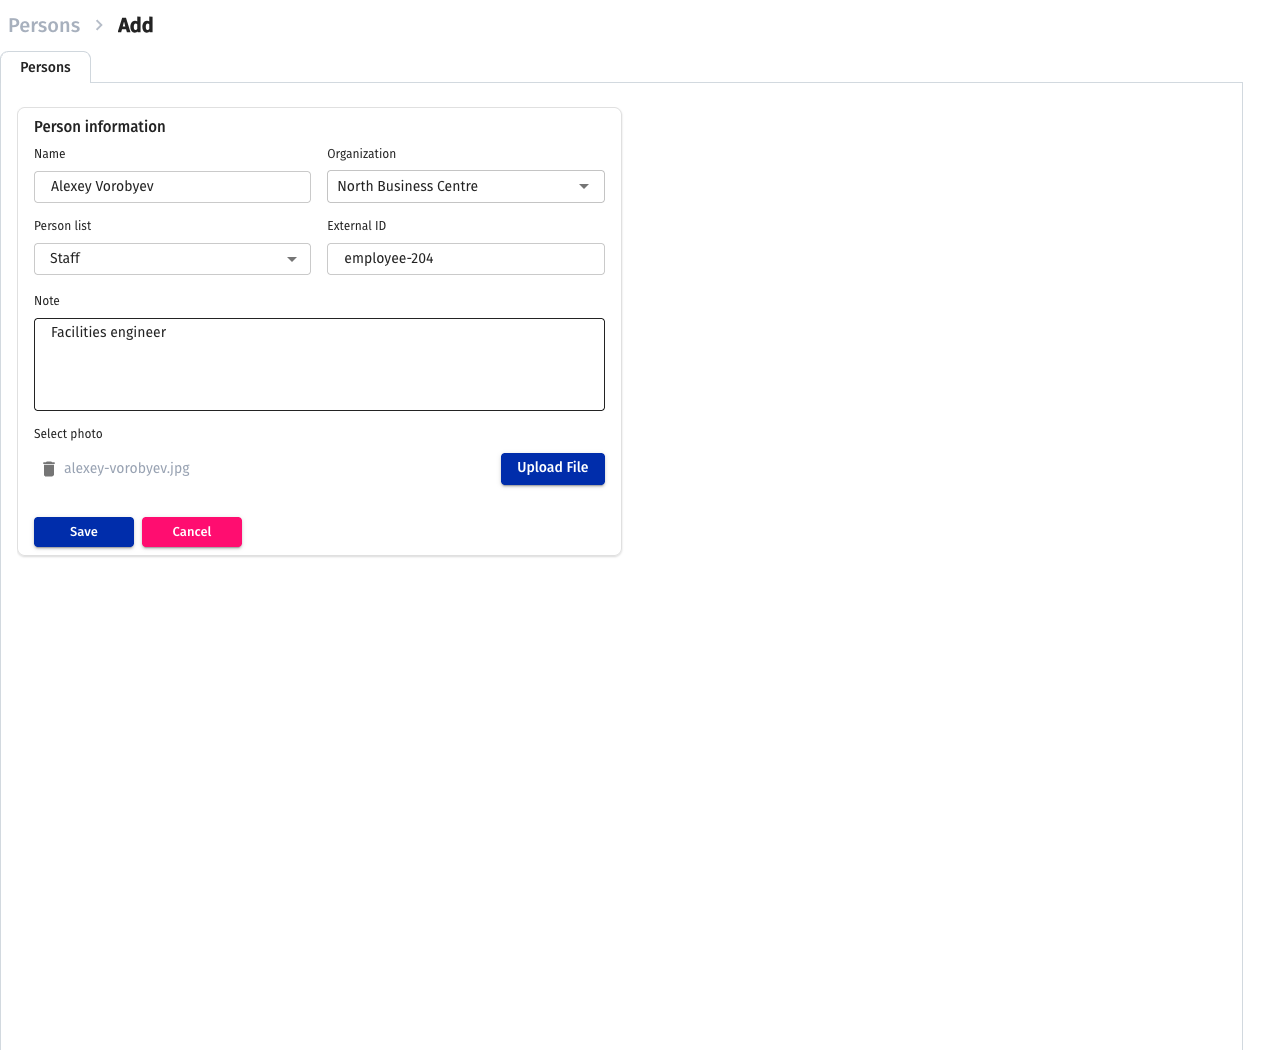
Open Persons to find, create or edit a record. When creating one, enter a name and Organization, add a photograph and optionally select a person list. Use a clear face image for the photograph.
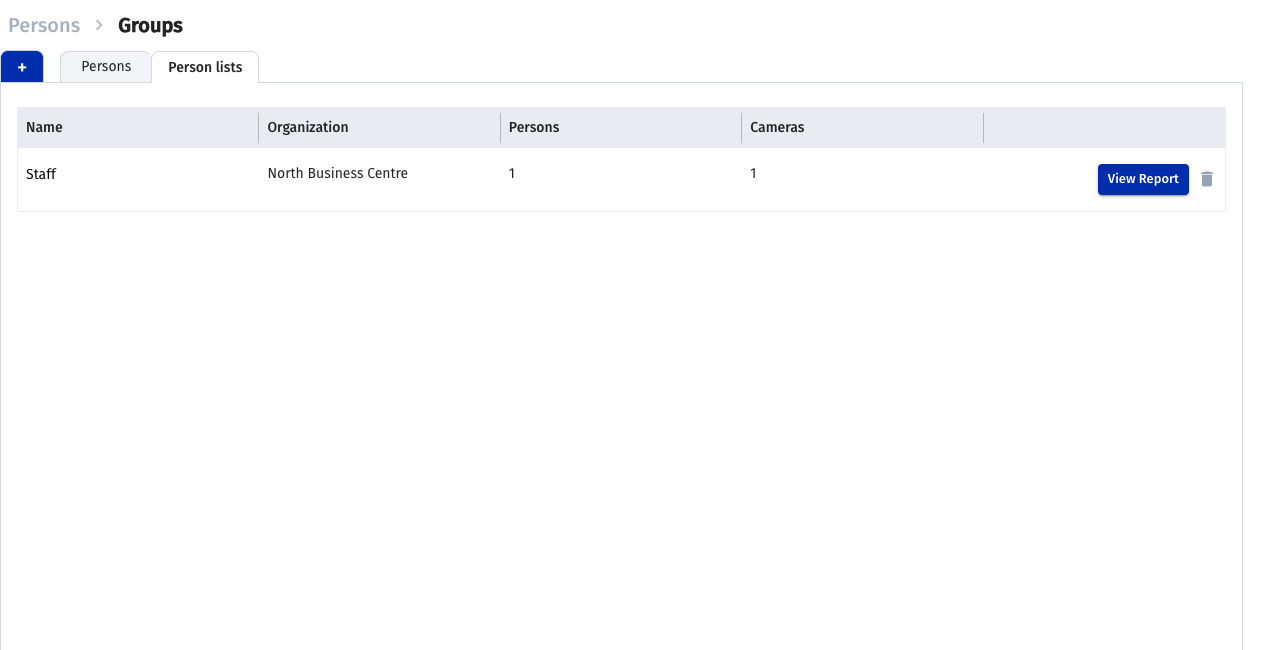
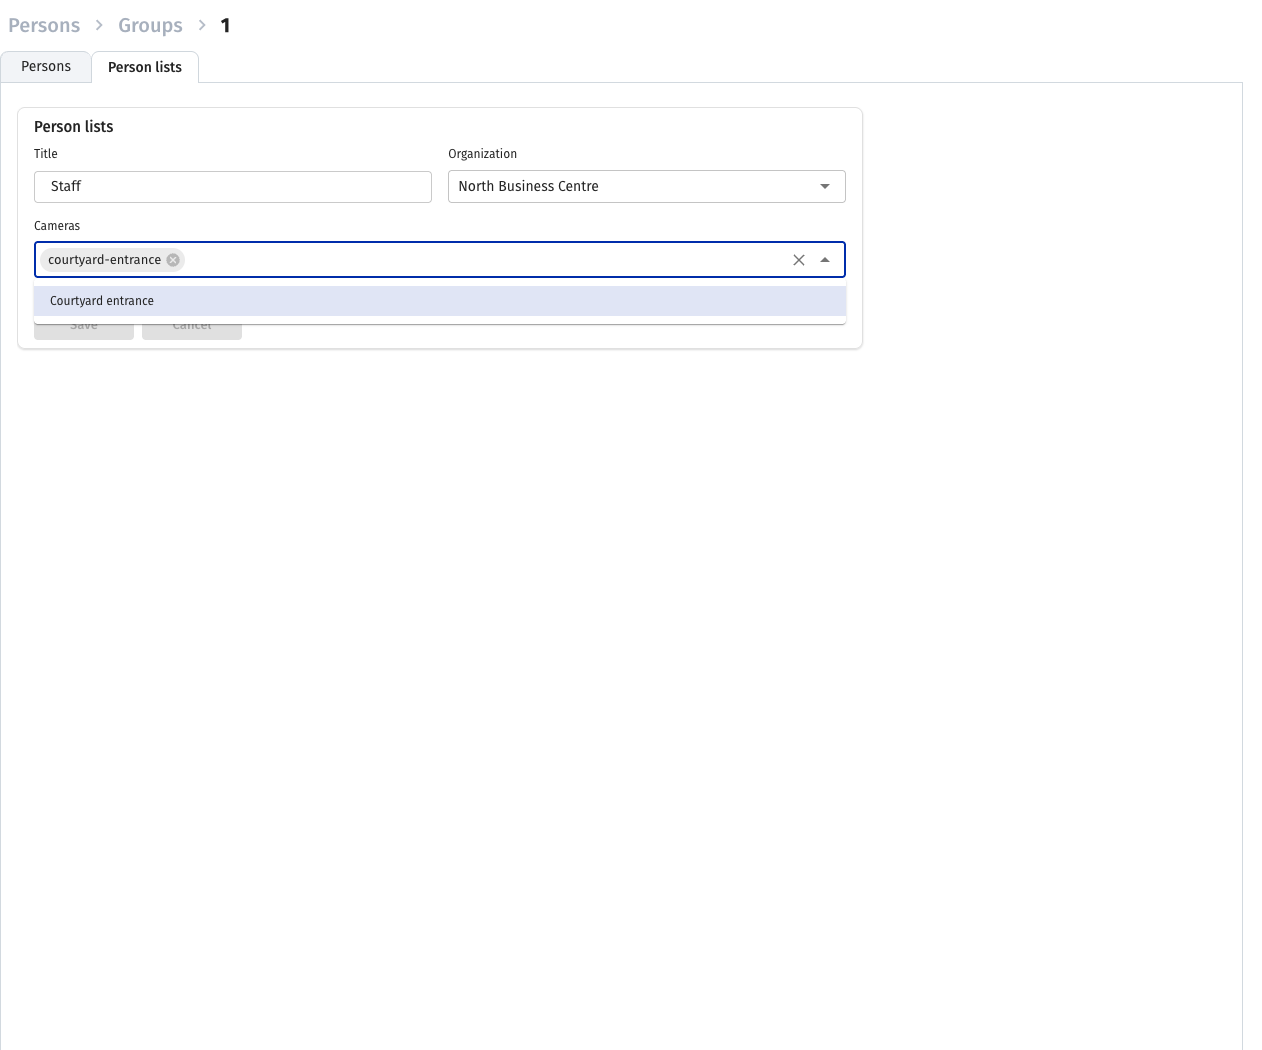
On the lists tab, create a list, select its Organization and associated cameras. Cameras must belong to the same Organization. Each camera can be associated with one list. Cameras used by other lists are not offered in the selection form. To move a camera, first remove it from the old list and save that list, then add it to the new list.
Face episodes appear on Events → Face detector. Open an episode to view video. An automatically created person may have a default name; edit the record to enter a meaningful name.
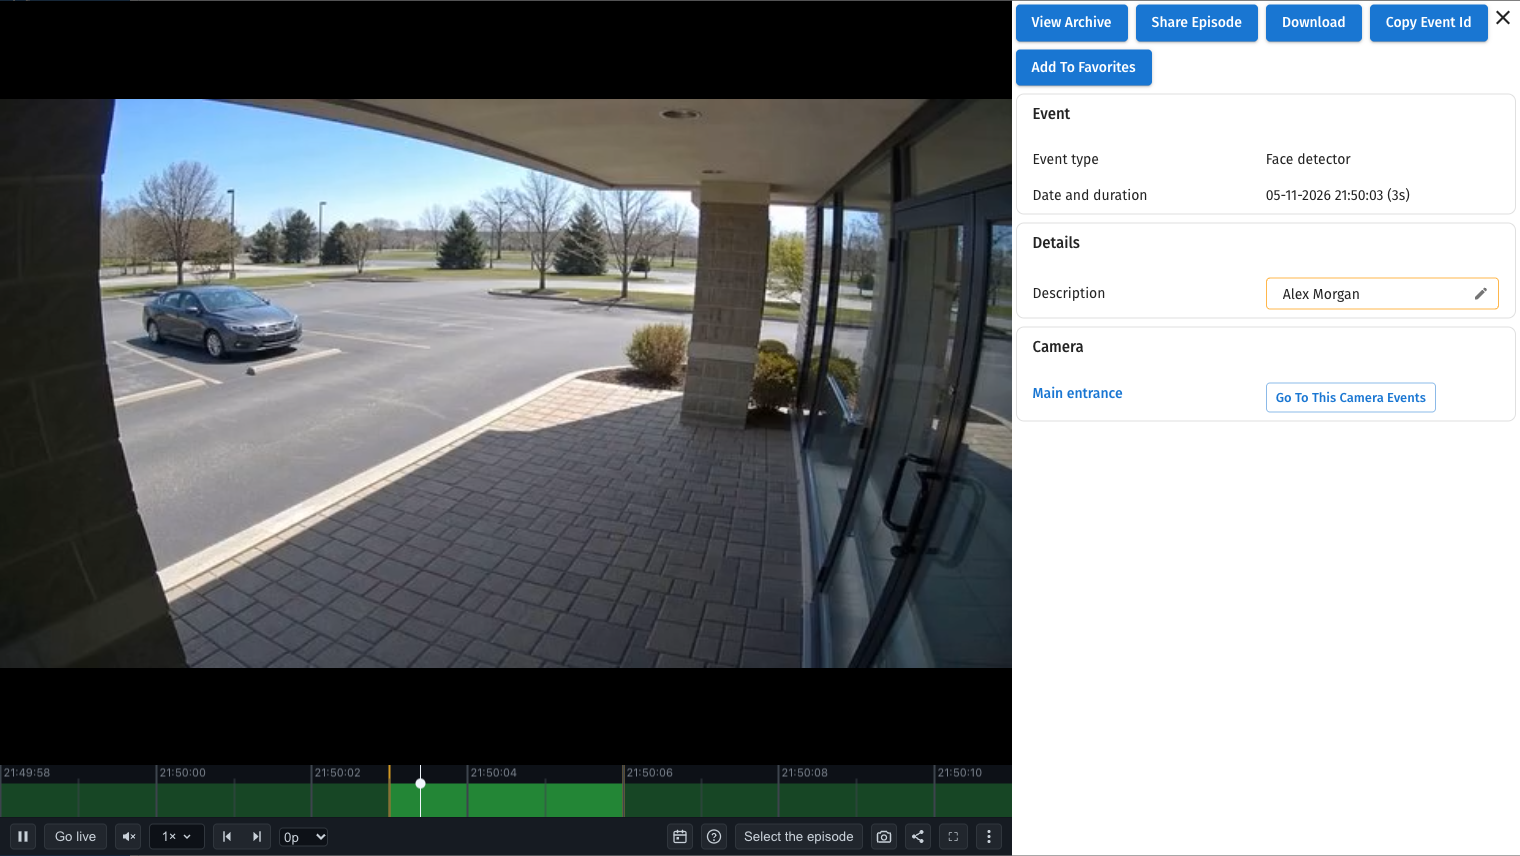
In the episode card, compare the event time, identified person and video for that interval.
Unknown selects automatically created persons with default names. It does not perform a separate comparison against an employee list. To view persons without a list, use the relevant filter on the persons page.
List visitor report
The report shows person recognition events for the selected list for one day. Access requires Watcher administrator rights, Organization ownership or Access to service usage statistics in the Organization. Person list viewing and editing permissions alone do not grant report access. Data is limited to the user's accessible Organizations and domain.
- Open Persons → Person lists and click View report in the required list row.
- Select a date in Report Date. The interface requests a day starting at midnight in the browser timezone.
- Compare times, person names and cameras in records grouped by hour. If needed, click print to open the browser print dialog.
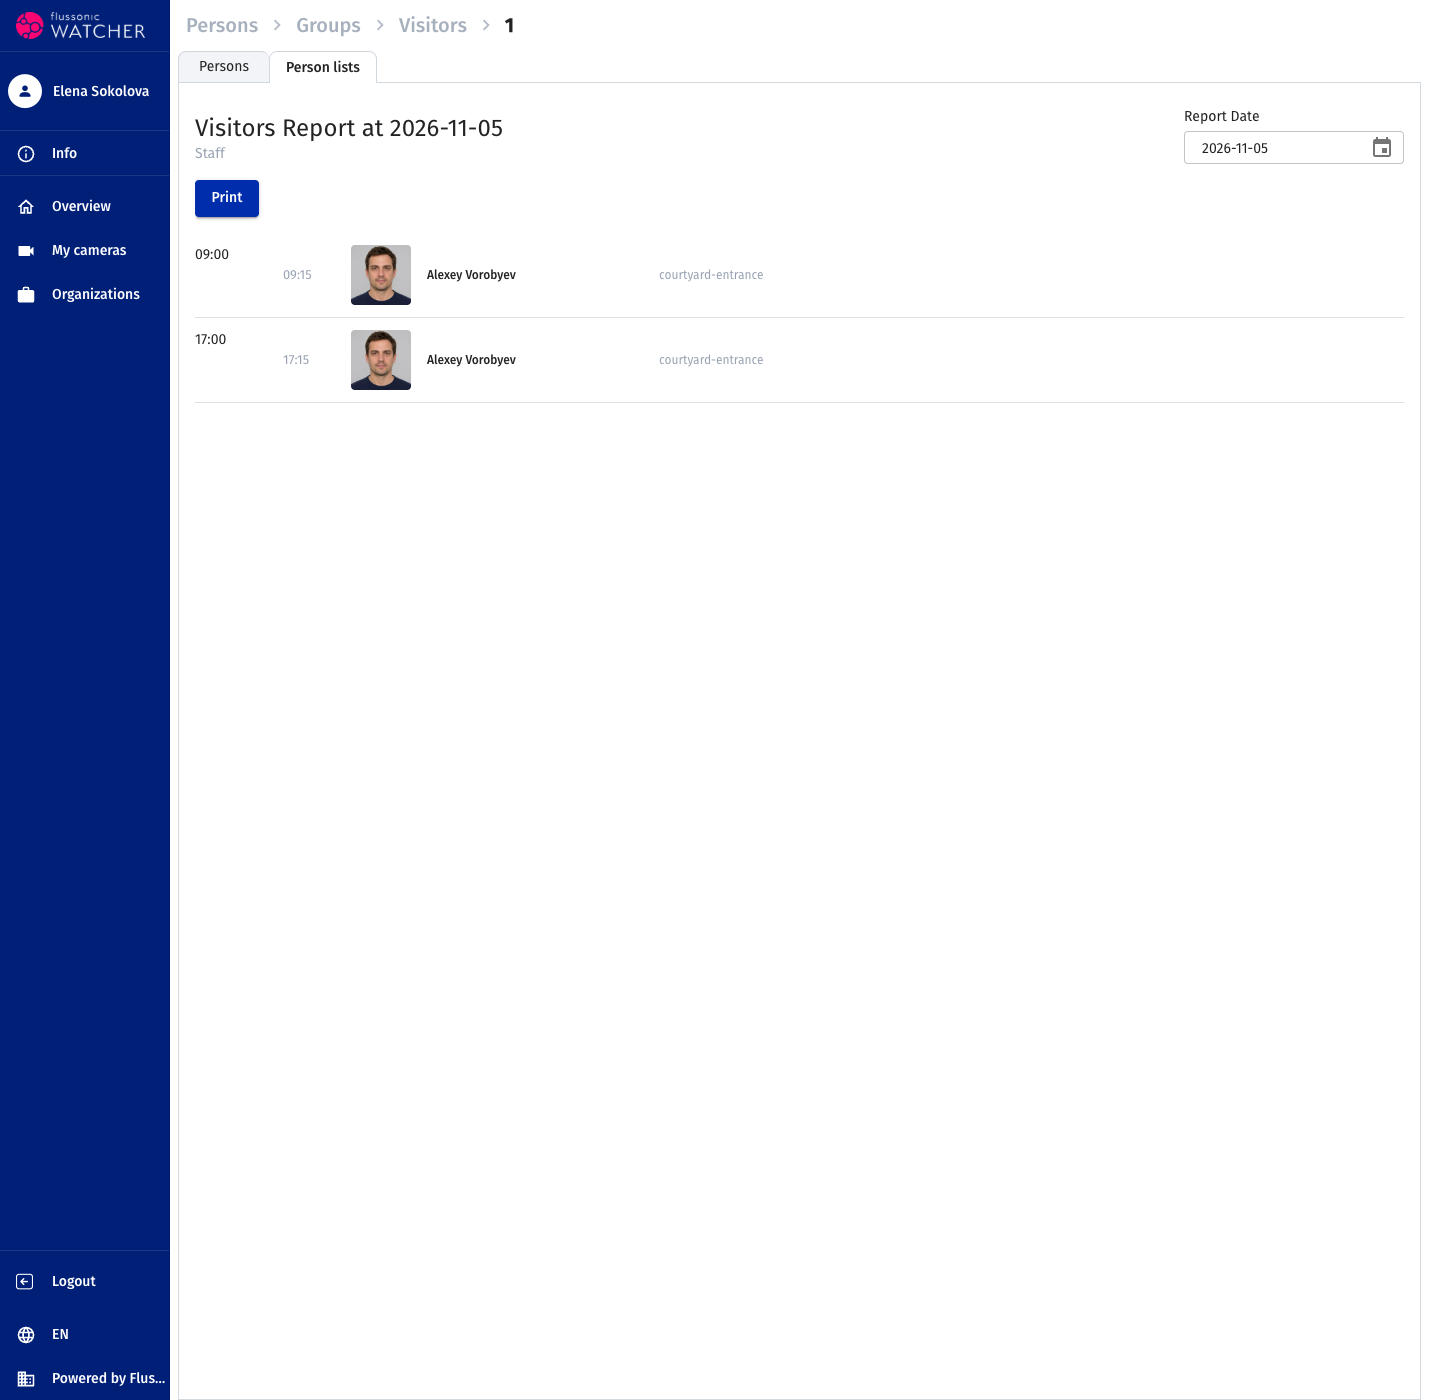
The interface requests up to 1,000 events and does not load subsequent pages. No records for a selected date does not confirm that there were no visitors: check the person list, Organization access and face detector events. For Cannot load report, check permissions and Watcher availability.
Integration with third-party systems
Recognition data can be retrieved through Watcher Client API v3 and used in an external system.
The External ID field in a person card associates the Watcher record with the person's identifier in an external system. Enter the value expected by your integration. Filling the field alone does not create an account in the external system or configure passage rules: the integration performs those actions.
Check access decisions in the access control system according to its rules and the recognition result.