Adding cameras
Supported cameras
Any camera with RTSP support can be added to Watcher.
However, access to cameras behind NAT always presents many troubles. This is why Flussonic introduces versatile tools to facilitate this process:
- Agent creates a secure tunnel between the camera and the server to which the Agent is bound.
- Iris firmware not only has a built-in Agent for plug-and-play connection with the server but also makes it easier to connect your camera to the Wi-Fi network. Moreover, Iris enhances the camera features in Watcher with motion detection and PTZ control (given the hardware support).
The additional features are also available for cameras with ONVIF support including motion detection, PTZ control, automatic network search and configuration of the camera itself from the Watcher interface.
Supported codecs
Watcher supports H.264 and H.265 (HEVC) codecs.
Remember that the use of H.265 (HEVC) depends on whether it is supported in a web browser. Most of the browsers including Safari, Chrome, and Edge, support H.265. However, H.265 playback may be unavailable in some browsers like Firefox.
Summary of adding cameras
Cameras in Watcher are created and exist only within a specific Organization. One camera can belong to one Organization only. Please refer to Managing Organizations section for details.
Depending on the scenario of using Watcher, cameras can be added by users with different roles including video surveillance system administrator, provider (or subscriber service) administrator, subscriber, etc. The user must have permissions to manage cameras in the Organization to which they add camera(s).
The cameras can be added via web UI or Watcher mobile app. Available ways to add a camera depend on the camera type.
Warning
The camera with bound Agent is automatically provisioned to bound Watcher as soon as the camera connects to a network with Internet access. In some cases, the billing integration may be used for adding the camera to the proper Organization.
Ways to add cameras via Watcher mobile app:
| Menu item \ Camera type | Camera with Iris | Camera with Agent | Common camera |
|---|---|---|---|
| Wi-Fi camera (via QR code) |
✅ | ❌ | ❌ |
| Ethernet camera (MDNS request) |
✅ | ✅ | ❌ |
| ONVIF camera | ❌ | ❌ | ✅ |
Ways to add cameras via Watcher web UI:
| Menu item \ Camera type | Camera with Iris | Camera with Agent | Common camera |
|---|---|---|---|
| Add a camera (manually by RTSP URL) |
✅ | ✅ | ✅ |
| Add by IP | ✅ | ❌ | ✅ (ONVIF only) |
| Search cameras | ❌ | ❌ | ✅ (ONVIF only) |
You will find the detailed instructions on each way below on this page.
Note
If you have a large list of cameras with connection parameters in a CSV file, you can import this data to Watcher using API or web UI. Watcher administrator permissions are required for that.
Feel free to contact our technical support team in case if you haven't found a suitable way to connect your cameras. We are always ready to help you find a solution that suits your needs.
Adding cameras via web UI
Adding cameras manually
Any camera with RTSP support can be added manually. Please note that manual adding of cameras with Iris or Agent eliminates the benefits of these tools related to the tunnel for connection through NAT.
You should know the RTSP URL of camera streams in order to be able to add the camera manually. Please look for this info in the camera manual.
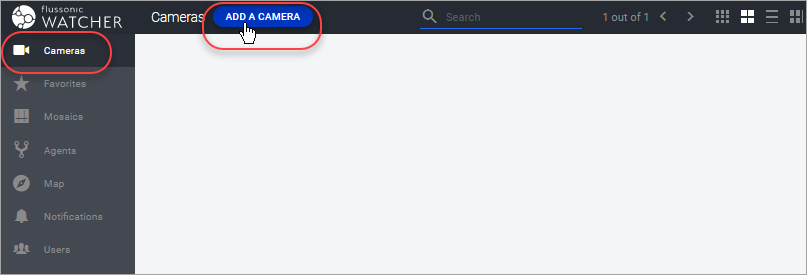
To add a camera by RTSP link, go to My cameras in the main menu and click Add a camera:
The add camera form opens. Fill in the fields:
- Name — display name of the camera.
- Stream URL — RTSP address of the main stream (required).
- Substream URL — additional RTSP address (optional).
- Organization and Folder — where the camera will be added.
- Preset — ready-made DVR and analytics settings (optional).
- DVR depth, DVR limit in days, DVR space — archive options (available when the preset is adjustable).
- Enable recognition — face or license plate detection (when supported by the preset).
- Under Additional settings — enable camera, video-only capture, audio transcoding, note.
- Under Location — coordinates and address on the map.
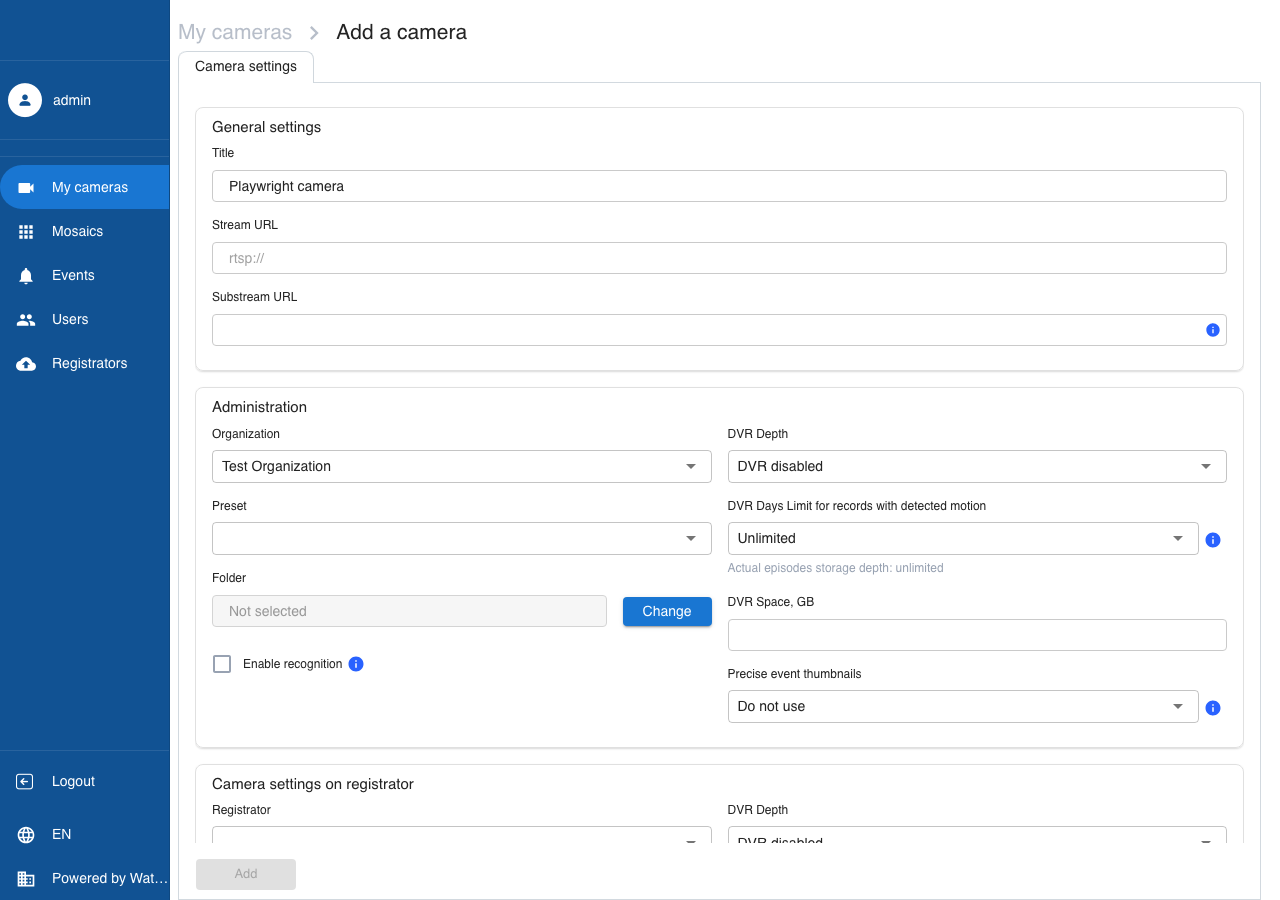
Click Add. The camera appears in the My cameras list.
Adding cameras by IP
The camera must support ONVIF or have the Iris firmware in order to be added by IP. In addition, the camera should be in the same LAN with the Watcher managing server or streamer to which it is going to be added.
On a cloud-connected NVR, adding by IP opens a five-step wizard in the Add camera dialog (connection, analytics, local archive, cloud plan, permissions). The short form below applies to cloud Watcher and to a local NVR that is not linked to the cloud.
To add a camera by IP:
-
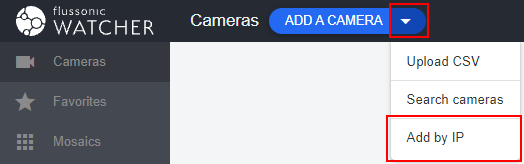
Go to Cameras and select Add by IP.
-
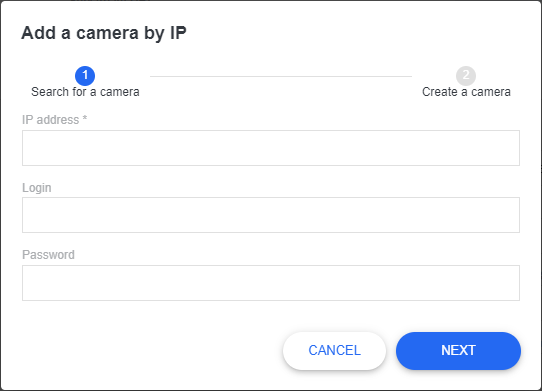
On the page that opens, enter the camera IP address and ONVIF credentials if needed.
-
Click Find camera to check if the camera is available.
-
If Watcher successfully connects to the camera, a form will open for the camera title, organization, preset, and folder.
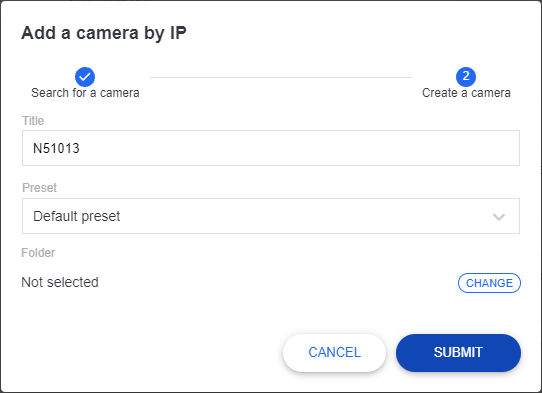
-
Set the desired parameters and click Add camera.
The added camera settings page will open. Configure and save the desired parameters if necessary.
Searching for cameras
Flussonic Watcher uses the WS-Discovery mechanism to search ONVIF-compatible cameras. It can detect Ubiquity, Samsung and other cameras.
The user must have Watcher administrator permissions to be able to use this way of adding cameras.
In this way, cameras can be searched only in the network of the Watcher managing server. If streamer(s) and Watcher for some reason are on different local networks, then it is recommended to add cameras by IP or manually instead of searching them.
To search for cameras:
-
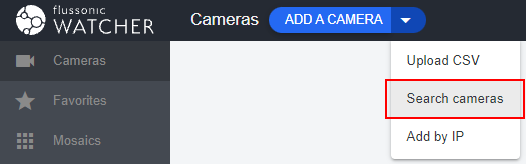
Go to Cameras and select Search cameras.
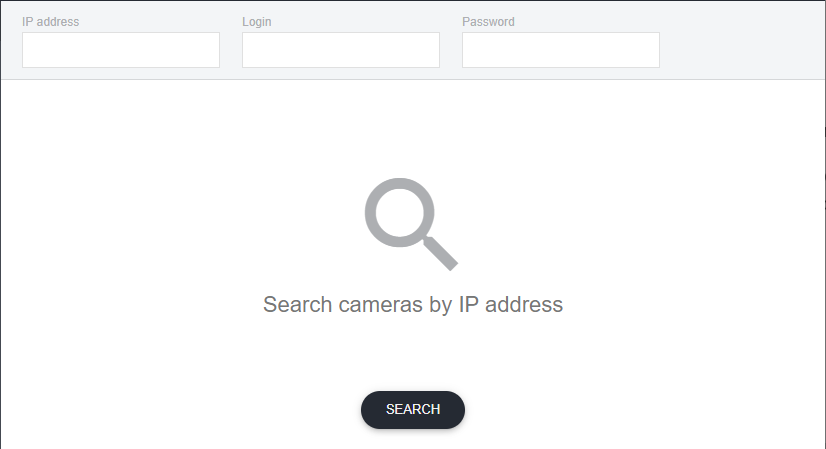
-
Click Search on the page that opens and wait for the search to finish.
-
As the search proceeds, the found cameras will appear on the page.
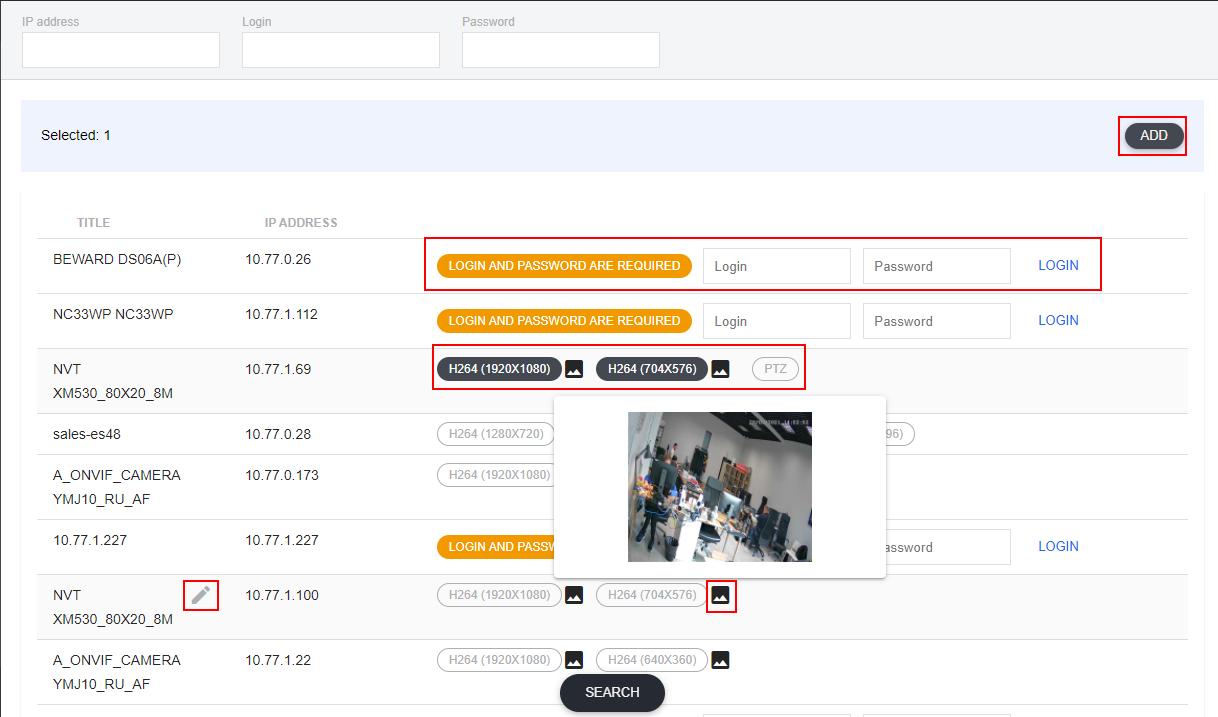
Some cameras require login and password for authorization so you may have to enter your login and password to connect the camera.
Click the pencil icon that appears when you hover over the camera line in order to edit the camera name.
Many cameras has two or more H.264 streams, so you can add any or all of them.
When you hover the mouse cursor over the thumbnail icon, a preview of the stream from the camera pops up.
Also you can turn on PTZ control in the list of found cameras if PTZ is available.
-
Having the stream(s) selected, click Add in the top of the list.
The cameras will be added to Watcher with default preset to the default Organization. You will find them on the Cameras page and will be able to adjust the rest of the settings if necessary.
Note
If you cannot find the camera you need on the list but you know the camera's IP address and credentials, try using the form in the top of the page. If Watcher successfully connects to the camera at the specified IP, then you will be able to add it from the search page. Alternatively, you can add your camera by IP in this case.
Adding cameras via the Watcher mobile app
Note
The screenshots in this section were made with Android app. The iOS app appearance may differ, however the main steps are the same.
Before adding a camera via the Watcher mobile application, make sure that:
- The Flussonic Watcher mobile app is installed on the phone
- The user logs in to a mobile application using the credentials that grant the rights to edit the list of cameras in at least one Organization.
To add a camera via the mobile app:
-
Log in to the Flussonic Watcher mobile application using the credentials you received from the system administrator.
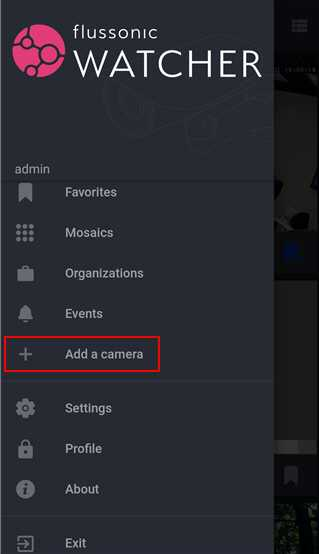
-
Open the menu and select Add Camera.
-
Tap the desired way to add the camera.
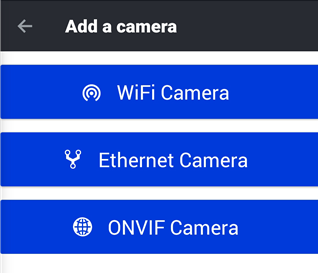
The ways are described below.
Adding a Wi-Fi camera with Iris
Wi-Fi cameras with Iris firmware are supplied inactivated i.e. with Agent not bound to any Watcher server. In this case the Agent can be activated using the Watcher mobile application. During the activation process, the camera will connect to the Wi-Fi network and receive a command from the Watcher application to connect to an Organization on the server.
Make sure that the camera is reset to factory default settings before proceeding to the activation.
To add a camera with Iris via the mobile application:
-
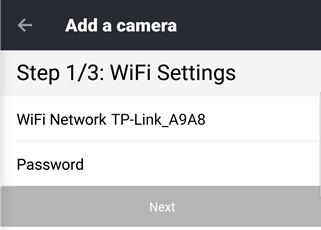
Select Wi-Fi camera in the add camera menu.
-
Check the network name and enter the Wi-Fi password.
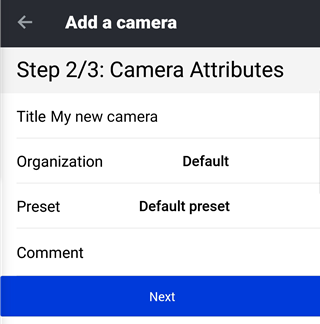
-
Fill in the camera information:
- Name is the name under which the camera will be displayed in Watcher.
- Organization is the Organization in which you add the camera.
- Preset is a group of recording settings to be set on the camera being added.
- Note is additional information about the camera (not required).
-
Click Next. The QR code will be displayed on the screen.
-
Present the QR-code to the activated camera. Please note that if the camera is ready to read the QR code, it will play the corresponding voice message from time to time. If you do not hear the voice message, check the power connection and try resetting the camera to factory settings.
-
The camera will inform you when it has successfully read the QR code and connected to the Wi-Fi network. After that,, you can go to viewing the video from the camera, activate another camera, or return to the main page in the application.
Note
It may take some time for a newly connected camera to start sending frames. In practice, this time does not exceed one minute.
Adding an Ethernet camera with Agent
If you connect cameras with unbound Agent (with or without Iris firmware) via Ethernet, they can be found on the LAN automatically or added by IP from the Watcher app. The search is carried out using the MDNS protocol, by sending a UDP request to the address 224.0.0.251.
Note
Make sure to configure your network so that MDNS requests were not blocked, e.g. disable IGMP snooping on your router.
Cameras must be connected to the same local network as the phone with the Flussonic Watcher mobile application installed.
The Agent will de activated when you add the camera this way.
To activate an Agent on an Ethernet camera:
-
Select Ethernet camera in the add camera menu. The mobile application will scan the local network and you will see a list of found cameras.
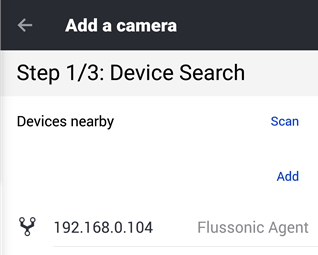
To start the search again, tap Scan. If the desired camera is not found, but you know its IP address, click Add and enter it.
-
Fill in the camera information (see item 3 in the above section for details):
-
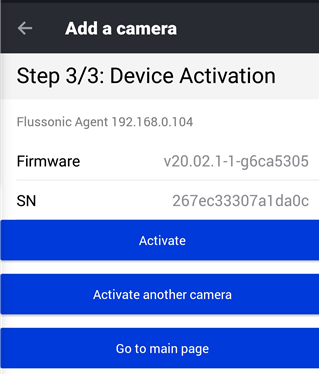
Tap Activate on the next screen.
-
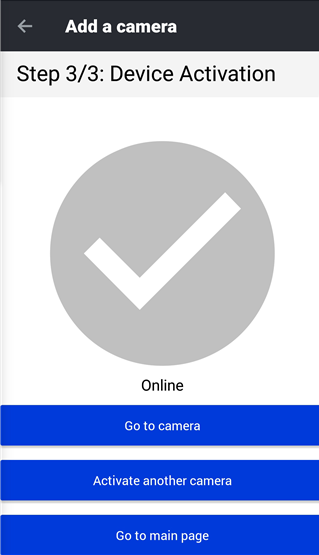
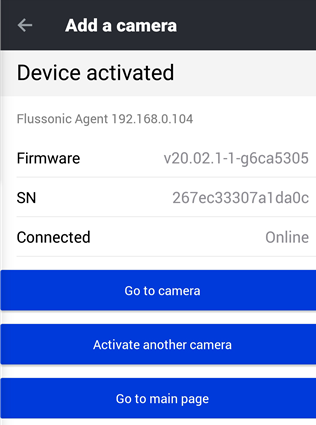
After the activation process is completed, you will see corresponding message on the screen and will have options to view video from the camera, activate another camera, or go to the app home page.
Note
It may take some time for a newly connected camera to start sending frames. In practice, this time does not exceed one minute.
Adding an ONVIF camera
Adding an ONVIF camera in the mobile app utilizes the same principle as camera search in web UI.
Warning
Unlike the above ways of adding cameras via the Watcher mobile app, ONVIF cameras are searched in the local network of Watcher managing server (not your phone).
To add an ONVIF camera:
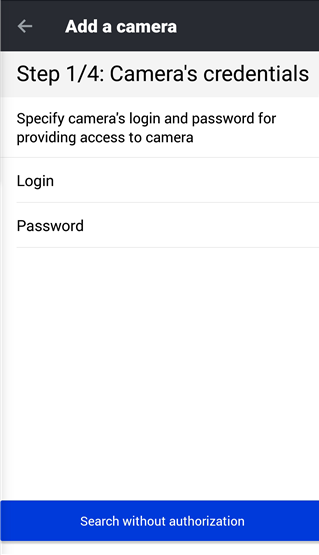
- Select ONVIF camera in the add camera menu.
-
Enter credentials to access the camera via ONVIF or tap Search without authorization if the camera can be connected without authorization. Please remember that ONVIF credentials may differ from camera credentials.
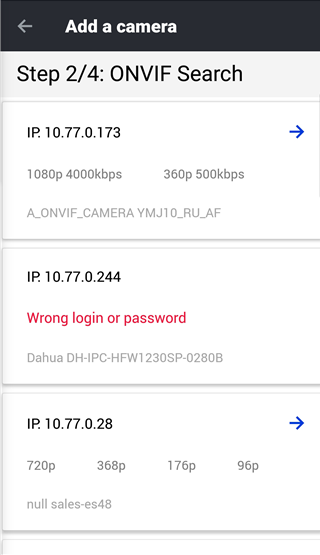
-
The found cameras will be displayed in the app. Tap the camera you want to add.
-
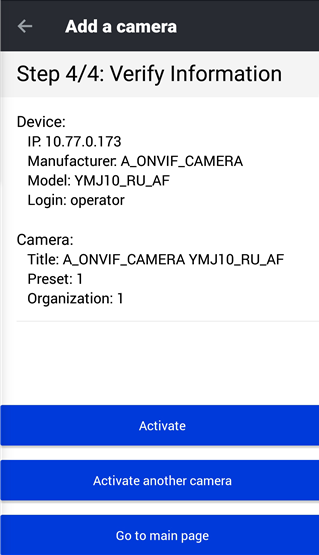
Fill in the camera information (see item 3 in the above section for details) and click Next.

-
Check the camera info and tap Activate.
-
After the activation process is completed, you will see corresponding message on the screen and will have options to view video from the camera, activate another camera, or go to the app home page.

Note
It may take some time for a newly connected camera to start sending frames. In practice, this time does not exceed one minute.
Deleting a camera
To delete a camera:
- In the app: select the camera and tap Delete on the Actions tab. You may need to enter the camera name for confirmation.
- In the web UI: in the 'Cards' mode, click the trash bin icon on the camera preview; in the 'List' and 'Dashboard' modes, select the Delete option in the menu on the right of the camera name. See this page for details on the display modes. Another way to delete a camera is by clicking Delete on the camera settings page.