Installing Flussonic
Learn how to install, activate, and start Flussonic Media Server.
On the page:
- Prerequisites
- Installing Flussonic Media Server
- Activating Flussonic Media Server
- How to change the administrator's password?
- Starting and stopping Flussonic Media Server
- Running Flussonic in a Docker container
Prerequisites
Before you install Flussonic Media Server, make sure the following conditions are met:
- Your system satisfies the system requirements.
- HTTP port 80 is open and no other applications in your OS listen to this port. By default, Flussonic Media Server uses HTTP port 80.
Installing FMS
You can install Flussonic Media Server on Ubuntu, CentOS/RedHat and other RPM-based distributions.
On Ubuntu
Supported architectures: amd64, arm64.
Supported OS versions: Ubuntu LTS 24.04, 22.04.
Install Flussonic Media Server using the apt tool:
curl -sSf https://flussonic.com/public/install.sh | sh
After installation finishes, activate Flussonic Media Server
On RPM-based CentOS/RedHat and others
Danger
We strongly recommend that you avoid using RPM-based distributions like CentOS, RedHat, and Suse. We do not provide technical support on issues concerning RPM packages and distributions to users with less than 10 licenses.
Install Flussonic Media Server from Yum repository using the following command in the terminal:
cat > /etc/yum.repos.d/Flussonic.repo <<EOF
[flussonic]
name=Flussonic
baseurl=http://apt.flussonic.com/rpm
enabled=1
gpgcheck=0
EOF
yum -y install flussonic-erlang flussonic flussonic-transcoder
service flussonic start
After installation finishes, activate Flussonic Media Server
Activating FMS
To activate Flussonic Media Server:
1) Start the server by running the following command in the terminal:
service flussonic start
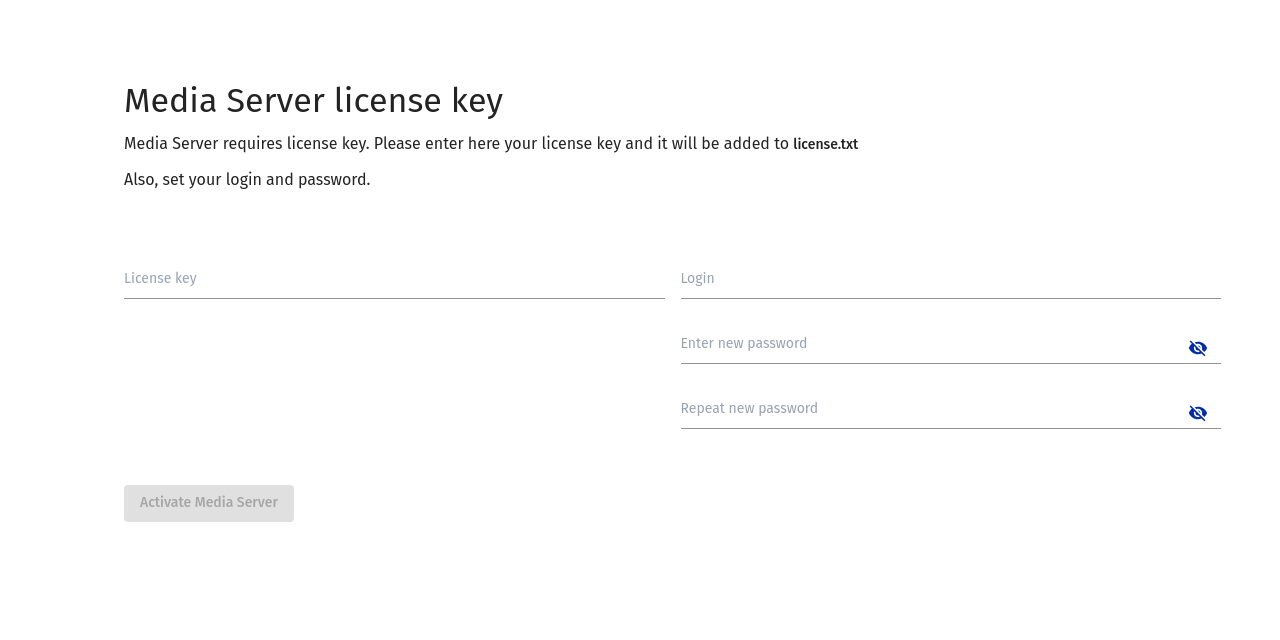
2) Open the Flussonic admin UI by entering the http://FLUSSONIC-IP:80/ URL in the browser. FLUSSONIC-IP is the IP address of your Flussonic server.
3) Enter the license key you received and set the administrator's username and password that you are going to use. You can find your license key in the client area on my.flussonic.com/.
Warning
Both login and password must NOT include any of the following characters: @, ;, #, [, \, /, =, $
Read more about Flussonic license at Using the license key.
4) Check if your Flussonic installation is correct by running the following command:
service flussonic status
Flussonic Media Server is ready to work.
Note
We suggest you do some fine-tuning for best performance with a large number of clients.
Warning
You need to disable swap completely as its presence is not compatible with video streaming. If a server doesn't have enough RAM, it can't be extended with swap.
About configuration file
When you start the admin UI for the first time and activate Flussonic Media Server, a configuration file is created automatically. It contains the default settings, such as the path to the Pulse database and session log.
If you already have an experience with Flussonic, you can also prepare this file manually: specify the login and password in this file and copy it to the server immediately after installation.
How to change the administrator's password?
You can change the administrator's password by editing the config file or using the admin UI.
Editing the configuration file
1) Open the /etc/flussonic/flussonic.conf config file and change the password in the edit_auth directive.
2) To apply the changes, reload the server configuration by running the following command:
service flussonic reload
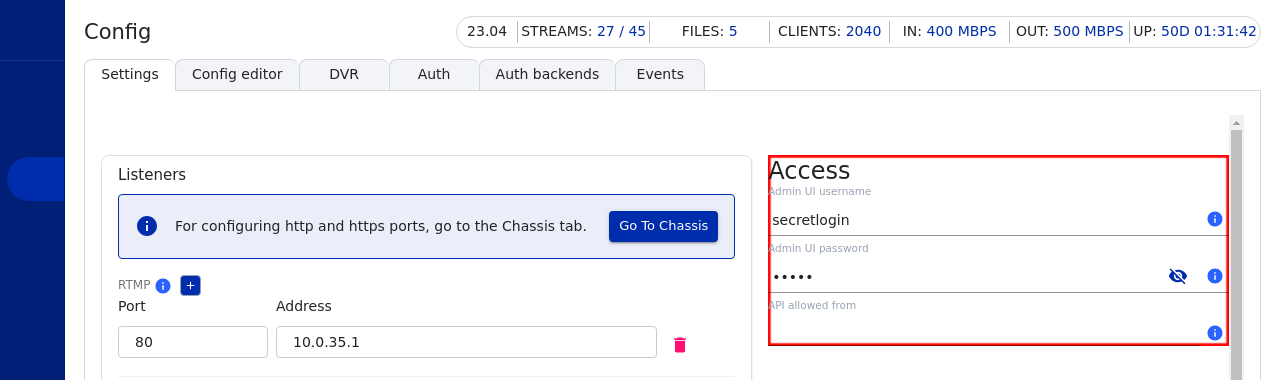
Using the admin UI
1) Go to the Config page in the navigation menu.
2) Head to the Settings tab and find the Access section. Enter your new password in the Admin UI password field and repeat the password in the field below. Apply the changes by clicking Save .
Starting and stopping Flussonic
To manage Flussonic in the terminal, use the following commands:
- To start the service:
service flussonic start
- To stop the service:
service flussonic stop
- To restart the service:
service flussonic restart
- To reconfigure the service with active client connections:
service flussonic reload
Running Flussonic in a Docker container
Flussonic Media Server is available as a Docker container.
Installing in Docker allows you to run Flussonic on various operating systems that support Docker, not just Ubuntu. Additionally, this installation allows you to take advantage of all Docker benefits: isolation, security, container management, etc.
There are two modes in which you can use Flussonic in Docker. I'll call them the sysadmin-way and the devops-way.
sysadmin-way
In this configuration, Docker is used as an equivalent to a virtual machine. We recommend this mode only for testing and experiments, small services, and when using only TCP/HTTP protocols.
To run Flussonic in a container:
docker run -p 8081:80 -v /some/path/flussonic1:/etc/flussonic flussonic/flussonic
Or, if you have Nvidia graphics cards that you want to use:
docker run --rm -p 8081:80 -v /etc/flussonic:/etc/flussonic --gpus all -e NVIDIA_DRIVER_CAPABILITIES='all' flussonic/flussonic
Each container can have its own path for configuration, mapped to a convenient network port. You can access the UI via the port specified in the startup command, create, and edit streams.
UDP capture, QSV, WebRTC may not work, or will work with limitations due to Docker specifics.
devops-way
In this mode, infrastructure parameters are passed through environment variables, and stream configuration is either via ro-directory or config-external.
STREAMER_HTTP- allows you to specify the port the container will listen on.STREAMER_EDIT_AUTH- sets the login-password for access to API and UI.STREAMER_CONFIG_EXTERNAL- the address of the stream configuration backend.LICENSE_KEY- license key.
You need to mount the /etc/flussonic/flussonic.conf.d directory, from which Flussonic will read all files.
In this mode, the server cannot be configured via API, but you can access the UI for debug purposes, check your streams.
How to change time zone on your server
If you need to change the time zone on the server, this can be done using standard operating system tools. Changing the time zone on the server does not affect the operation of Flussonic Media Server, since all operations internally are carried out in the UTC time zone, including logging. We recommend that you always synchronize your server's time via NTP.